Fuel Pump Control Module
Fuel Pump Control Module
Removing
Observe safety precautions. Refer to => [ Safety Precautions ] Fuel Supply System.
Observe rules for cleanliness. Refer to => [ Clean Working Conditions ] [1][2]Fuel Injection System.
CAUTION!
Risk of accident due to fuel tank weight.
• The fuel tank must be empty when it is lowered. Drain fuel tank if necessary. Refer to => [ Fuel Tank, Draining ] Procedures.
CAUTION!
Risk of destroying electrical components when battery is disconnected.
• Follow the instructions when disconnecting the battery.
- Switch off ignition.
- Release the fuel tank flap.
Sedan:
- Fold the luggage compartment floor upward.
Wagon:
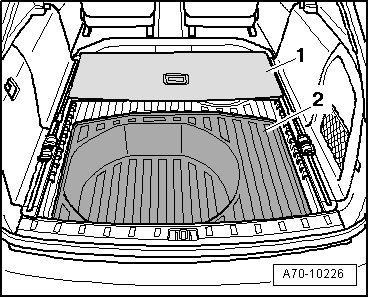
- Remove luggage compartment cargo floor - 1 - and spare wheel cover - 2 -.
All:
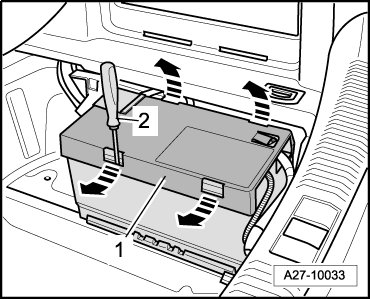
- Release the retaining clips - arrows - with a screwdriver - 2 - and remove the cover - 1 -.
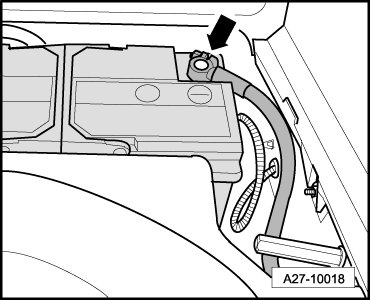
- Disconnect Ground (GND) strap at battery ground (GND) terminal - arrow -.
- Open the fuel tank flap.
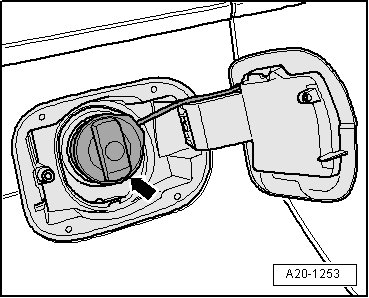
- Clean the area around the fuel filler tube.
- Remove fuel filler cap - arrow - from fuel filler tube.
- Close off the opening of the fuel filler tube with a clean piece of foam to prevent dirt from falling in.
- Remove right rear wheel.
- Remove rear right wheel housing liner.
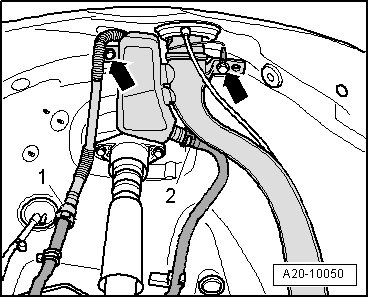
- Pull vent line - 2 - off from fuel filler tube by pressing the release buttons.
• Ignore - item 1 -.
- Unfasten the bolts - arrows - for fuel filler tube.
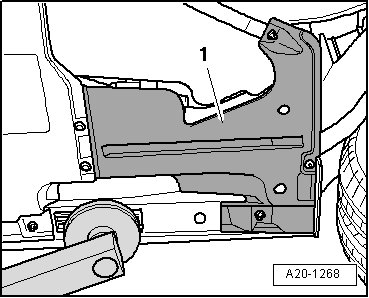
- Remove right rear cover - 1 - on bottom of vehicle floor.
CAUTION!
Risk of accident due to fuel tank weight.
• The fuel tank must be empty when it is lowered.
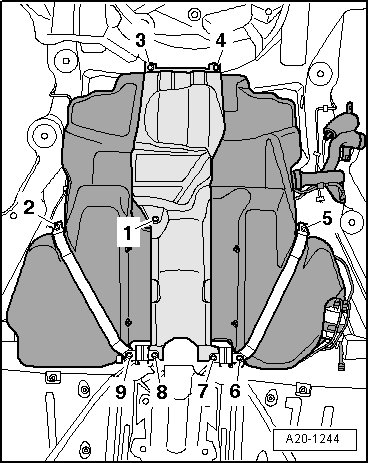
- Loosen bolts - 1, 2, 3, 4, 8, 9 - a maximum of 8 turns.
- Remove the bolts - 5, 6 and 7 -.
- Remove rear seat bench.
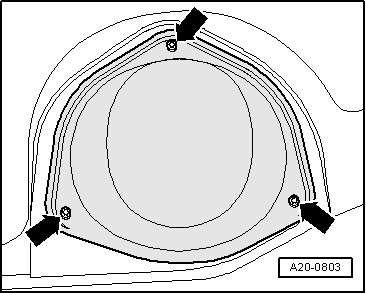
- Unbolt cover for right locking flange - arrows -.
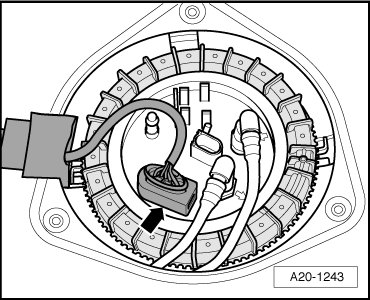
- Disconnect electrical harness connector - arrow - at locking flange.
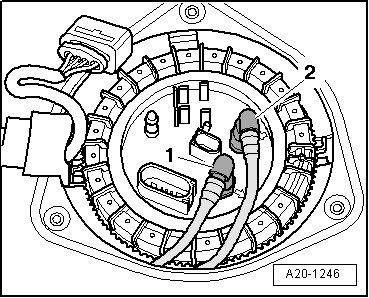
- Mark the fuel supply line - 1 - and fuel return line - 2 -.
CAUTION!
There is a risk of injury because the fuel is under high pressure.
• To reduce pressure in fuel system, lay a clean cloth around the connector and carefully loosen connector.
- Pull both lines from locking flange, by pressing the release buttons.
- Remove the bolts - arrows -.
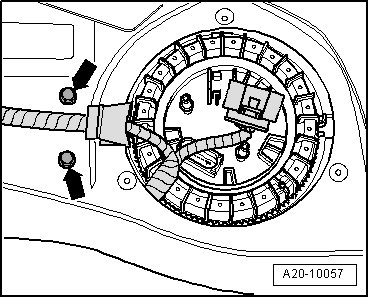
- Pull the fuel pump control module with the bracket inward between the fuel tank and vehicle floor to remove it.
Installing
• Assembly overview, refer to => [ Fuel Tank with Attachments Assembly Overview ] Fuel Tank with Attachments Assembly Overview.
• Tightening specifications, refer to => [ Fastener Tightening Specifications ] Fuel Supply System - Fastener Tightening Specifications.
Installation is performed in the reverse order of removal, noting the following:
- Fasten mounting straps and carrier plate - 1 to 9 -.
- Fasten the fuel filler tube with ground (GND) connection - arrows -.
CAUTION!
Risk of explosion due to electrostatic charge.
• After installing, check electrical connection on fuel filler neck metal ring to an empty spot on the body using an Ohm meter.
• Specified value: about 0 ohms
- Secure vent line - 2 - to fuel filler tube.
• Ignore - item 1 -.
- Install rear right wheel housing liner.
- Install rear seat bench.
- Connect battery. Observe safety precautions after connecting battery.