Instrument Panel (I/P) Assembly Replacement
Instrument Panel (I/P) Assembly Replacement
Removal Procedure
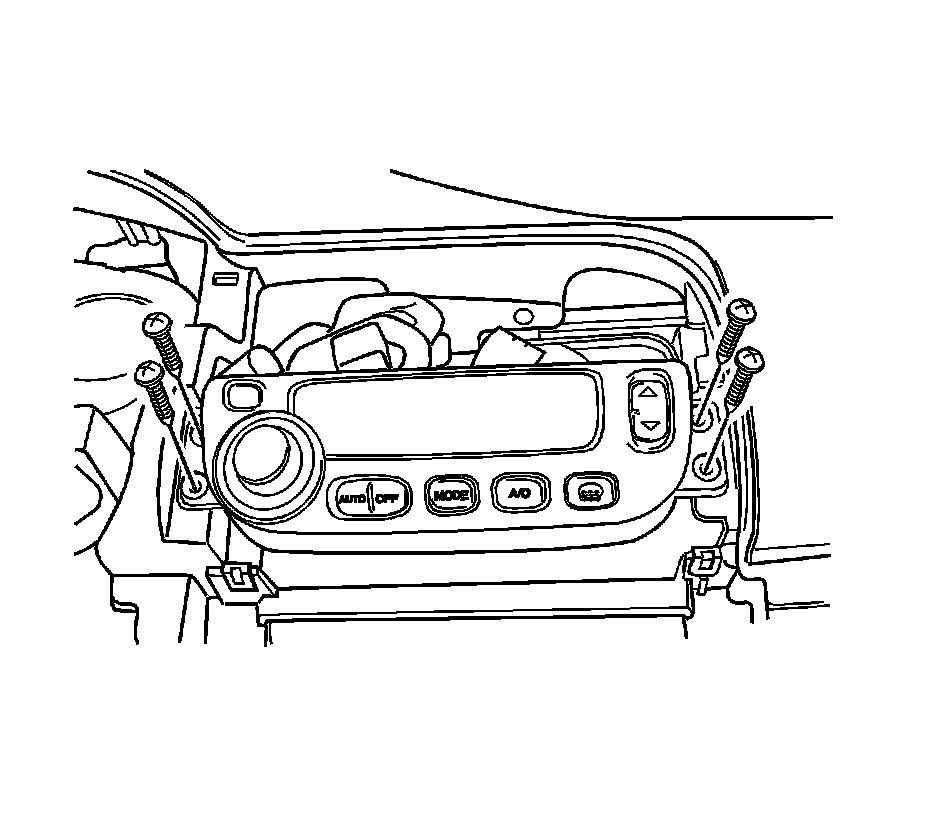
Caution: Refer to Battery Disconnect Caution Battery Disconnect Caution.
1. Disconnect the negative battery cable.
2. Remove the floor console. Refer to Console Replacement - Front Floor Console Replacement - Front Floor.
3. Remove the sun sensor. Refer to Sun Load Sensor Replacement Service and Repair.
4. Remove the tweeter speakers and the stereo cassette AM/FM radio. Refer to Radio Replacement Service and Repair.
5. Remove the instrument cluster dimmer switch assembly. Refer to Instrument Panel (I/P) Dimmer Switch Replacement Service and Repair.
6. Remove the instrument cluster trim panel. Refer to Trim Panel Replacement - Instrument Panel (I/P) Cluster Trim Panel Replacement - Instrument Panel (I/P) Cluster.
7. Remove the HVAC controls assembly. Refer to HVAC Control Assembly Replacement HVAC Systems - Automatic.
8. Remove the instrument cluster. Refer to Instrument Panel Cluster (IPC) Replacement Instrument Panel Cluster (IPC) Replacement.
9. Remove the kick panels. Refer to Trim Panel Replacement - Hinge Pillar Trim Panel Replacement - Hinge Pillar.
10. Remove the glove box. Refer to Storage Compartment Replacement - Instrument Panel (I/P) Service and Repair.
11. Remove the screws and the glove box housing.
12. Disconnect the glove box housing electrical connectors.
13. Remove the knee bolster. Refer to Knee Bolster Replacement Knee Bolster Replacement.
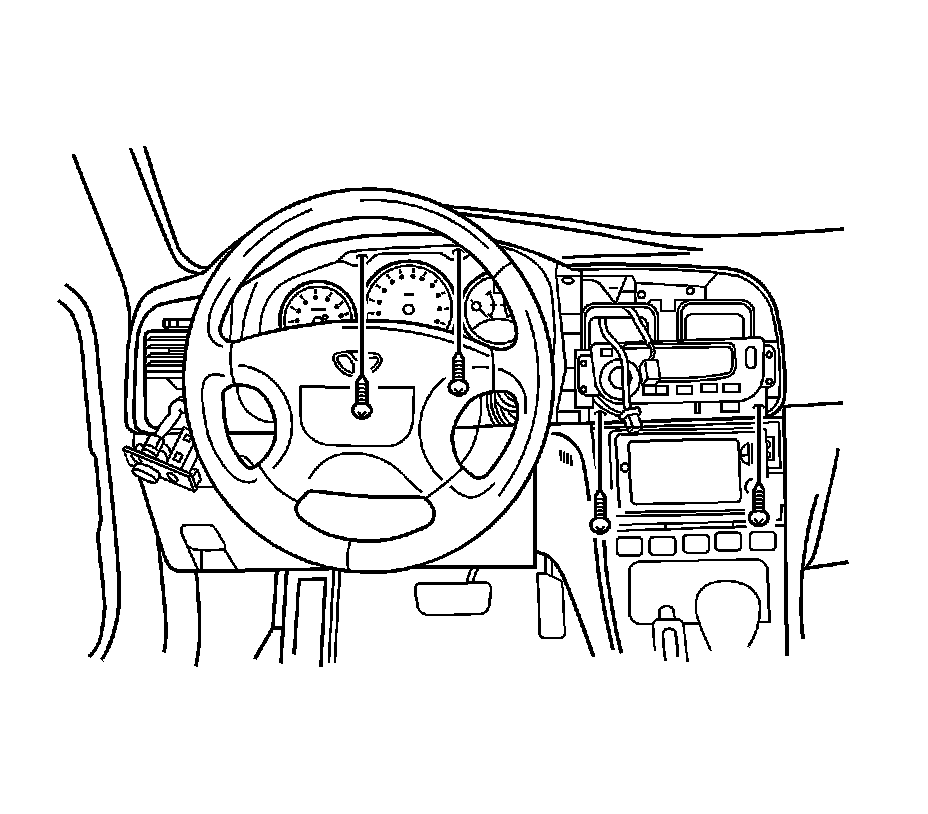
14. Remove the screws and the instrument panel side covers.
15. Remove the screw and instrument panel fuse block.
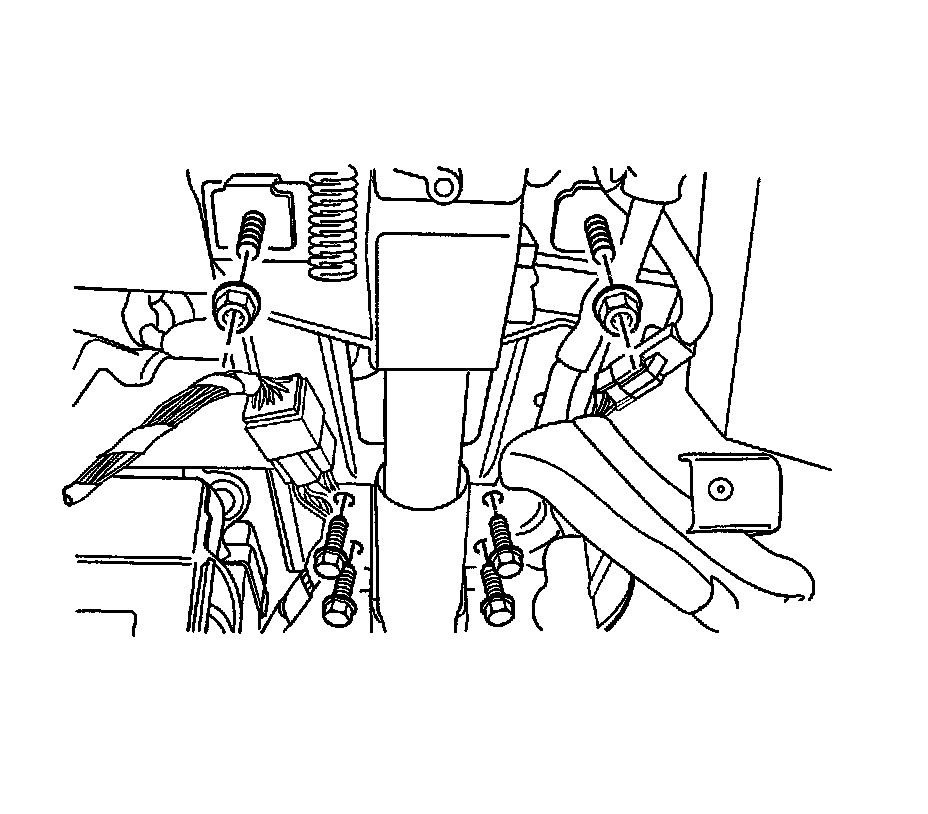
16. Remove the nuts and the bolts securing the steering column.
17. Disconnect the steering column electrical connector.
18. Lower the steering column.
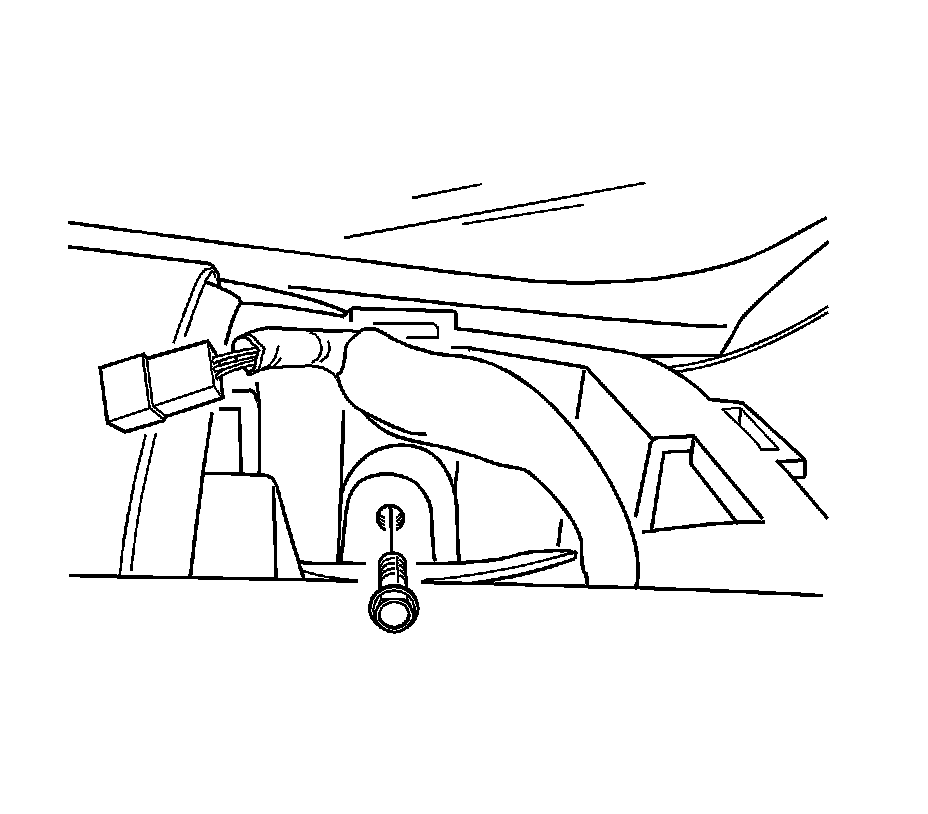
19. Remove the instrument panel bolts below the windshield.
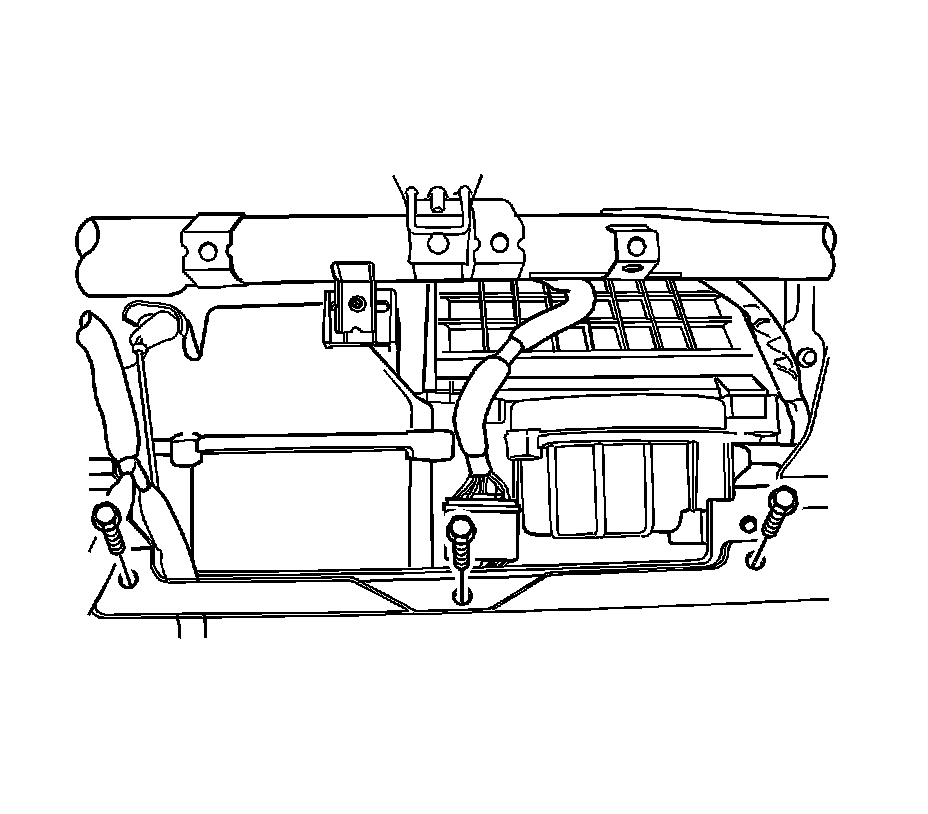
20. Remove the instrument panel screw behind the glove box brace.
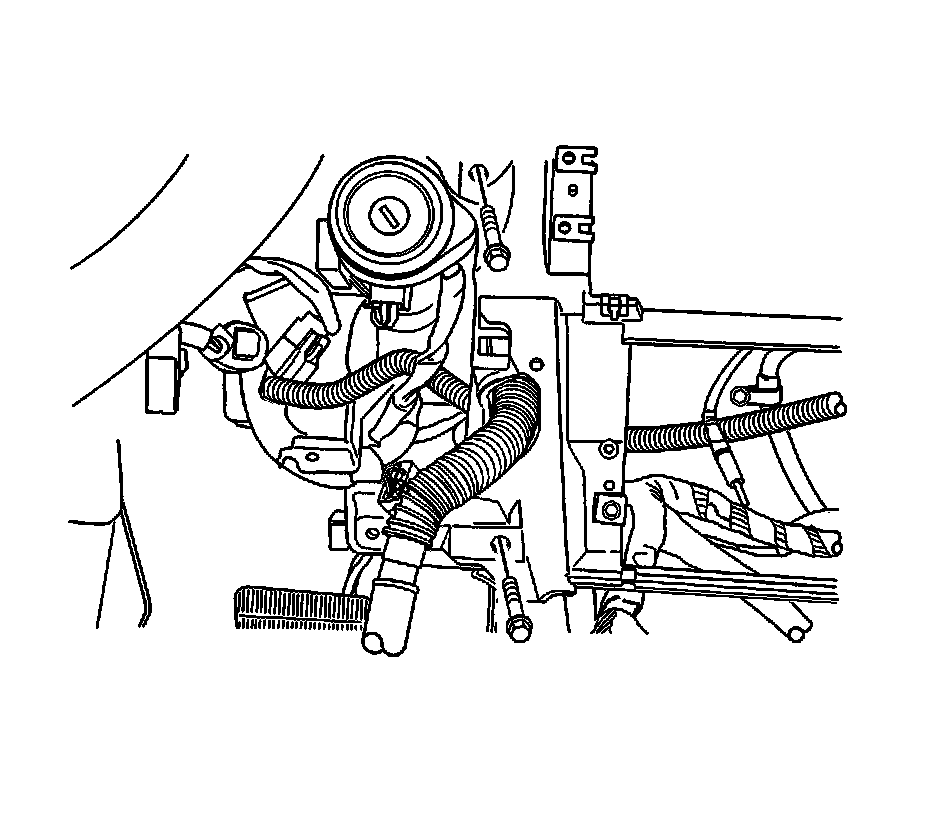
21. Remove the fixing screws securing the instrument panel.
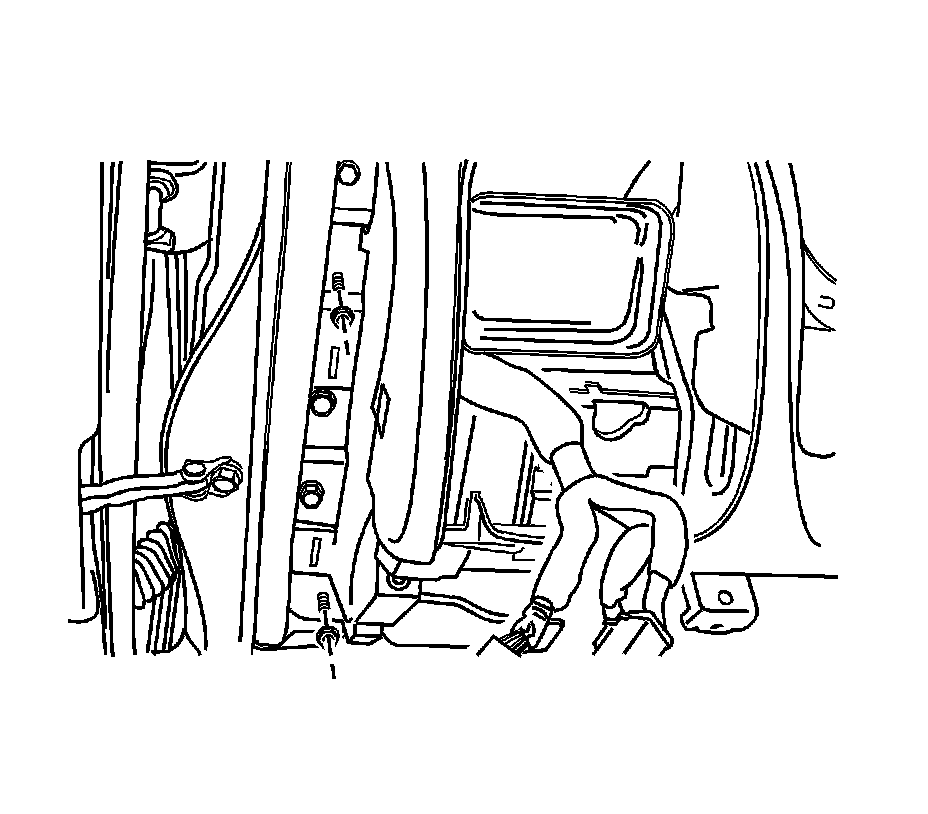
22. Remove the bolts securing the sides of the instrument panel to the body.
23. Disconnect the instrument panel electrical connectors.
24. Remove the instrument panel.
Installation Procedure
1. Position the instrument panel in the vehicle.
2. Connect the instrument panel electrical connectors.
Notice: Refer to Fastener Notice Fastener Notice.
3. Install the bolts securing the sides of the instrument panel to the body.
Tighten the instrument panel-to-body bolts to 22 Nm (16 lb ft).
4. Install the fixing screws securing the instrument panel.
5. Install the instrument panel screws behind the glove box brace.
6. Install the instrument panel bolts below the windshield.
7. Raise the steering column.
8. Connect the steering column electrical connector.
9. Install the nuts and the bolts securing the steering column.
* Tighten the steering column nuts to 22 Nm (16 lb ft).
* Tighten the steering column bolts to 22 Nm (16 lb ft).
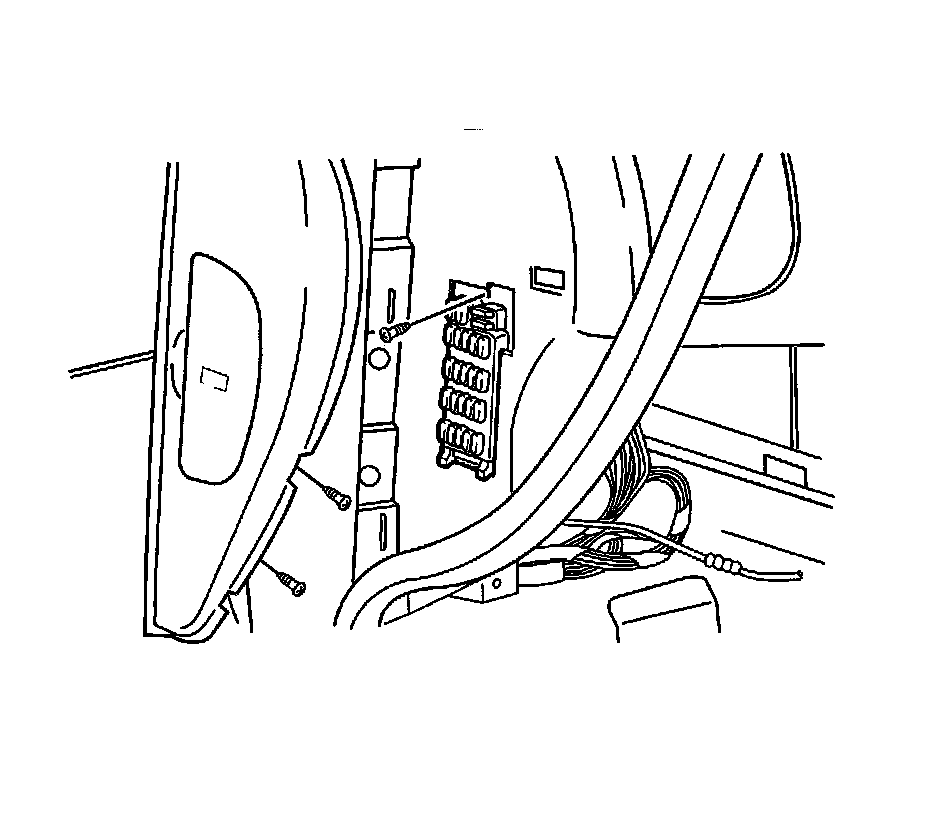
10. Install the instrument panel fuse block with the screw.
11. Install the instrument panel side covers with the screws.
12. Install the knee bolsters. Refer to Knee Bolster Replacement Knee Bolster Replacement.
13. Connect the glove box housing electrical connectors.
14. Install the screws and the glove box housing.
15. Install the glove box. Refer to Storage Compartment Replacement - Instrument Panel (I/P) Service and Repair.
16. Install the kick panels. Refer to Trim Panel Replacement - Hinge Pillar Trim Panel Replacement - Hinge Pillar.
17. Install the instrument cluster. Refer to Instrument Panel Cluster (IPC) Replacement Instrument Panel Cluster (IPC) Replacement.
18. Install the HVAC controls assembly. Refer to HVAC Control Assembly Replacement HVAC Systems - Automatic.
19. Install the instrument cluster trim panel. Refer to Trim Panel Replacement - Instrument Panel (I/P) Cluster Trim Panel Replacement - Instrument Panel (I/P) Cluster.
20. Install the instrument cluster dimmer switch assembly. Refer to Instrument Panel (I/P) Dimmer Switch Replacement Service and Repair.
21. Install the tweeter speakers and the stereo cassette AM/FM radio. Refer to Radio Replacement Service and Repair.
22. Instal the sun sensor and the automatic temperature controls assembly. Refer to Sun Load Sensor Replacement Service and Repair.
23. Install the floor console. Refer to Console Replacement - Front Floor Console Replacement - Front Floor.
24. Connect the negative battery cable.