Supercharger Replacement
Supercharger Replacement
Special Tools
* EN-48898 - Supercharger Lift Fixture
* J-37088-A - Fuel Line Disconnect Tool Set
Removal Procedure
1. Remove the supercharger belt. Refer to Supercharger Belt Replacement Supercharger Belt Replacement.
2. Remove the intake manifold cover. Refer to Intake Manifold Cover Replacement - Front Intake Manifold Cover Replacement - Front.
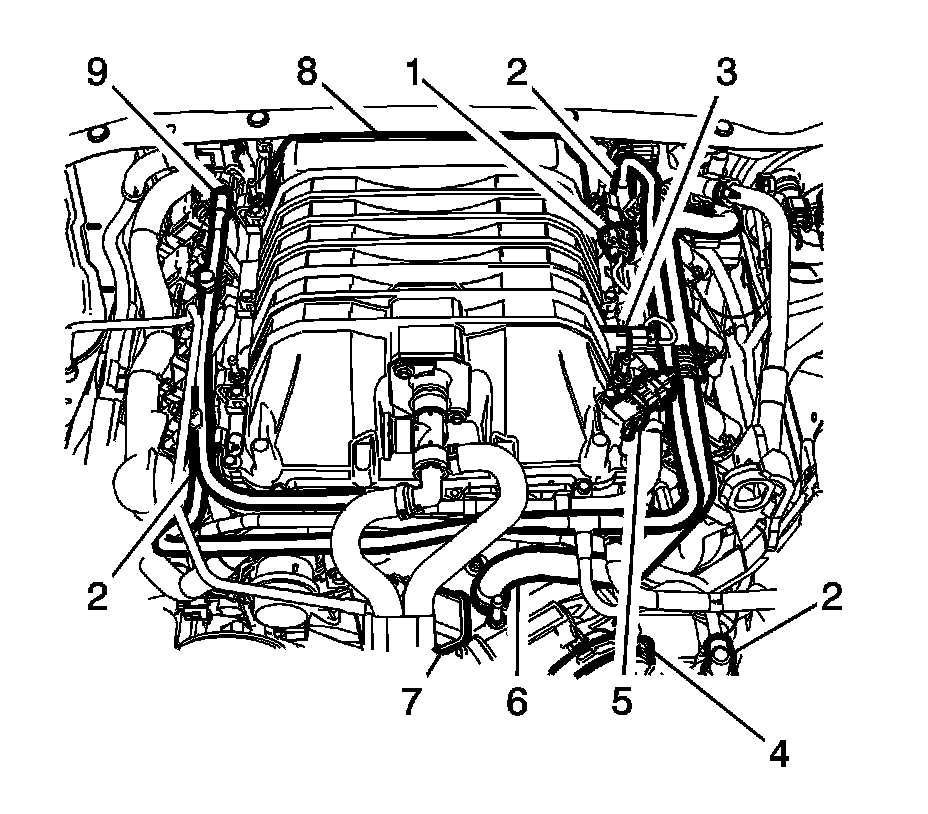
3. Disconnect the supercharger pressure (1), intake air temperature (3) and barometric pressure (5) sensors.
4. Disconnect and remove the PCV fresh air tube (2).
5. Disconnect the brake booster vacuum hose (6).
6. Disconnect and remove the EVAP line from the canister purge solenoid (7).
7. Loosen the clamp (4) and remove the air cleaner outlet duct.
8. Remove the fuel injection fuel rail assembly (9). Refer to Fuel Injection Fuel Rail Assembly Replacement (L99 or LS3) Service and RepairFuel Injection Fuel Rail Assembly Replacement (LSA) Service and Repair.
9. Remove the charge air cooler cover (8). Refer to Charge Air Cooler Cover Replacement Charge Air Cooler Cover Replacement.
Note:
* The supercharger, throttle body and sensors may be removed as an assembly. If not servicing the individual components, remove the supercharger as an assembly.
* Cover the inlet area of the supercharger to prevent dirt or debris contamination onto the rotors.
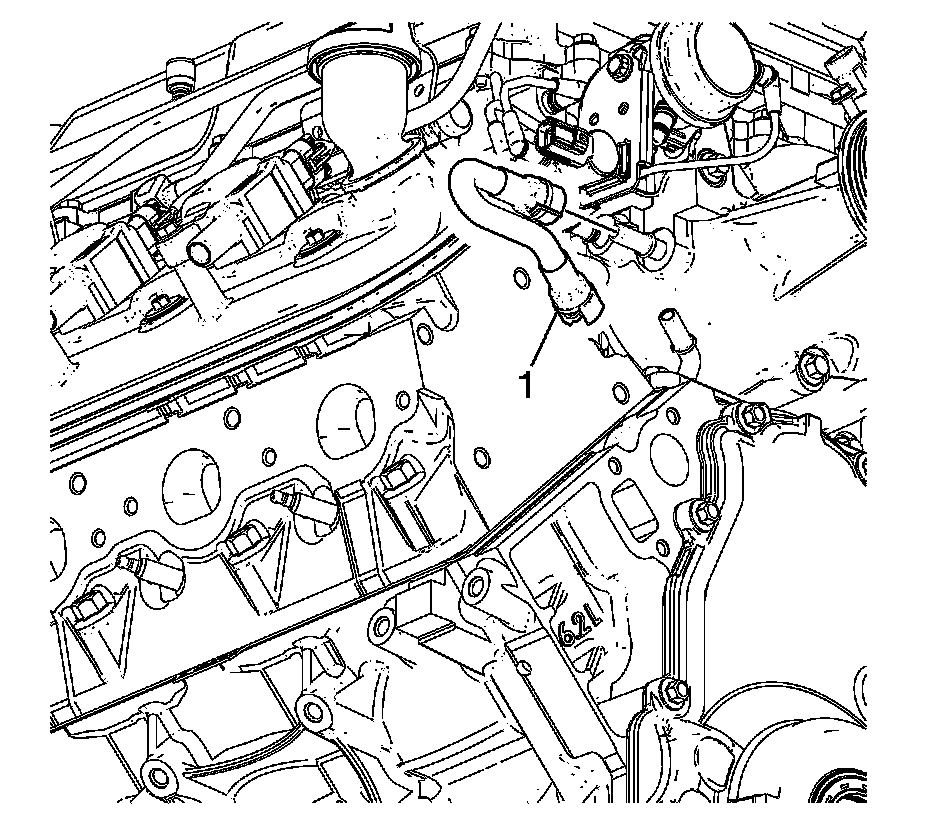
10. Remove the positive crankcase ventilation (PCV) dirty air hose (1) from the valley cover and supercharger.
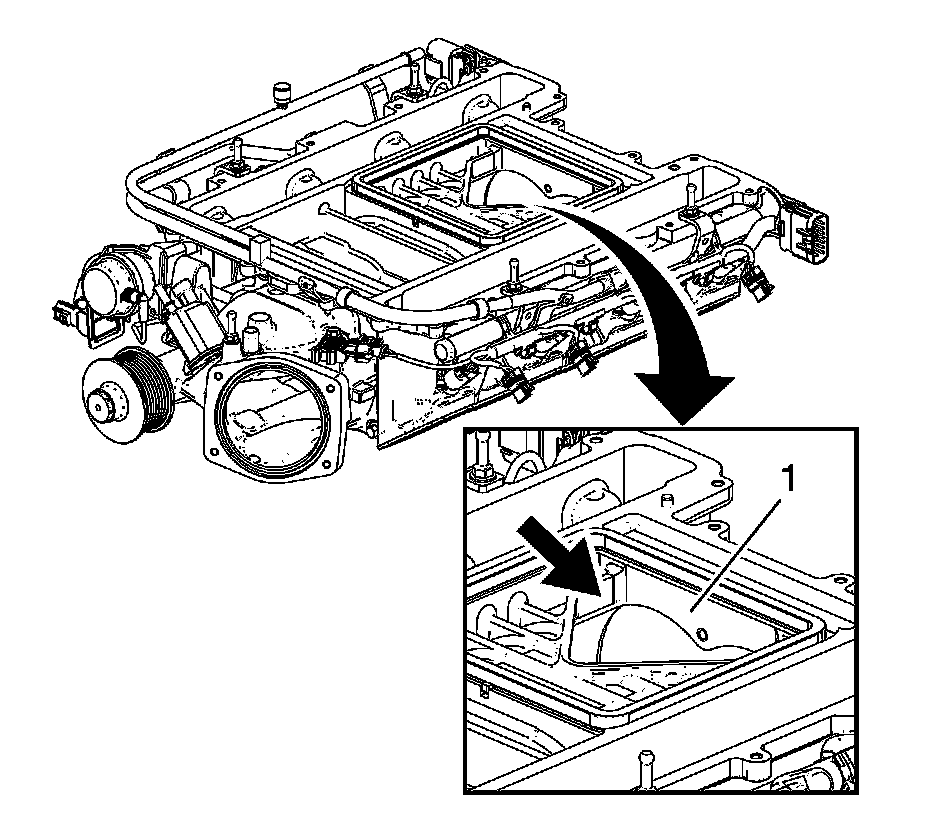
11. Cover the supercharger rotors area (1) to prevent dirt or debris contamination onto the rotors.
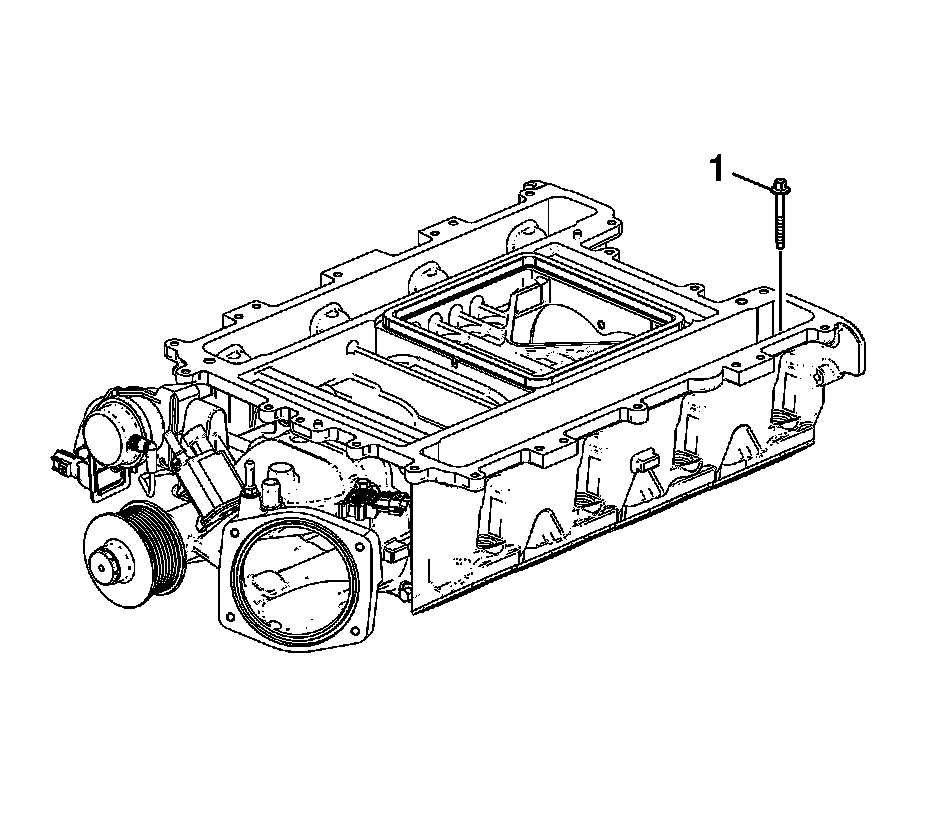
12. Remove the supercharger bolts (1).
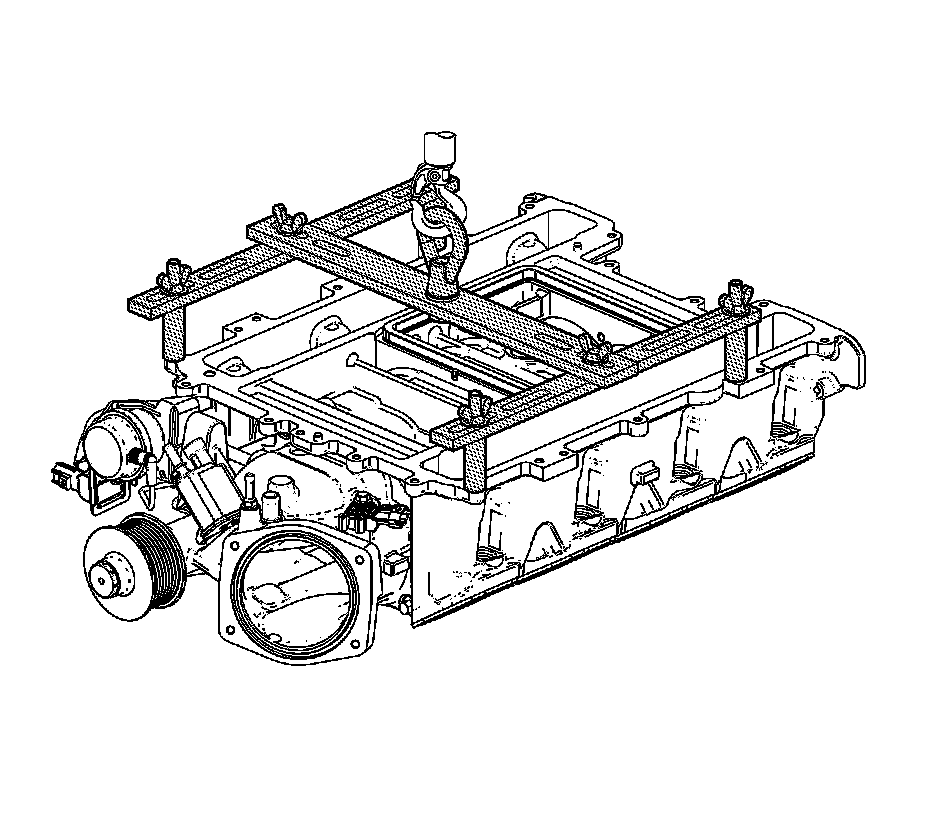
13. Install the EN-48898 - fixture to the supercharger and tighten the EN-48898 - fixture studs and nuts until snug.
14. Using a lifting device, remove the supercharger from the engine.
Note:
* Do not allow dirt or debris to enter the passages of the supercharger. Cover the intake ports as required.
* With the manifold positioned upside down on a bench, the lower assembly may be positioned onto the intercooler cover dowel pins. Use care not to reposition or bend the dowel pins.
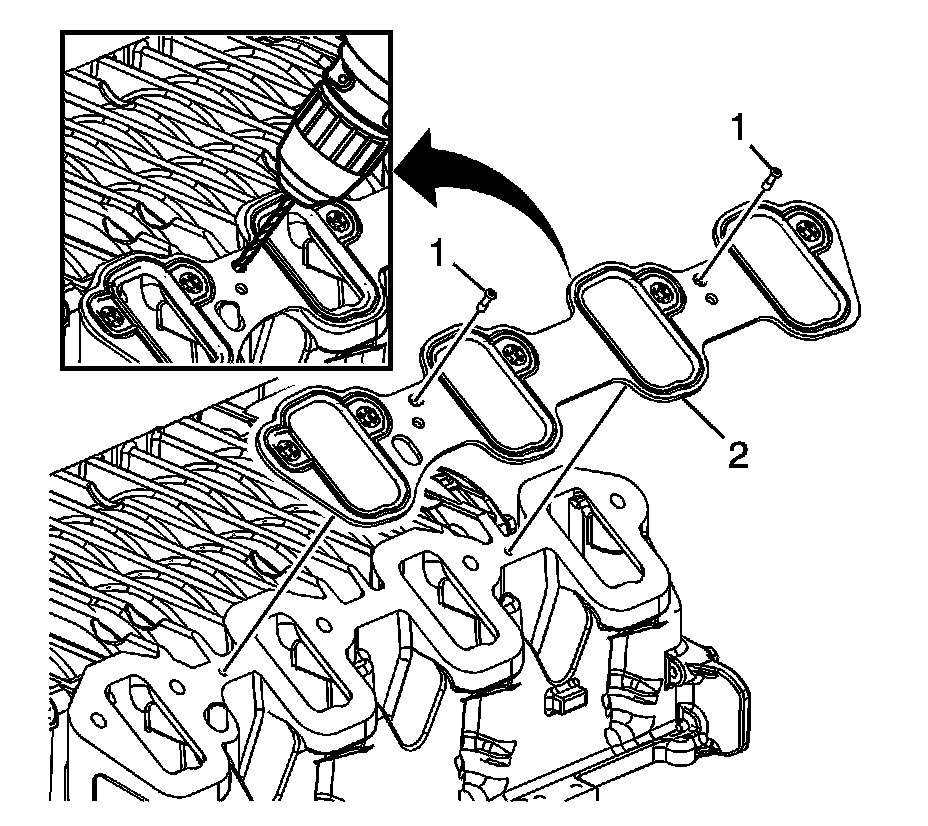
15. Drill out the gasket rivets (1) using a drill bit with an outside diameter no larger than 3.2 mm (0.125 in). Remove the gasket (2).
Installation Procedure
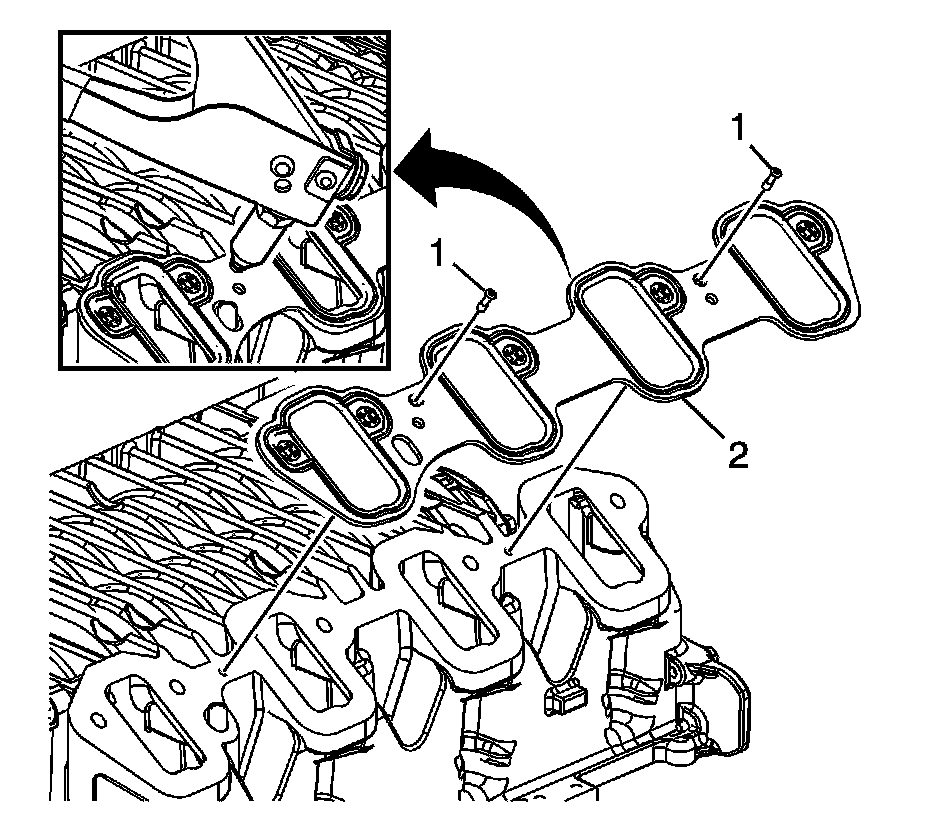
1. Install the NEW gaskets (2).
2. Install NEW gasket rivets (1).
Note:
* The supercharger, throttle body and sensors may be removed as an assembly. If not servicing the individual components, remove the supercharger as an assembly.
* Cover the inlet area of the supercharger to prevent dirt or debris contamination onto the rotors.
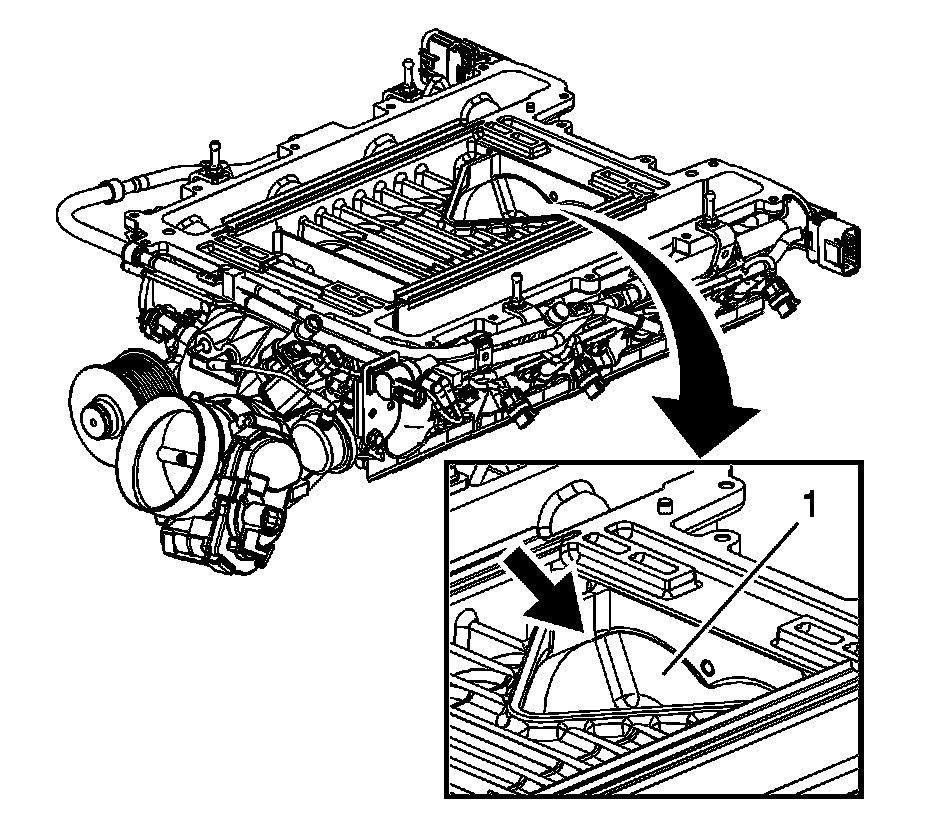
3. Cover the supercharger rotors area (1) to prevent dirt or debris contamination onto the rotors.
4. Install the EN-48898 - fixture to the supercharger.
5. Tighten the EN-48898 - fixture bolts and nuts until snug.
6. Using a lifting device, install the supercharger onto the engine. Align the dowel pin at the right front of the supercharger to the cylinder head.
7. Apply a 5 mm (0.2 in) band of threadlocker to the threads of the bolts. Refer to Adhesives, Fluids, Lubricants, and Sealers [1][2]Fluid Type Specifications.
8. Install the supercharger bolts (1).
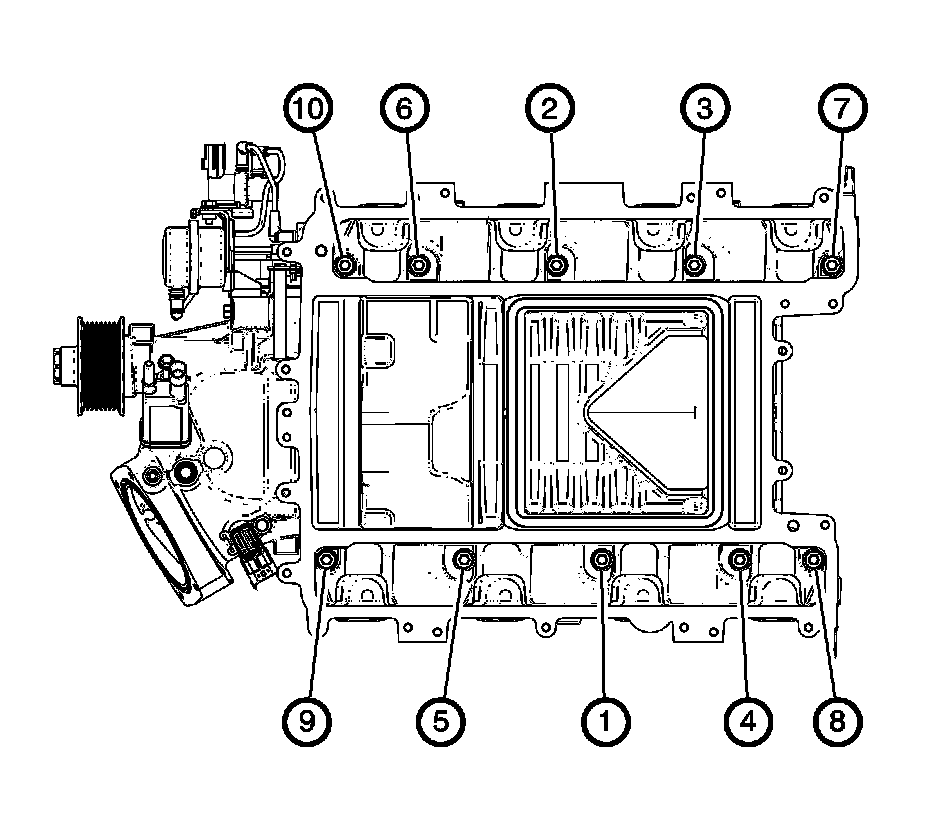
Caution: Refer to Fastener Caution Fastener Caution.
9. Tighten the bolts.
1. Tighten the bolts a first pass in sequence to 5 Nm (44 lb in).
2. Tighten the bolts a final pass in sequence to 10 Nm (89 lb in).
10. Install the PCV dirty air hose (1) to the valley cover and supercharger.
11. Install the charge air cooler cover. Refer to Charge Air Cooler Cover Replacement Charge Air Cooler Cover Replacement.
12. Install the fuel injection fuel rail assembly (9). Refer to Fuel Injection Fuel Rail Assembly Replacement (L99 or LS3) Service and RepairFuel Injection Fuel Rail Assembly Replacement (LSA) Service and Repair.
13. Connect the brake booster vacuum hose (6).
14. Connect the connector and the EVAP line to the canister purge solenoid (7).
15. Connect the air cleaner outlet duct and tighten the clamp (4).
16. Connect the supercharger pressure (1), intake air temperature (3) and barometric pressure (5) sensors.
17. Install and connect the PCV fresh air tube (2).
18. Install the intake manifold cover. Refer to Intake Manifold Cover Replacement - Front Intake Manifold Cover Replacement - Front.
19. Install the supercharger belt. Refer to Supercharger Belt Replacement Supercharger Belt Replacement.