Timing Cover: Service and Repair
Engine Front CoverRemoval
1. CAUTION: The air suspension switch must be turned off prior to raising the vehicle. Failure to do so can result in unexpected inflation or deflation of the air springs, which could result in shifting of the vehicle during the repair operation.
If equipped, turn the air suspension switch off.
2. Remove both of the valve covers.
3. Remove the power steering pump.
4. Remove the cooling fan.
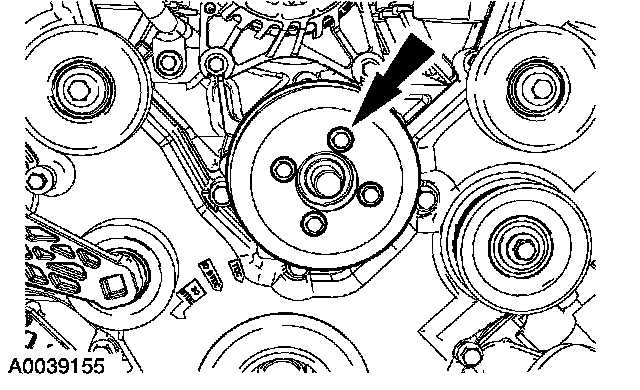
5. Remove the bolts and the coolant pump pulley.
6. Remove the crankshaft front seal.
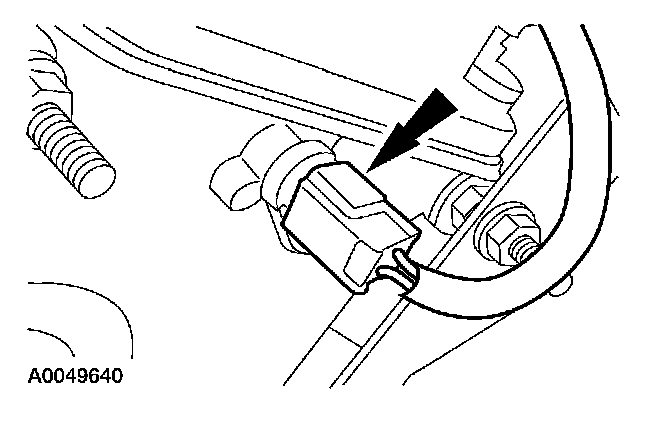
7. Disconnect the Camshaft Position (CMP) sensor electrical connector.
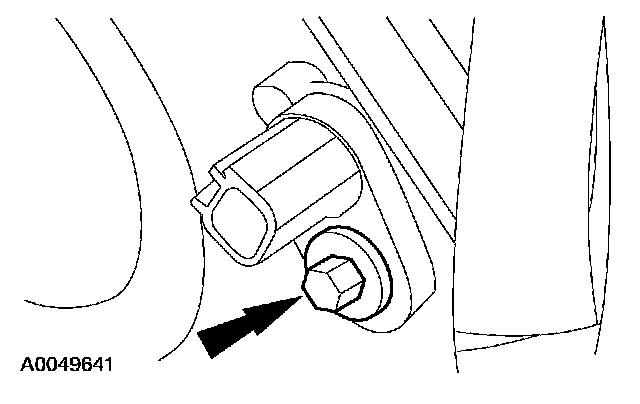
8. Remove the bolt and the CMP sensor.
9. Raise and support the vehicle.
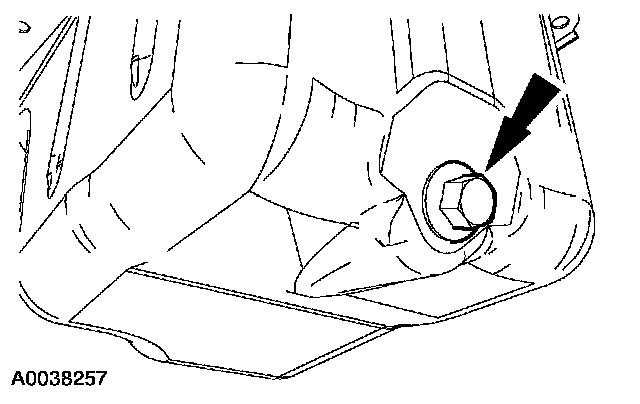
10. Remove the drain plug and drain the engine oil.
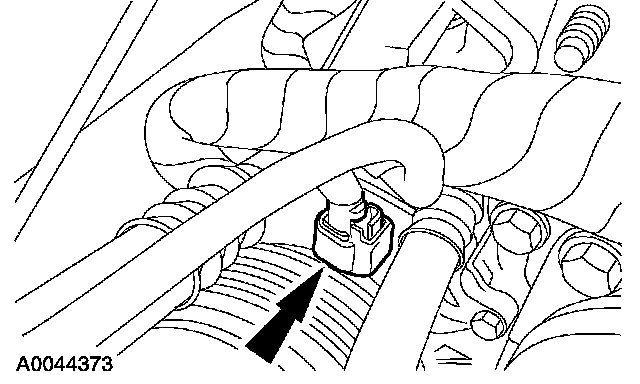
11. Disconnect the A/C compressor electrical connector.
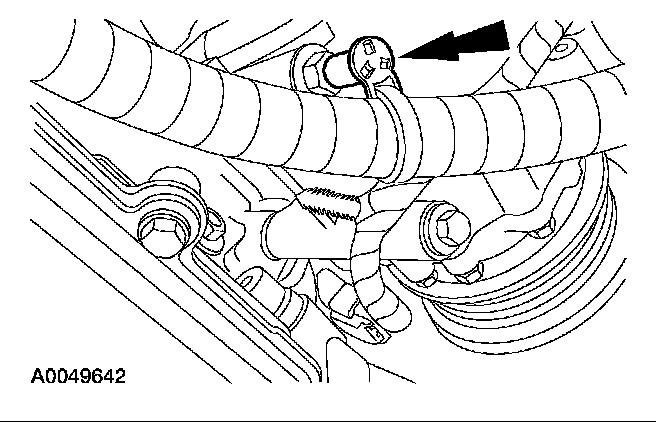
12. Disconnect the harness routing clip and position the horned fairly
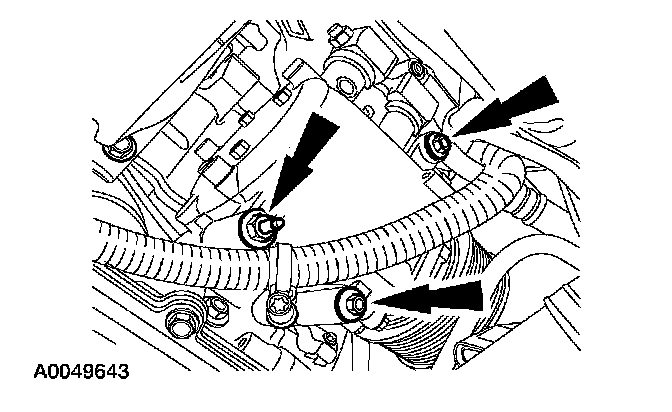
13. Remove the fasteners and position the A/C compressor aside.
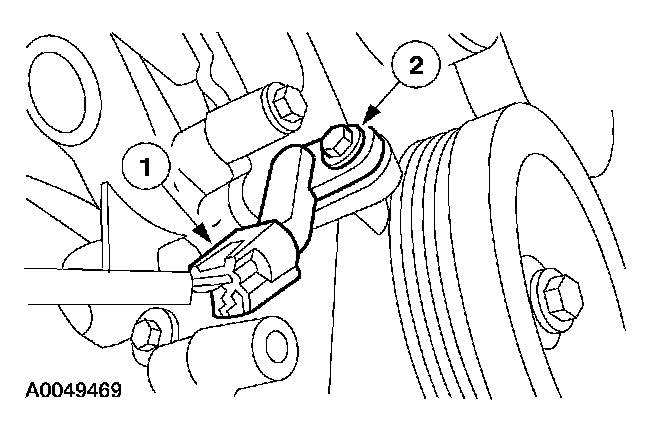
14. Remove the Crankshaft Position (CKP) sensor.
1 Disconnect the electrical connector.
2 Remove the bolt and the sensor.
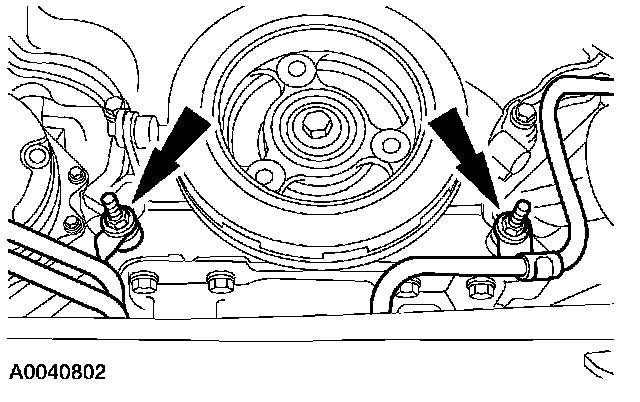
15. Remove the nuts and detach the power steering and transmission cooler tube brackets.
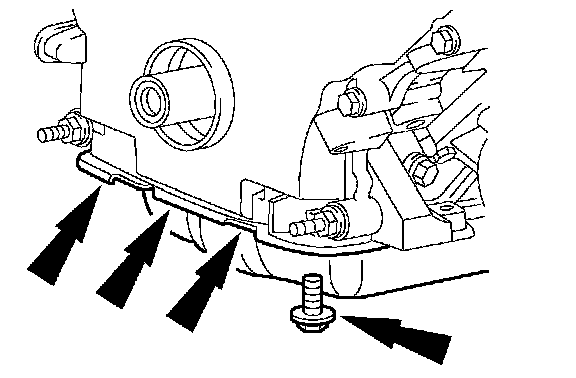
16. Remove the four bolts.
17. Lower the vehicle.
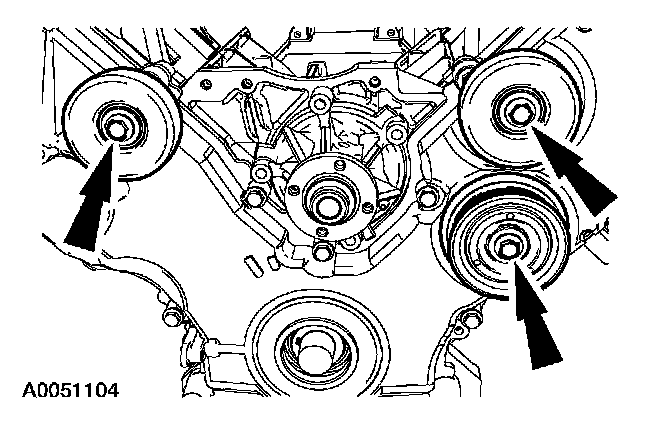
18. Remove the bolts and the drive belt idler pulleys.
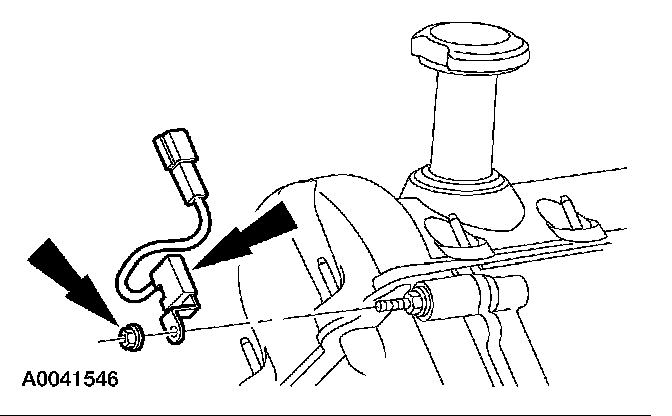
19. Remove the nuts and the two radio interference capacitors.
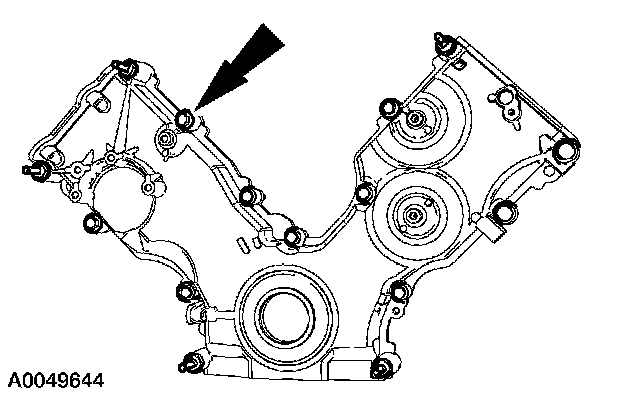
20. Remove the 15 fasteners, the engine front cover and the gaskets.
21. CAUTION: Do not use metal scrapers, wire brushes, power abrasive discs or other abrasive means to clean the sealing surfaces. These tools cause scratches and gouges which make leak paths. Use a plastic scraping tool to remove all traces of old sealant.
CAUTION: Cover the oil pan opening to prevent foreign material from falling into the oil pan.
Inspect and clean the gasket mating surfaces.
^ Clean the mating surfaces with silicone gasket remover and metal surface prep. Follow the directions on the packaging.
^ Inspect the mating surfaces.
Installation
All vehicles
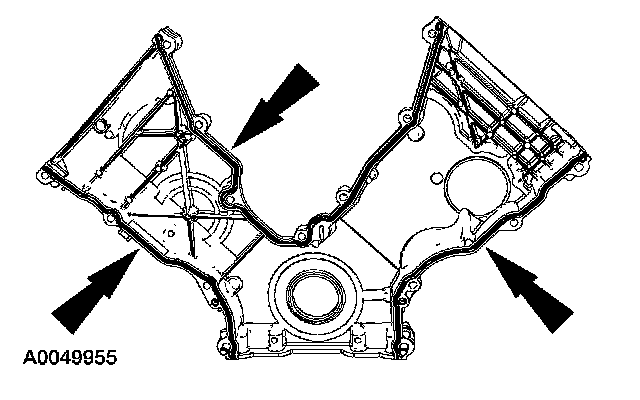
1. Install the gaskets on the engine front cover.
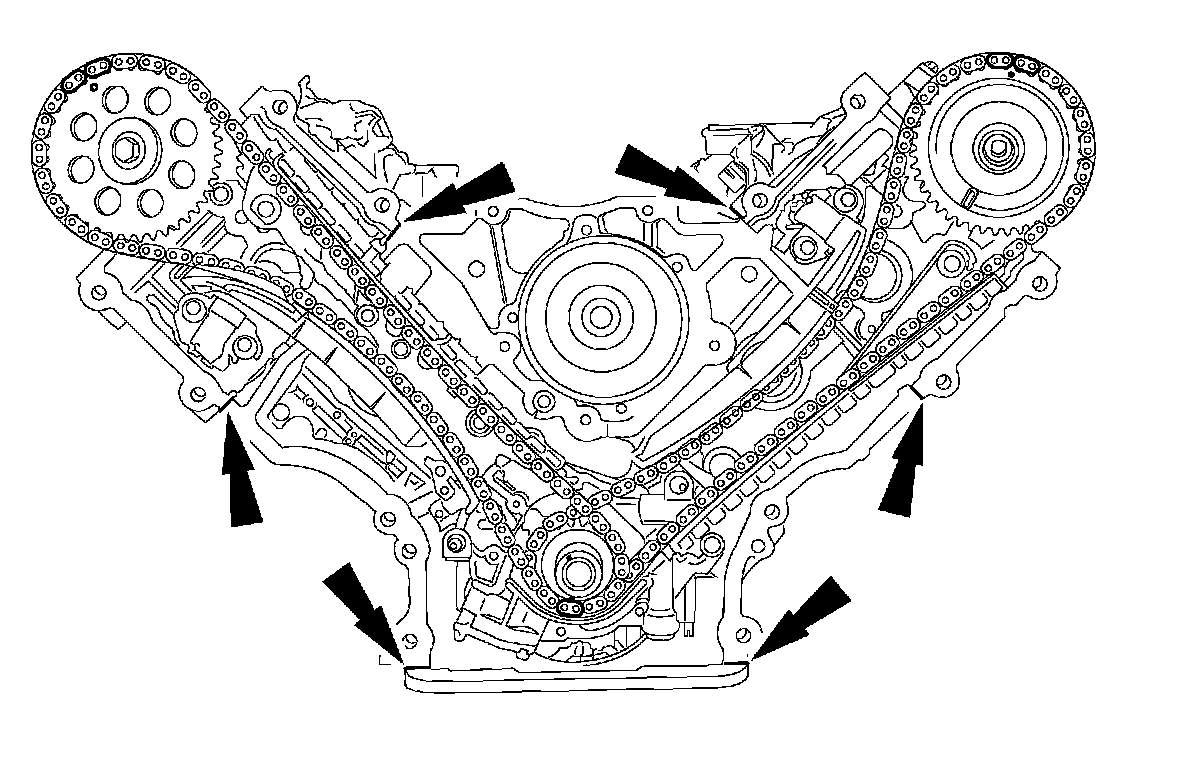
2. CAUTION: Do not use metal scrapers, wire brushes, power abrasive discs or other abrasive means to clean the sealing surfaces. These tools cause scratches and gouges which make leak paths. Use a plastic scraping tool to remove all traces of old sealant.
NOTE: If not secured within four minutes, the sealant must be removed and the sealing area cleaned. To clean the sealing area, use silicone gasket remover and metal surface prep. Follow the directions on the packaging. Failure to follow this procedure can cause future oil leakage.
Apply a bead of silicone gasket and sealant at the cylinder head-to-cylinder block surface and the oil pan-to-cylinder block surface, at the locations shown.
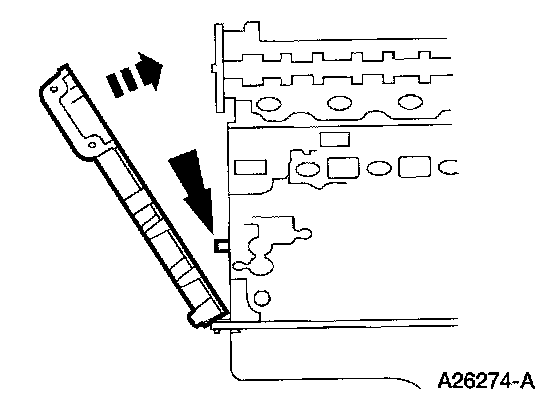
3. NOTE: Make sure that the engine front cover gaskets are in place on the engine front cover before installation.
Position the engine front cover on the front cover-to-cylinder block dowels and loosely install the bolts.
Romeo engine (4.6L)
Fastener Description - Part 1 Of 2:
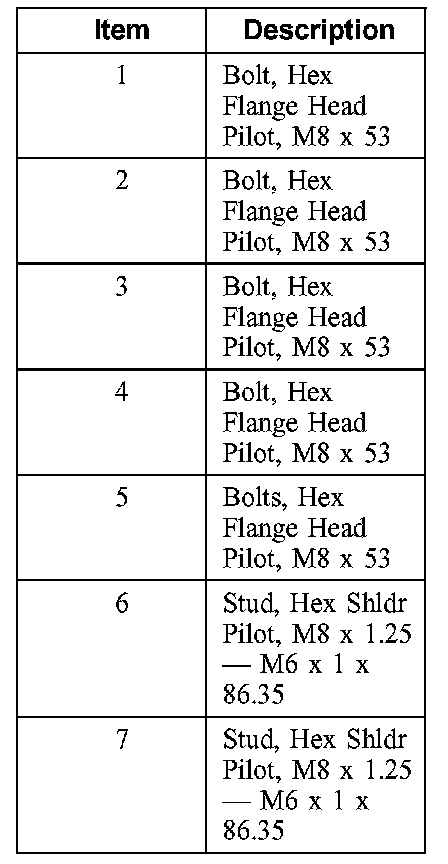
Fastener Description - Part 2 Of 2:
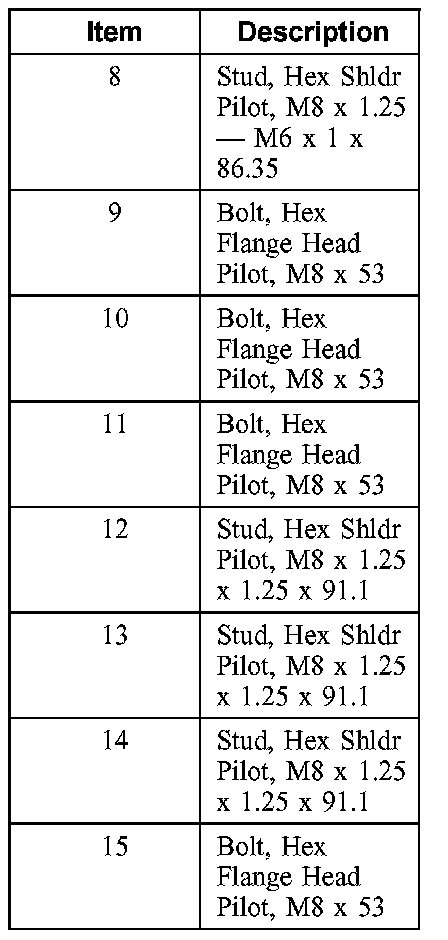
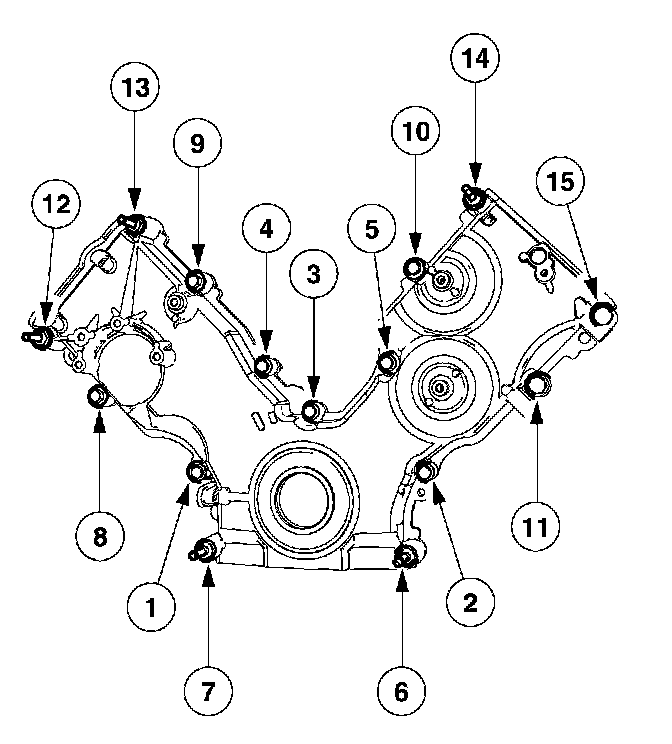
4. Tighten the engine front cover fasteners in the sequence shown to 25 Nm (18 ft. lbs.).
Windsor engine (5.4L)
Fastener Description - Part 1 Of 2:
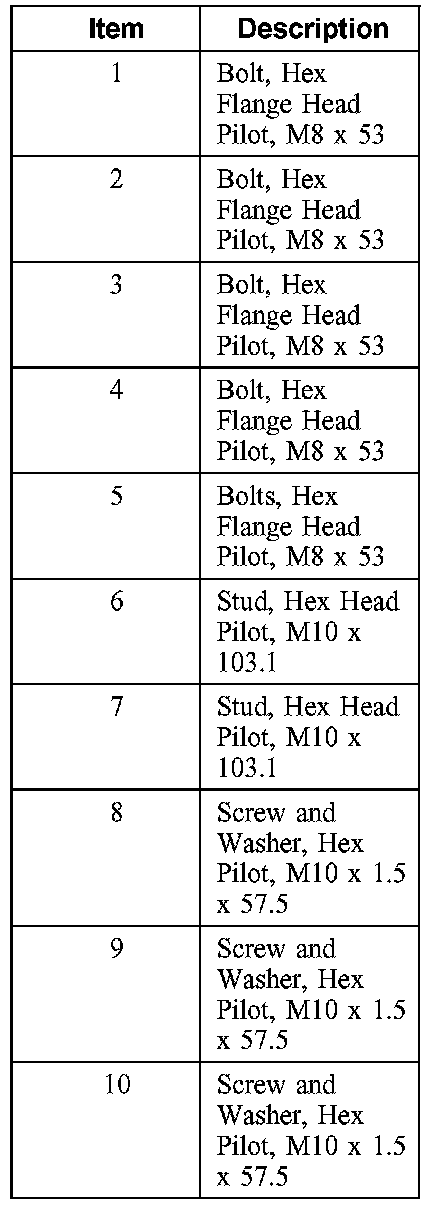
Fastener Description - Part 2 Of 2:
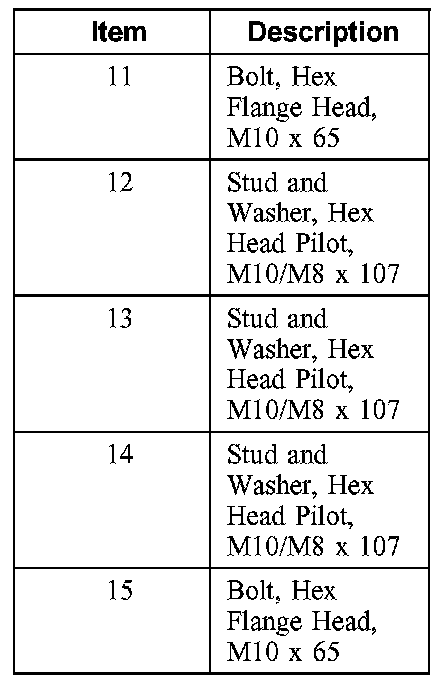
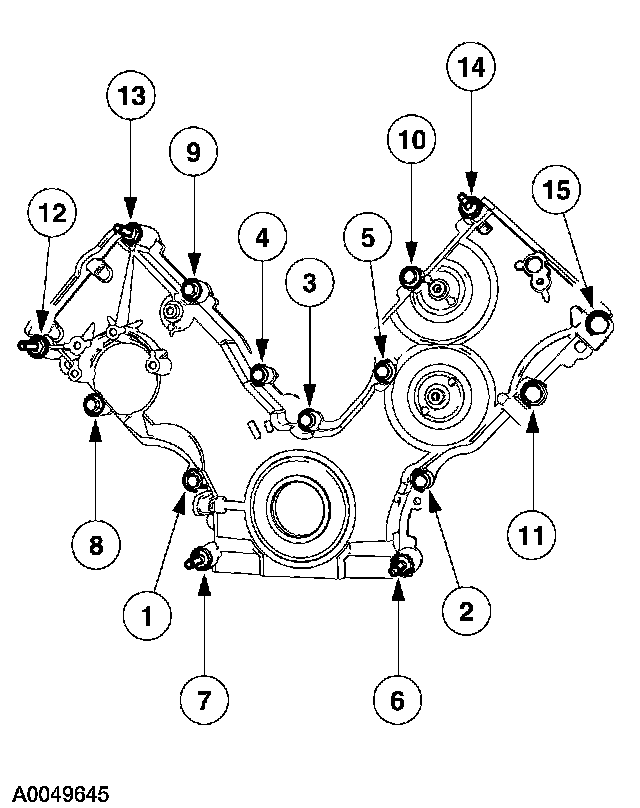
5. Tighten the engine front cover fasteners in the sequence shown in three stages.
^ Stage 1: tighten fasteners 1 through 7 to 25 Nm (18 ft. lbs.).
^ Stage 2: tighten fasteners 6 and 7 to 48 Nm (35 ft. lbs.).
^ Stage 3: tighten fasteners 8 through 15 to 48 Nm (35 ft. lbs.).
All vehicles
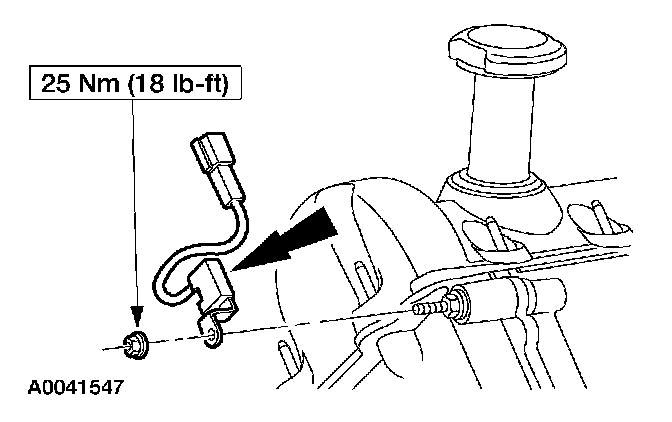
6. Position the two radio frequency interference capacitors and install the nuts.
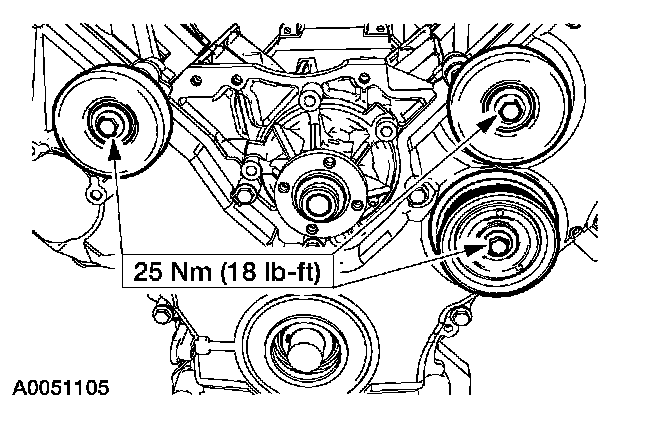
7. Position the drive belt idler pulleys and install the bolts.
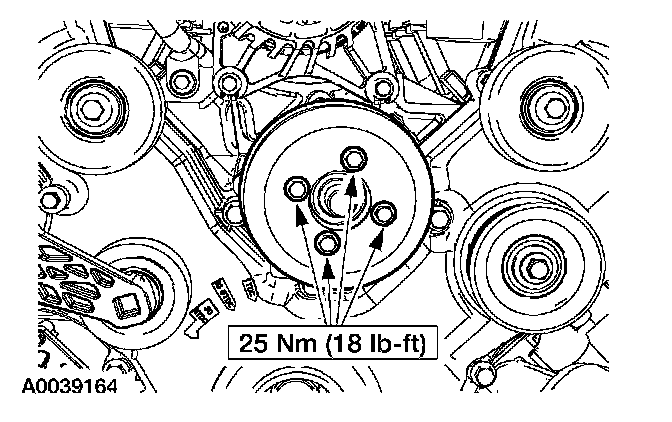
8. NOTE: Hold the water pump pulley with a suitable tool to prevent rotation.
Position the coolant pump pulley and install the bolts.
9. Raise and support the vehicle.
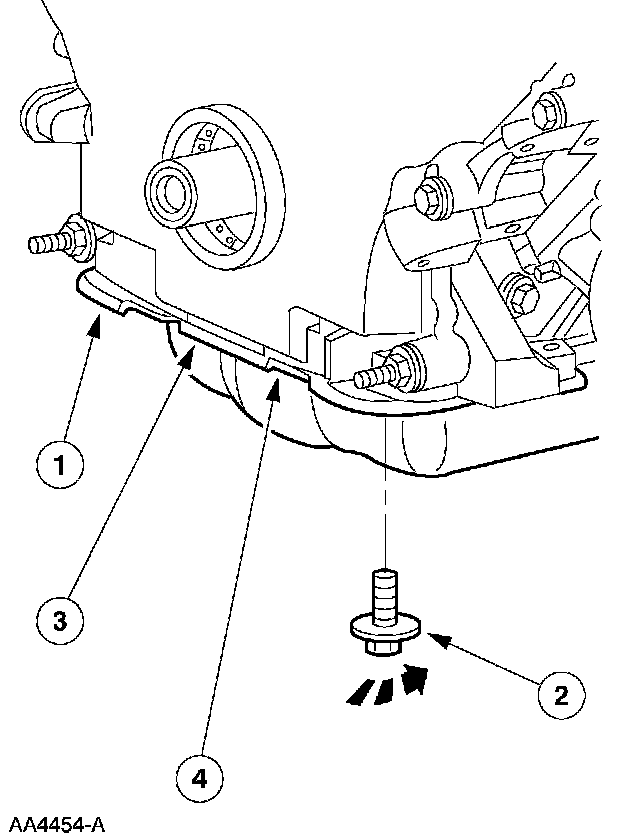
10. Loosely install the bolts, then tighten the bolts in two stages, in the sequence shown.
^ Stage 1: tighten to 20 Nm (15 ft. lbs.).
^ Stage 2: tighten an additional 90°.
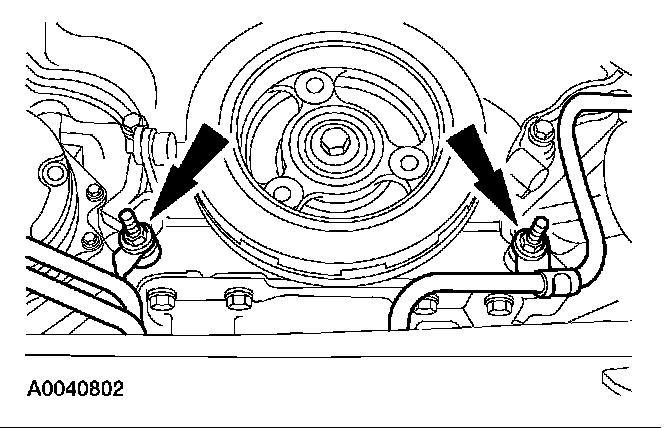
11. Position the transmission cooler tube and the power steering tube brackets. Install the nuts.
^ On 4.6L engine, tighten the nuts to 11 Nm (8 ft. lbs.).
^ On 5.4L engine, tighten the nuts to 40 Nm (30 ft. lbs.).
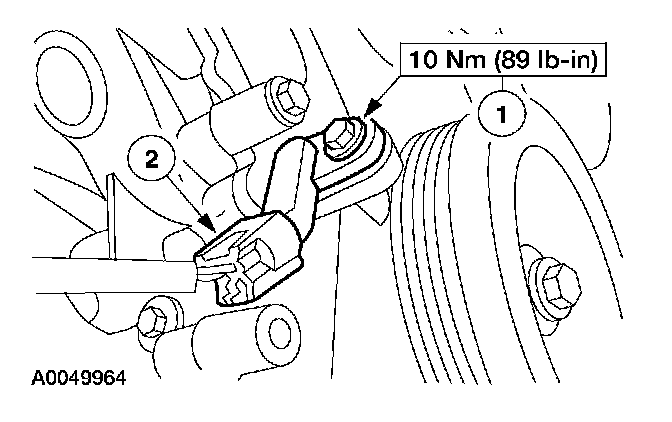
12. Install the CKP sensor.
1 Install the sensor and bolt.
2 Connect the electrical connector.
13. Install a new crankshaft front oil seal.
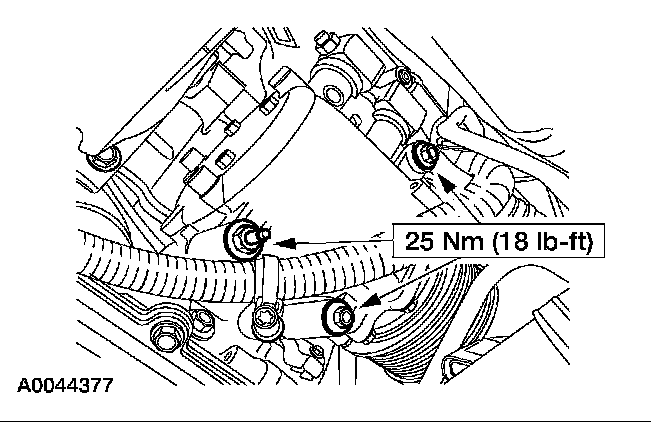
14. Position the A/C compressor and install the fasteners.
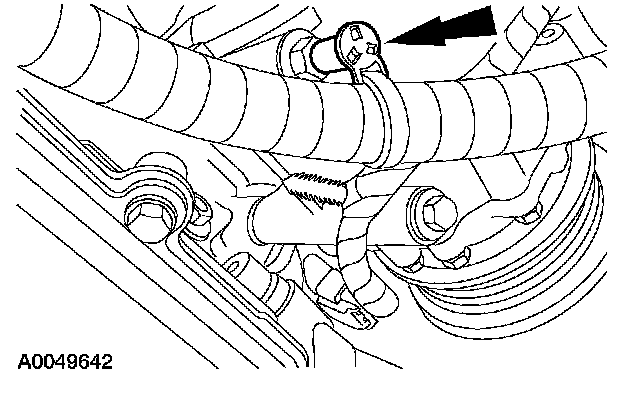
15. Install the harness routing clip.
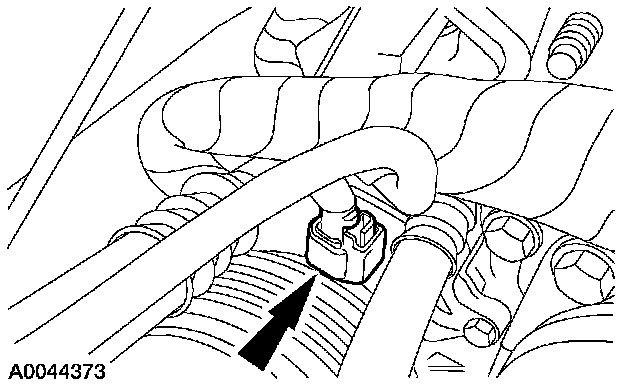
16. Connect the A/C compressor electrical connector.
17. Install the power steering pump.
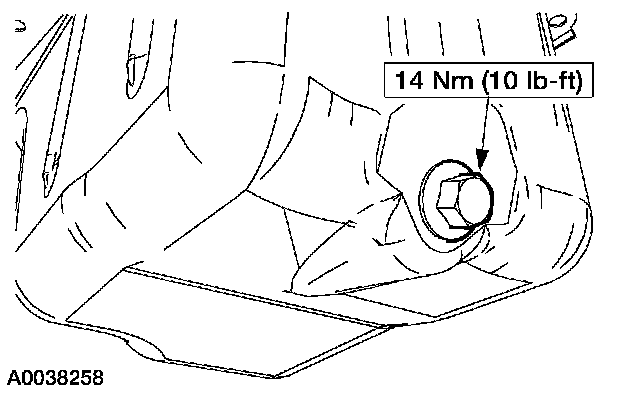
18. Install the drain plug.
19. Install a new engine oil filter.
20. Lower the vehicle.
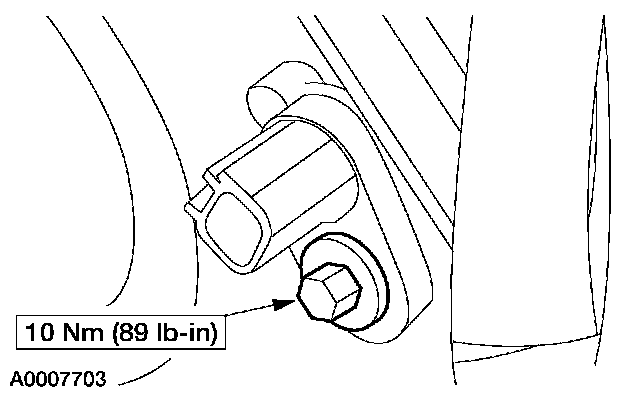
21. Install the CMP sensor and bolt.
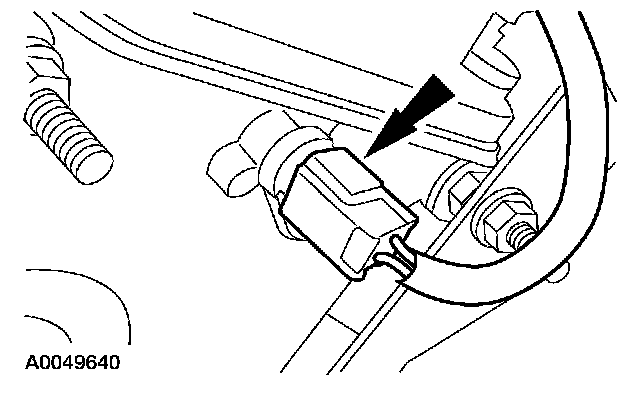
22. Connect the CMP sensor electrical connector.
23. Install the cooling fan.
24. CAUTION: Fill the engine with clean engine oil before starting the engine to fill the cooling system or charge the A/C system.
Install the LH and RH valve covers.
25. Fill the engine with clean engine oil.
26. If equipped, turn on the air suspension switch.