Headliner: Service and Repair
Headliner Removal/Installation
SRS components are located in this area. Review the SRS component locations Locations and the precautions and procedures Technician Safety Information before doing repairs or service.
NOTE:
- Put on gloves to protect your hands.
- Use the appropriate tool from the KTC trim tool set to avoid damage when prying components.
- Take care not to bend or scratch the trim and the panels.
1. Do the battery terminal disconnection procedure, Procedures and wait at least 3 minutes before beginning work.
2. Remove these items:
- A-pillar trim, both sides A-Pillar Trim
- B-pillar upper trim, both sides B-Pillar Upper/Lower Trim
- Quarter pillar glass trim, both sides Interior Trim Removal/Installation - Quarter Pillar Glass Trim
- Ceiling light Ceiling Light Test/Replacement
- Sunvisors, both sides Service and Repair
- Grab handles, four places Service and Repair
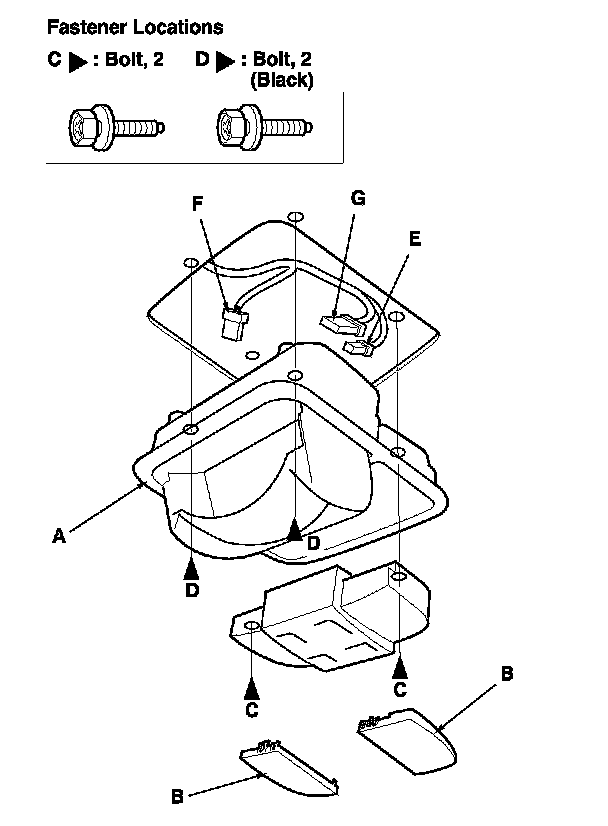
3. Remove the roof console (A).
-1 Remove the lenses (B), and remove the bolts (C).
Open the console, and remove the bolts (D).
-3 Lower the roof console, and disconnect the map light connector (E). If equipped, disconnect the moonroof switch connector (F) and the navigation microphone connector (G).
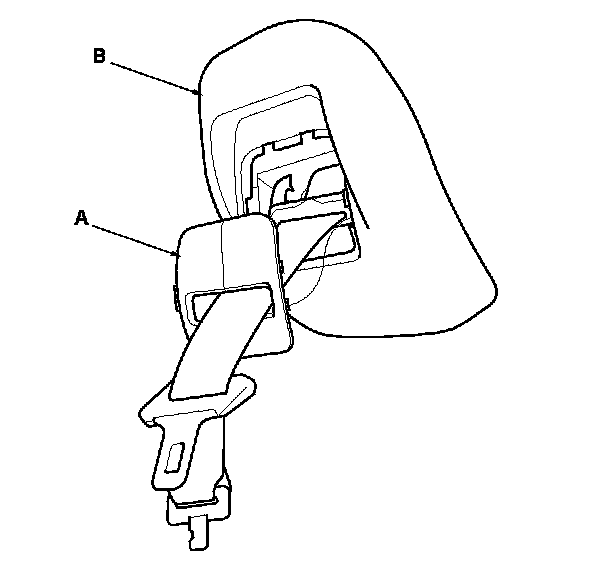
4. Remove the cap (A) from the center seat belt retractor cover (B).
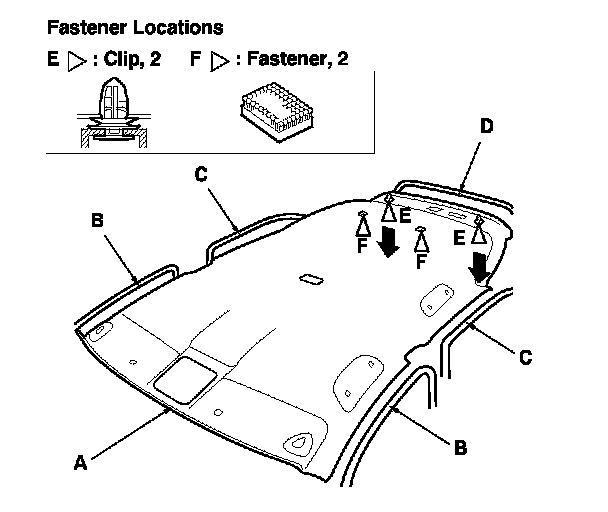
5. Lower the headliner (A).
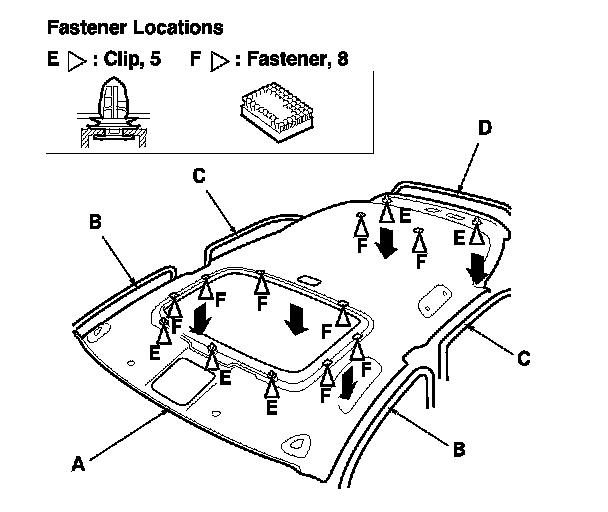
Remove the front door opening seals (B), the rear door opening seals (C), and the tailgate weatherstrip (D) from each roof portion.
-2 Release the clips (E) and the Velcro fasteners (F) from the headliner by pulling down. Take care not to damage the headliner.
Lower the headliner carefully.
Without moonroof
With moonroof
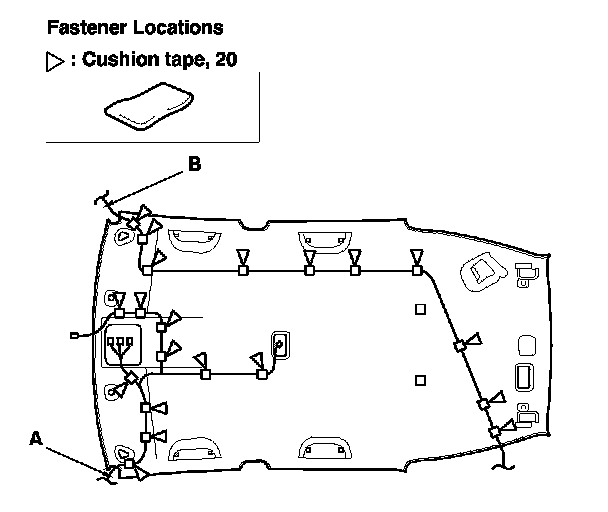
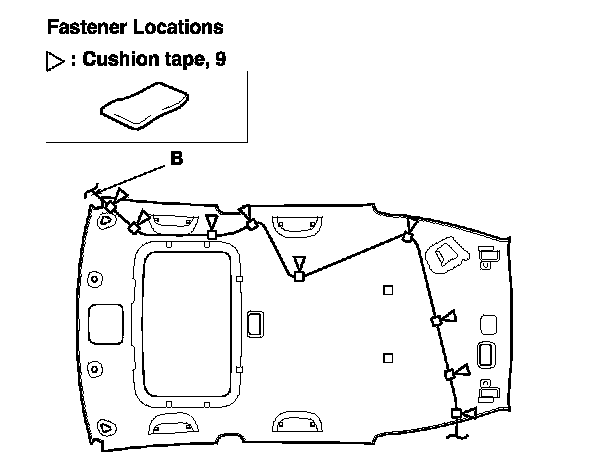
6. Remove the cushion tapes, then remove the interior wire harness (A) and the antenna lead (AM/FM) (B) from the headliner.
Without moonroof
With moonroof
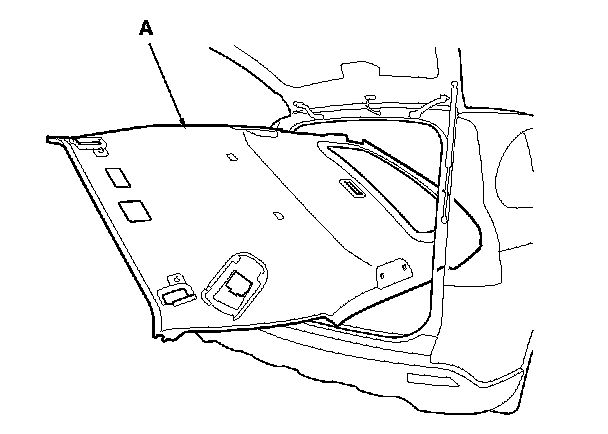
7. With the help of an assistant, pull the headliner (A) out through the tailgate opening. Do not bend the liner. Bending the liner will crease and damage it.
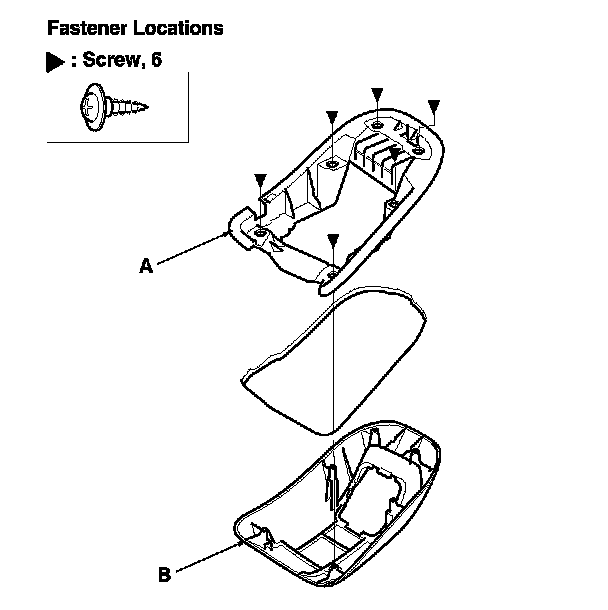
8. Remove the screws, and remove the retractor cover bracket (A) and the retractor cover (B) from the headliner.
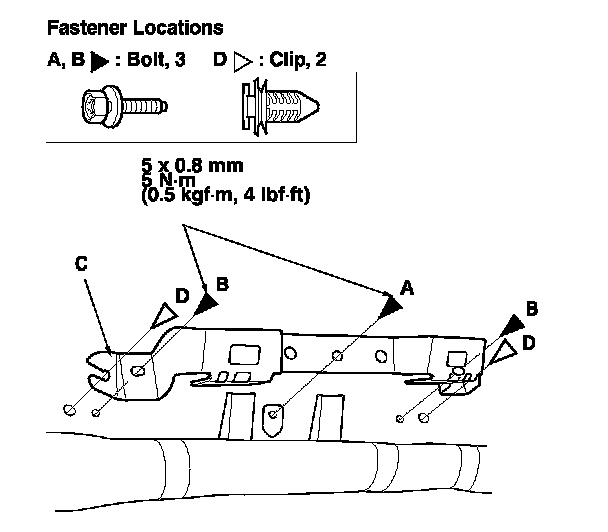
9. If necessary, remove the side curtain airbag mounting bolt (A) and the grab handle bracket mounting bolts (B), then remove the grab handle bracket (C) from each side clips (D) by pulling the bracket. If the clips are damaged or stress-whitened, replace them with new ones.
10. Install the headliner in the reverse order of removal, and note these items:
- If the side curtain airbag has deployed, replace the headliner and removed trim pieces with new ones. Service and Repair
- To prevent the side curtain airbags from deploying improperly and possibly causing injury, inspect removed pieces and replace them if they have any of these types of damage:
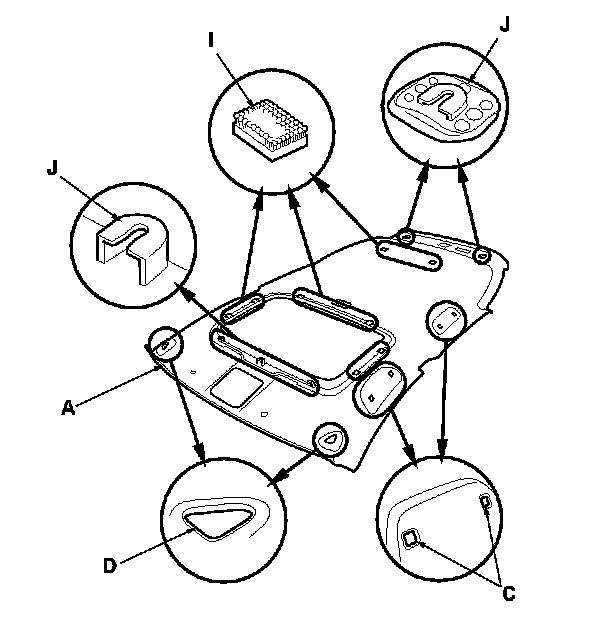
- Any crease or tears in the headliner (A)
- Any cracks or breakage in the grab handle (B)
- Any damages around the grab handle holes (C) or sunvisor holes (D) in the headliner
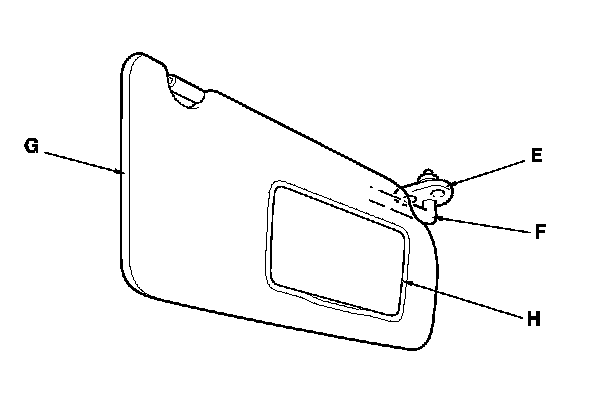
- Any cracks in the sunvisor stay base (E)
- Any bends or cracks in the sunvisor stay shaft (F)
- Any cracks in the sunvisor base (G)
- Any cracks or breakage in the vanity mirror base (H)
- Any Velcro fasteners (I) and clip bases (J) which have come off the headliner
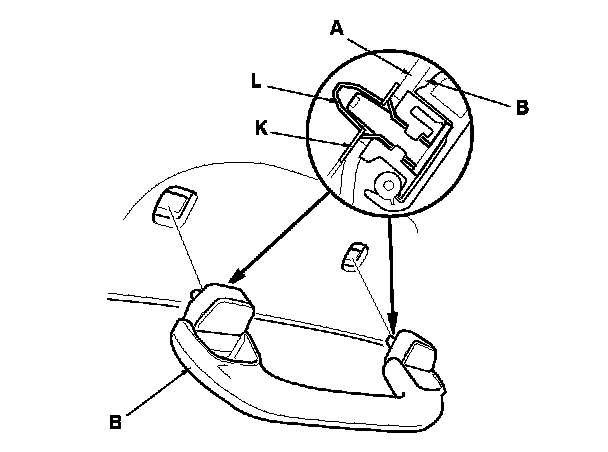
- When installing the grab handle, push on the handle against the bracket (K) until the clips (L) snap into place securely.
- If the clips are damaged or stress-whitened, replace them with new ones.
- Replace the removed cushion tape with new ones.
- Check that both sides of the headliner are securely attached to the body.
- Make sure the headliner overlaps the trim pieces correctly. Service and Repair
- When reinstalling the headliner through the tailgate opening, be careful not to fold or bend it. Also, be careful not to scratch the body.
- Do the battery terminal reconnection procedure. Procedures
- Check for any DTCs that may have been set during repairs, and clear them.
Headliner
Grab handle
Sunvisor