Fuel Pressure: Testing and Inspection
Service Information
Fuel Pressure Test
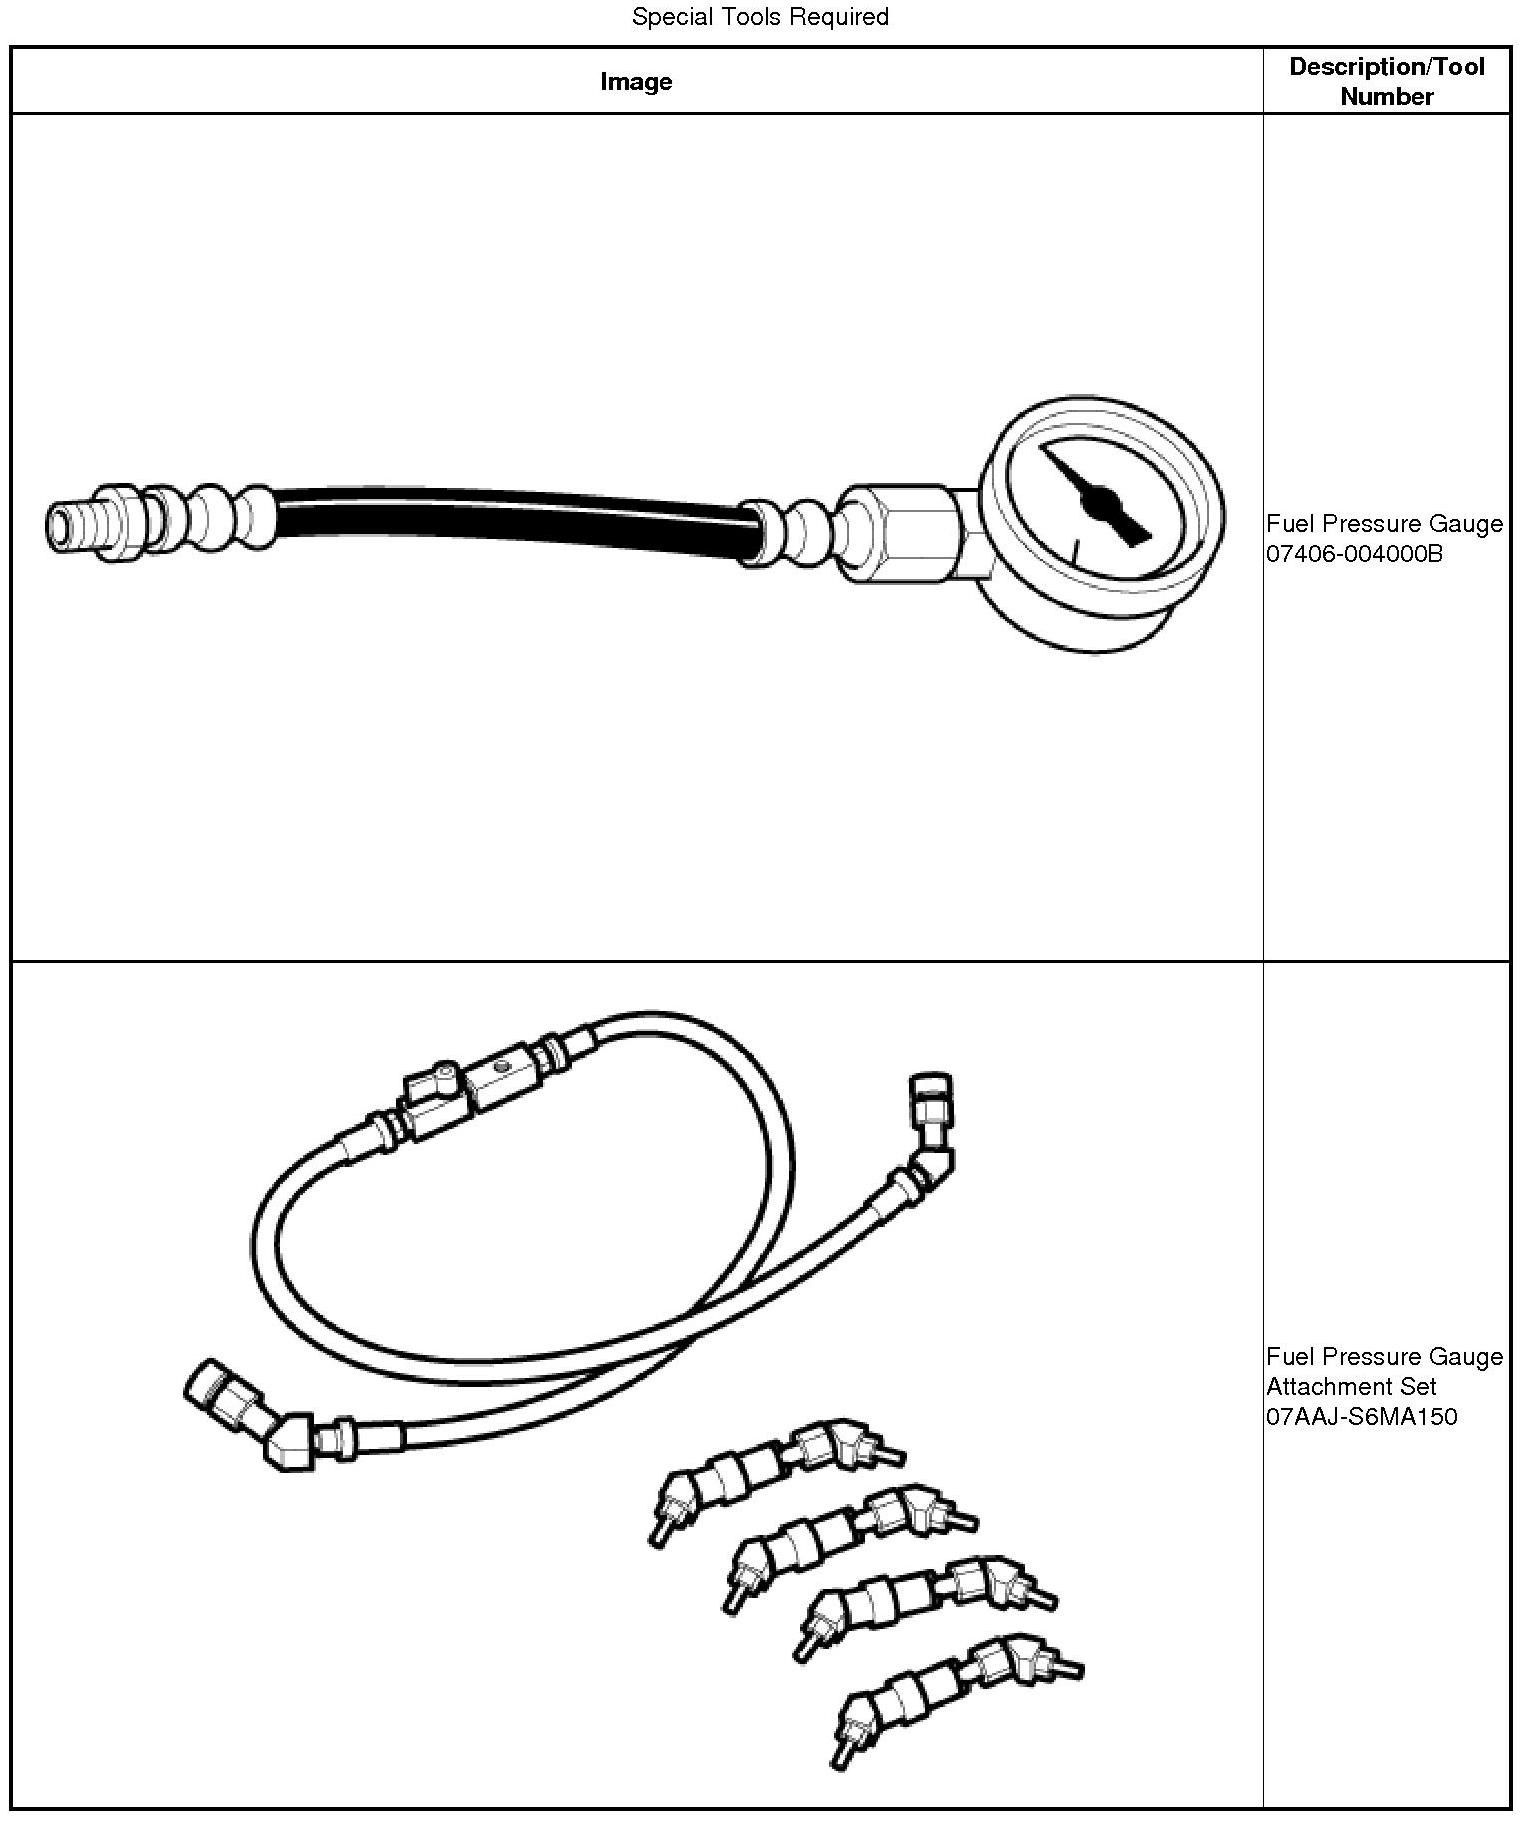
Removal
1. HDS DLC - Connection
NOTE: For specific operations, refer to the user's manual that came with the Honda Diagnostic System (HDS). Make sure the HDS is loaded with the latest software.
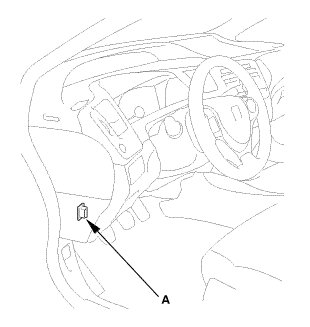
1. Connect the HDS to the data link connector (DLC) (A) located under the driver's side of the dashboard.
2. Turn the ignition switch to ON (II).
3. Make sure the HDS communicates with the vehicle. If it does not communicate, go to the DLC circuit troubleshooting.
2. Fuel Filler Cap
1. Remove the fuel fill cap to relieve the pressure in the fuel tank.
3. Fuel Pump OFF
1. From the INSPECTION MENU of the HDS, select Fuel Pump OFF, then start the engine, and let it idle until it stalls.
NOTE:
* Do not allow the engine to idle above 1,000 rpm or the PCM will continue to operate the fuel pump.
* Pending or Confirmed DTC may be set during this procedure. Check for DTCs, and clear them as needed.
2. Turn the ignition switch to LOCK (0).
4. Battery Terminal - Disconnection
1. Make sure the ignition switch is in LOCK (0).
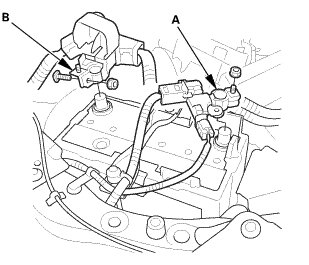
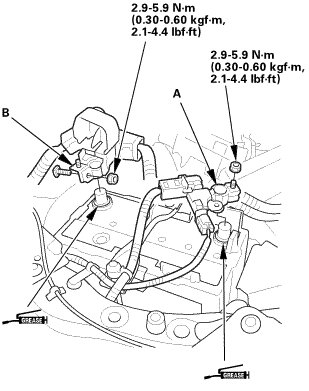
2. Disconnect and isolate the negative cable and battery sensor (A) from the 12 V battery.
NOTE: Always disconnect the negative side first.
3. Disconnect the positive cable (B) from the 12 V battery.
5. Air Cleaner
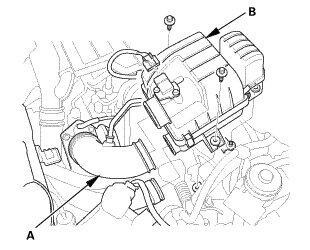
1. Disconnect the intake air duct (A) from the air cleaner (B).
2. Remove the air cleaner.
6. Fuel Pressure - Relieving
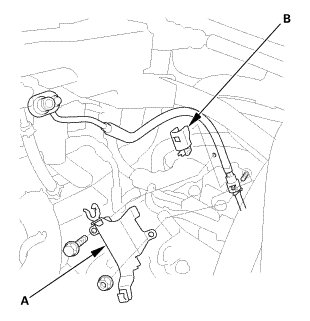
1. Remove the bracket (A).
2. Remove the quick-connect fitting cover (B).
3. Check the fuel quick-connect fitting for dirt, and clean it if needed.
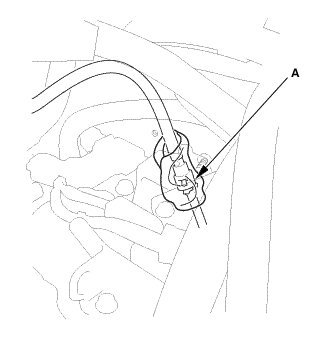
4. Place a rag or shop towel over the quick-connect fitting (A).
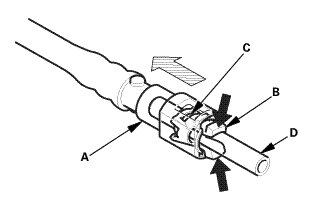
5. Disconnect the quick-connect fitting: Hold the connector (A) with one hand, and squeeze the retainer tabs (B) with the other hand to release them from the locking tabs (C). Pull the connector off.
NOTE:
* Be careful not to damage the line (D) or other parts.
* Do not use tools.
* If the connector does not move, keep the retainer tabs pressed down, and alternately pull and push the connector until it comes off easily.
* Do not remove the retainer from the line; once removed, the retainer must be replaced with a new one.
Test
1. Fuel Pressure - Test
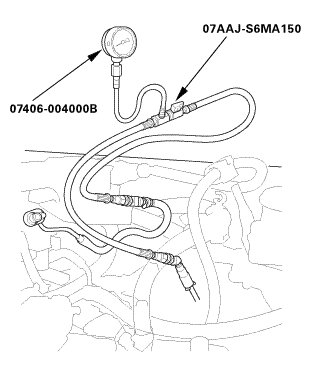
1. Disconnect the quick-connect fitting. Attach the fuel pressure gauge set and the fuel pressure gauge.
2. Start the engine, and let it idle.
* If the engine starts, go to step read the fuel pressure gauge.
* If the engine does not start, go to next step.
3. Check to see if the fuel pump is running: Listen to the fuel filler port with the fuel fill cap removed. The fuel pump should run for 2 seconds when the ignition switch is first turned to ON (II).
* If the pump runs, go to next step.
* If the pump does not run, do the fuel pump circuit troubleshooting.
4. Read the fuel pressure gauge. The pressure should be 260-310 kPa (2.7-3.2 kgf/cm2, 38-45 psi) .
* If the pressure is OK, the test is complete.
* If the pressure is out of specification, replace the fuel pressure regulator and the fuel filter, then recheck the fuel pressure.
Installation
1. Air Cleaner
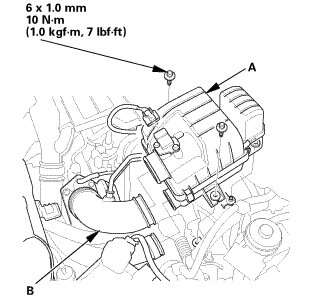
1. Install the air cleaner (A).
2. Connect the intake air duct (B) to the air cleaner.
2. Battery Terminal - Reconnection
NOTE: If the 12 V battery performs abnormally, test the battery.
1. Clean the battery terminals.
2. Connect the positive cable (A) to the 12 V battery.
NOTE: Always reconnect the positive side first.
3. Connect the negative cable and battery sensor (B) to the 12 V battery.
4. Apply multipurpose grease to the terminals to prevent corrosion.
3. Fuel Fill Cap
1. Install the fuel fill cap.
4. HDS DLC - Connection
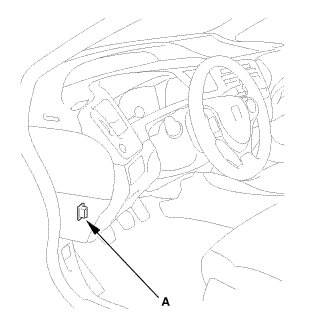
1. Connect the HDS to the data link connector (DLC) (A) located under the driver's side of the dashboard.
2. Turn the ignition switch to ON (II).
3. Make sure the HDS communicates with vehicle. If it does not communicate, go to the DLC circuit troubleshooting.
5. Fuel Pump ON
1. From the INSPECTION MENU of the HDS, select Fuel Pump ON.
NOTE: Pending or Confirmed DTC may be set during this procedure. Check for DTCs, and clear them as needed.
2. Turn the ignition switch to LOCK (0).
6. Fuel Line Leak Check
1. Reconnect the negative cable to the battery, and turn the ignition switch to ON (II) (do not operate the starter motor). The fuel pump will run for about 2 seconds, and the fuel pressure will rise. Repeat this two or three times, then make sure there are no fuel leaks.