Rear Disc Brake Pads
Brake Pads
Special Service Tools
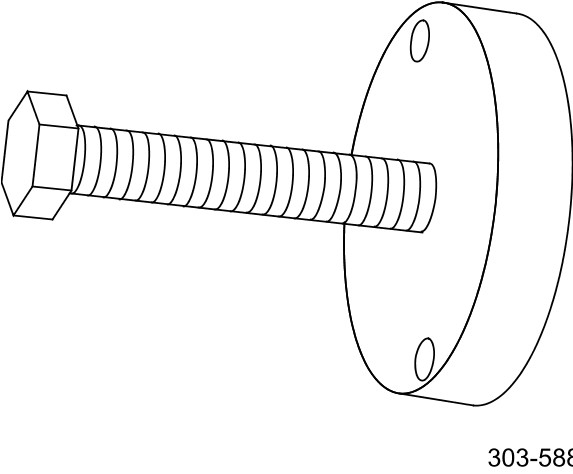
Crankshaft pulley/damper remover
303-588
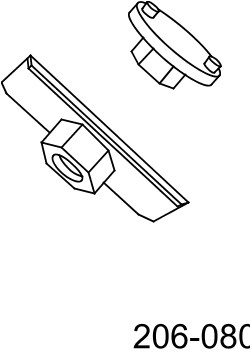
Brake caliper piston retractor tool
206-080
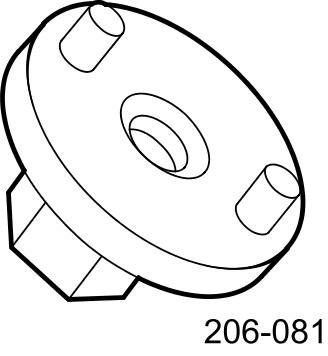
Brake caliper piston retractor tool
206-081
Removal
WARNING: Brake pads must be renewed in axle sets only, otherwise braking efficiency may be impaired.
WARNING: Do not allow dirt or foreign liquids to enter the reservoir. Use only new brake fluid of the correct specification from airtight containers. Do not mix brands of brake fluid as they may not be compatible.
WARNING: Failure to release the tension and calibrate the electric parking brake during rear parking brake related service procedures, could cause the parking brake to function incorrectly or become inoperative.
NOTE:
Only extraction bolt from special tool 303-588 is used.
All vehicles
1
WARNING: Do not work on or under a vehicle supported only by a jack. Always support the vehicle on safety stands.
Raise and support the vehicle.
2 Release the parking brake cable tension. For additional information, refer to Parking Brake Cable Tension Release Service and Repair
3 Remove the rear wheels and tires. For additional information, refer to Wheel and Tire Service and Repair
Vehicles with high performance brakes
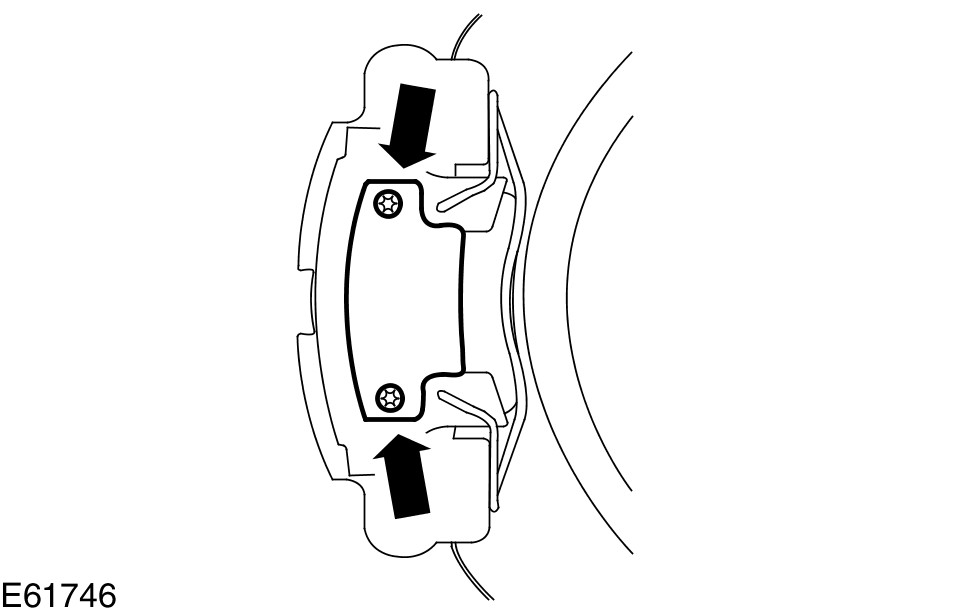
4
NOTE:
Left-hand shown, right-hand similar.
Remove the logo badge.
- Remove the two retaining screws.
All vehicles
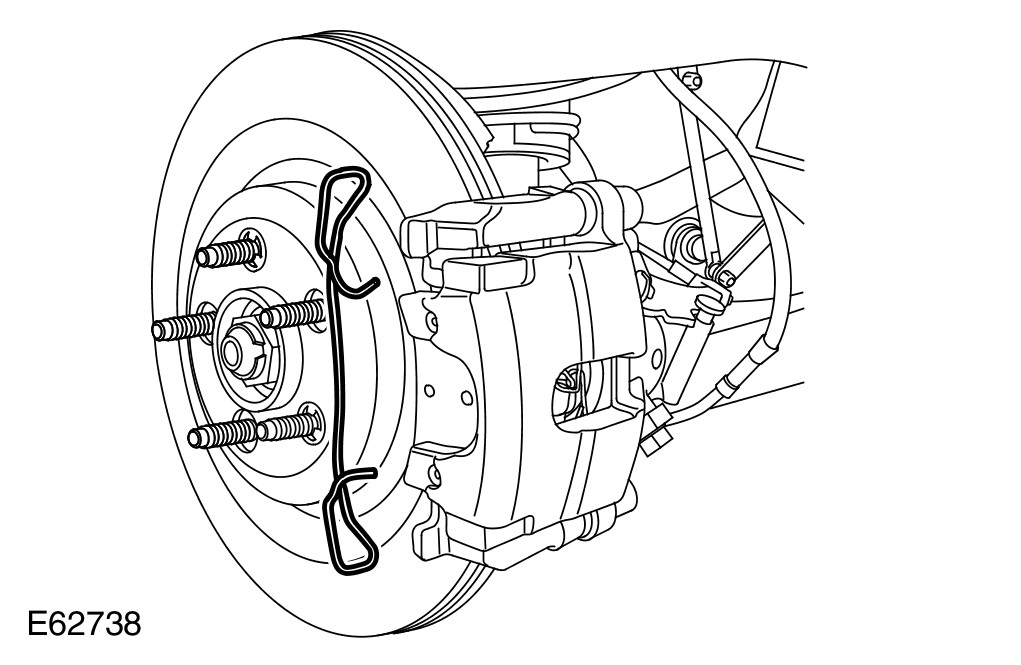
5
NOTE:
Right-hand shown, left-hand similar.
Remove the anti-rattle spring.
- Release the 2 clips.
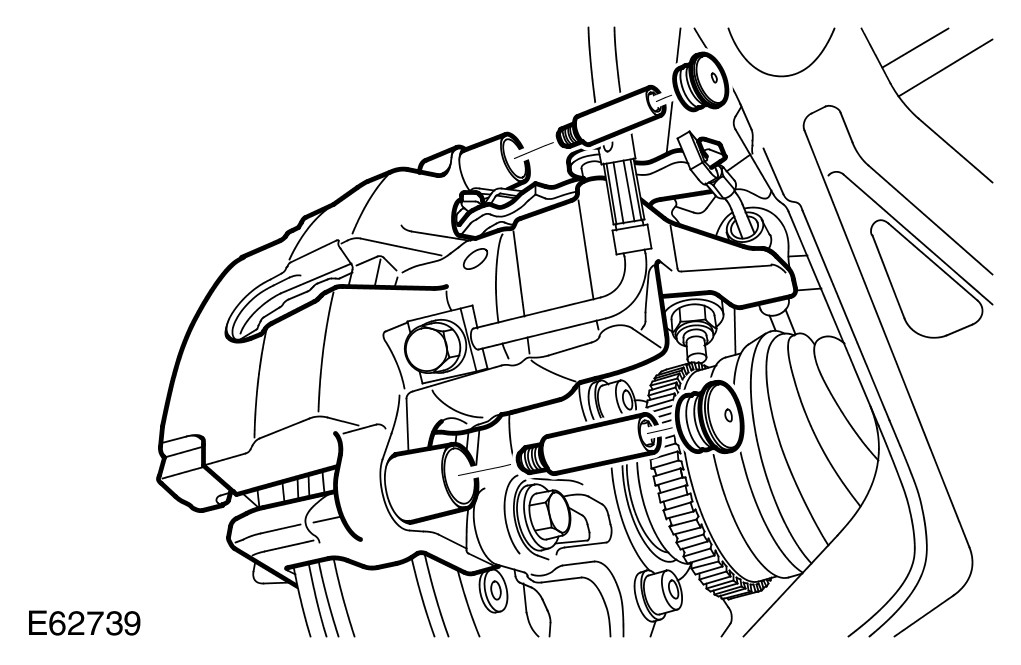
6
CAUTION: Do not allow the brake caliper to hang on the brake hose.
NOTE:
Right-hand shown, left-hand similar.
Remove the brake caliper.
- Remove the 2 access plugs.
- Release the 2 brake caliper guide pins.
- Tie the brake caliper aside.
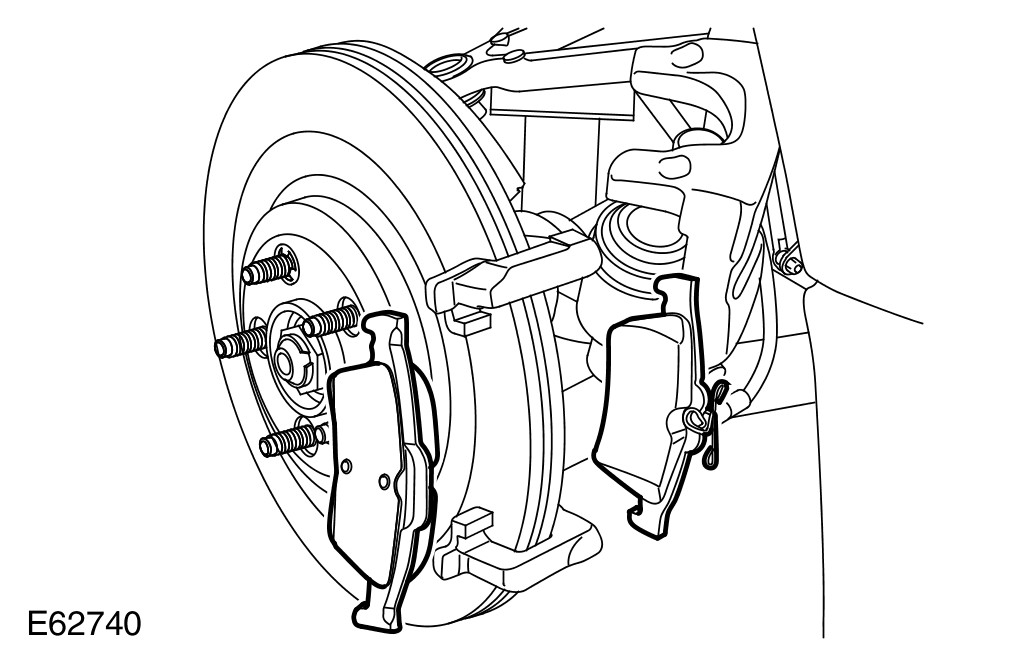
7
NOTE:
Right-hand shown, left-hand similar.
Remove the brake pads.
8 Repeat the above procedure for the other side.
Installation
All vehicles
1
WARNING: Do not use compressed air to clean brake components. Dust from friction materials can be harmful if inhaled.
Clean the brake caliper housings and anchor plates, using brake cleaning fluid.
- Repeat the above procedure for the other side.
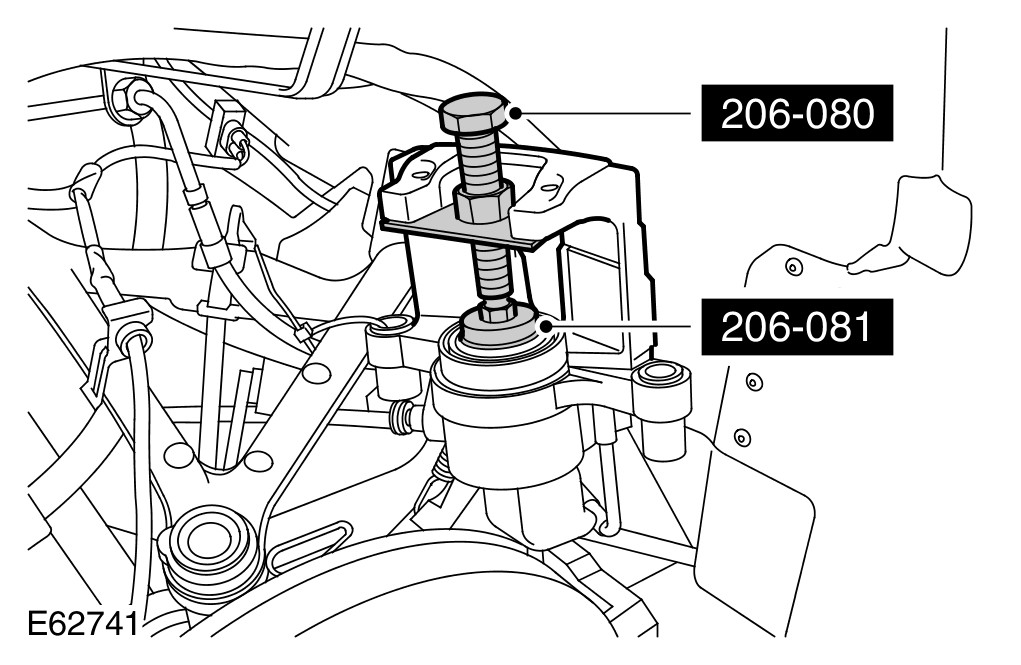
2
CAUTION: As the piston is pushed back into the caliper housing, the brake fluid level in the reservoir will rise. Do not allow the reservoir to overflow.
CAUTION: Brake fluid will damage paint finished surfaces. If spilled, immediately remove the fluid and clean the area with water.
Using the special tools, fully retract the brake caliper piston.
3
NOTE:
Right-hand shown, left-hand similar.
Install the brake pads.
- Position the inboard brake pad.
- Position the outboard brake pad.
4
NOTE:
Right-hand shown, left-hand similar.
Install the brake caliper.
- Tighten the guide pins to 28 Nm.
5
NOTE:
Right-hand shown, left-hand similar.
Install the anti-rattle spring.
- Carefully secure the clips.
Vehicles with high performance brakes
6
NOTE:
Left-hand shown, right-hand similar.
Install the logo badge.
- Install the two retaining screws.
All vehicles
7 Repeat the above procedure for the other side.
8 Install the wheels and tires. For additional information, refer to Wheel and Tire Service and Repair
9
WARNING: Calibrate the electric park brake using Jaguar approved diagnostic equipment. If Jaguar approved diagnostic equipment is not available disconnect the battery for approximately 30 seconds , the vehicle will then prompt the driver to carry out the calibration procedure as per the vehicle hand book on re-connection.
Re-calibrate the electric park brake. For additional information, refer to Parking Brake Cable Tension Release Service and Repair