Removal
Transmission
Special Service Tools
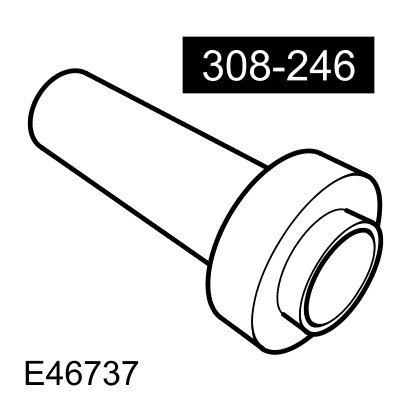
Torque converter seal installer
308-246
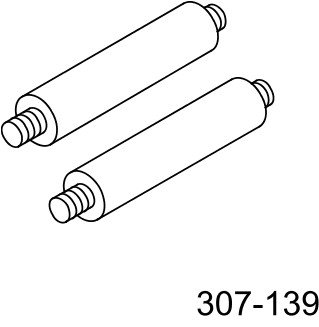
Torque converter handles
307-139
Removal
1 Remove the cover and disconnect the battery ground cable. For additional information, refer to Specifications [1][2]Battery
2 Recover the A/C refrigerant.
3
WARNING: Do not work on or under a vehicle supported only by a jack. Always support the vehicle on safety stands.
Raise and support the vehicle.
4 Remove the driveshaft. For additional information, refer to Driveshaft Removal and Replacement
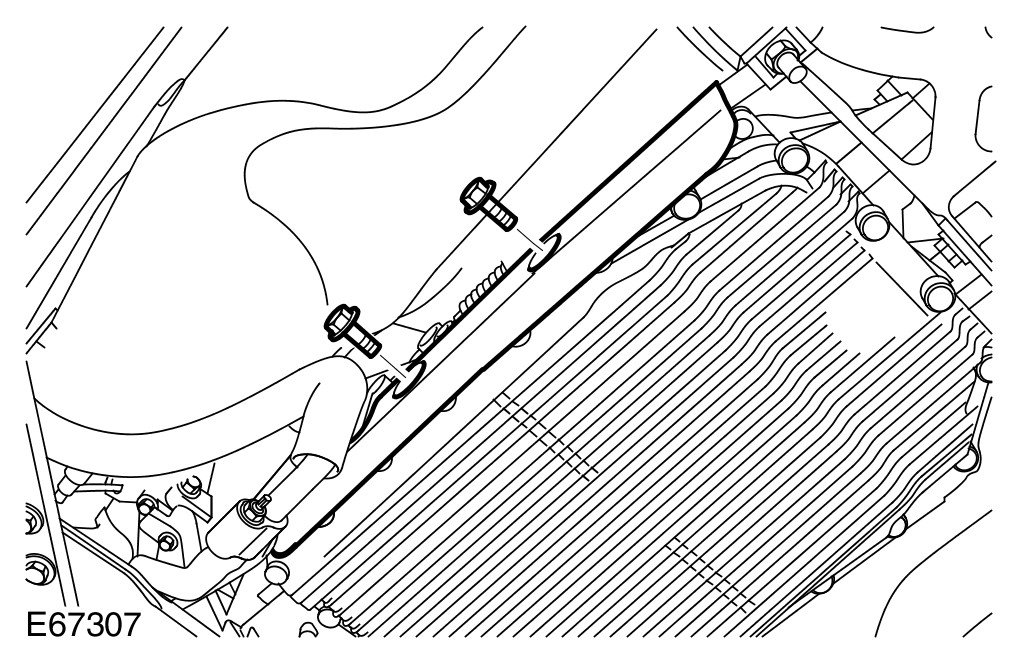
5
NOTE:
LH illustration shown, RH is similar.
Remove the 2 transmission heat shields.
- Remove the 4 bolts.
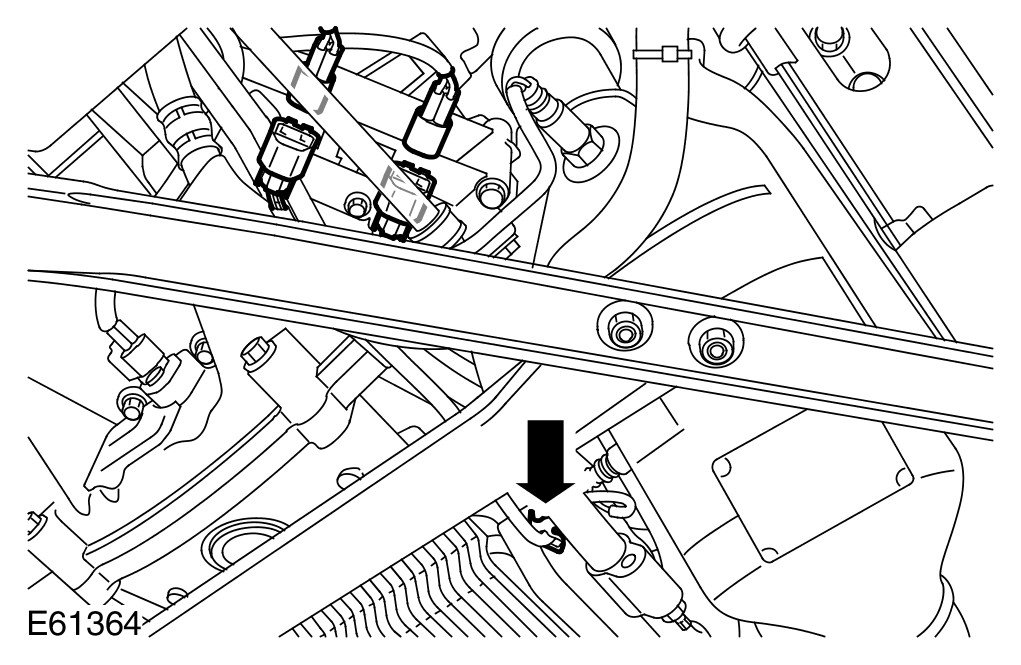
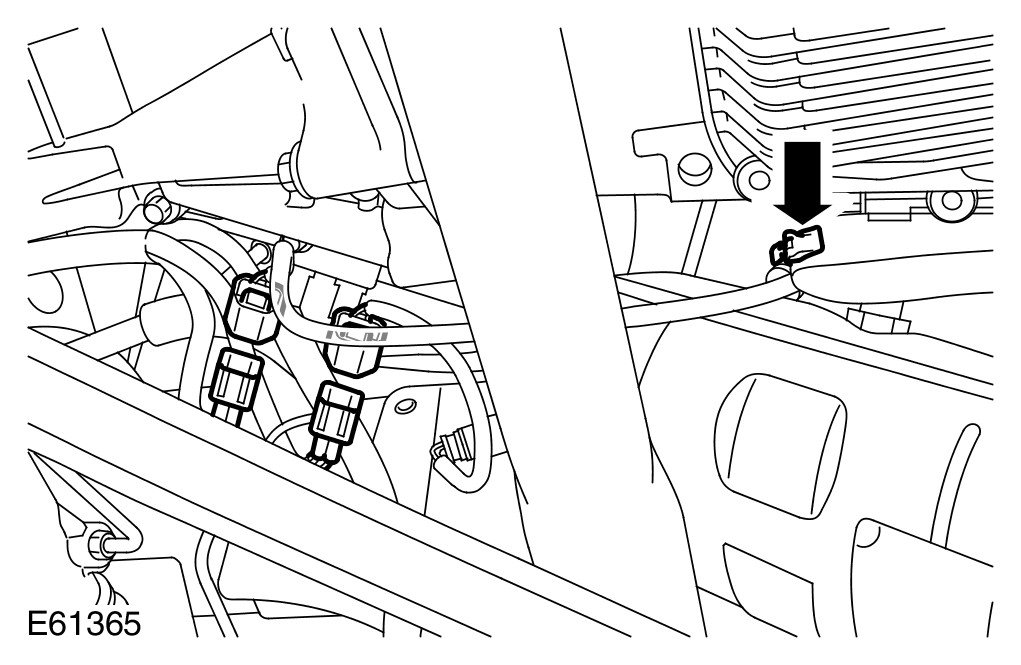
6 Release and disconnect the 2 LH HO2S electrical connectors.
- Release the clip.
7 Release and disconnect the 2 RH HO2S electrical connectors.
- Release the clip.
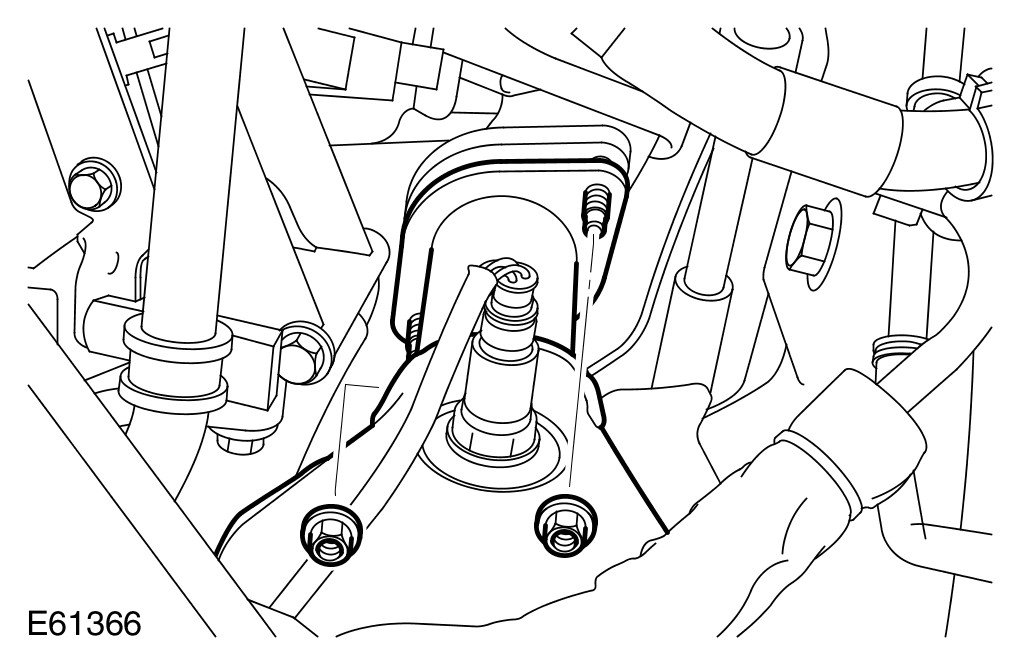
8 Remove the LH catalytic converter.
- Remove and discard the 2 nuts.
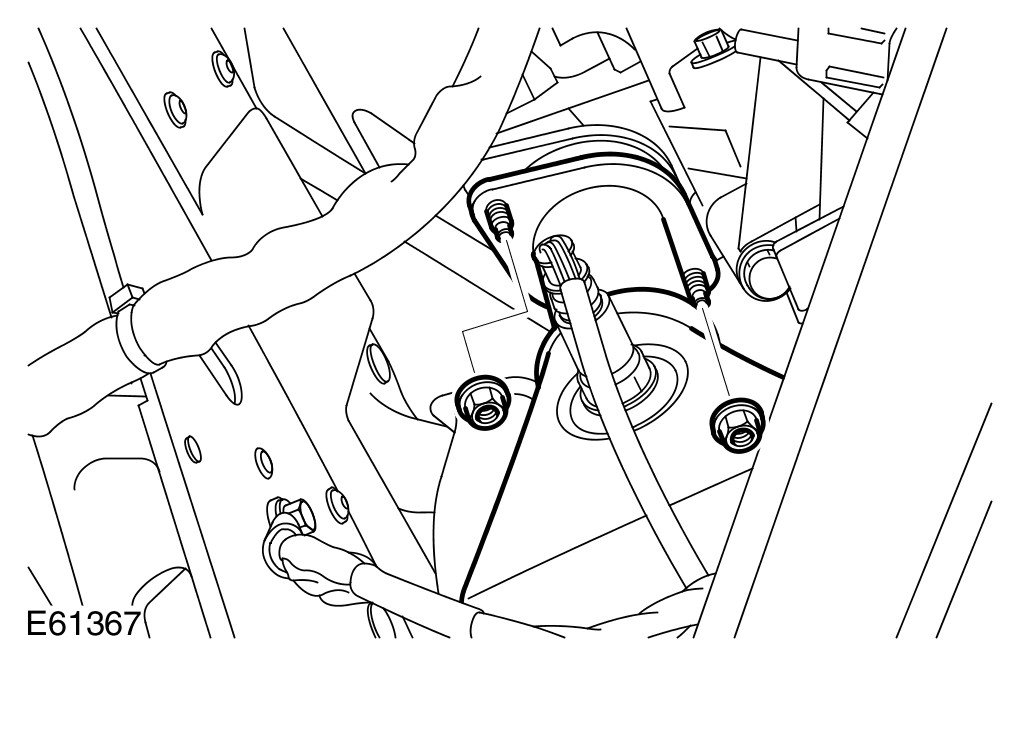
9 Remove the RH catalytic converter.
- Remove and discard the 2 nuts.
10
CAUTION: Immediately cap all refrigerant lines to prevent ingress of dirt and moisture.
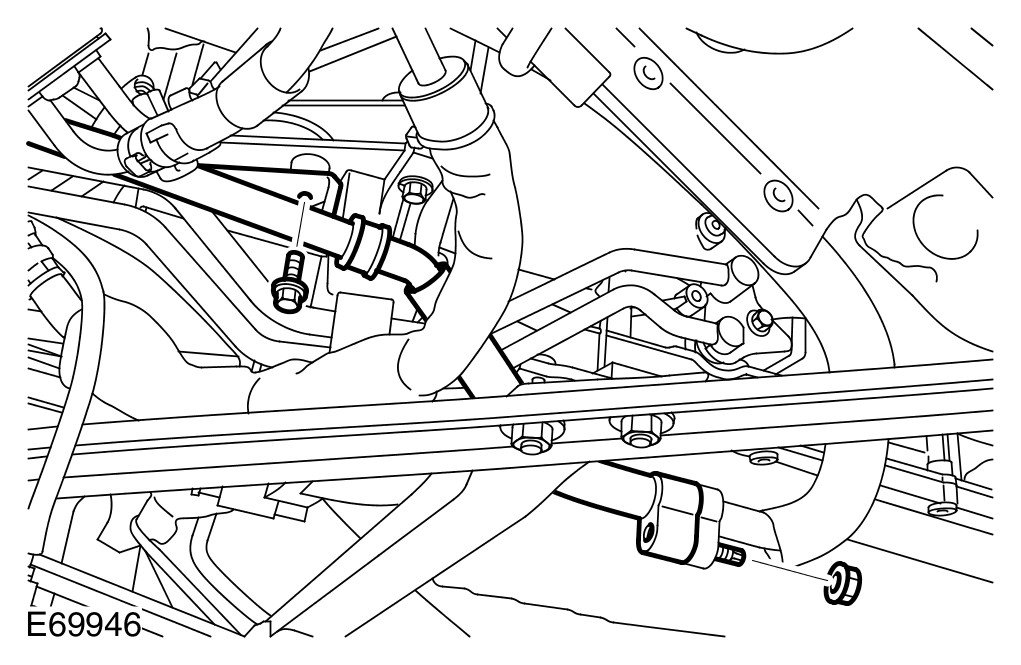
Remove the A/C pipe.
- Remove the bolt.
- Remove the nut.
- Remove and discard the 2 O-ring seals.
11
CAUTION: Always plug any open connections to prevent contamination.
NOTE:
Position cloth to collect fluid spillage.
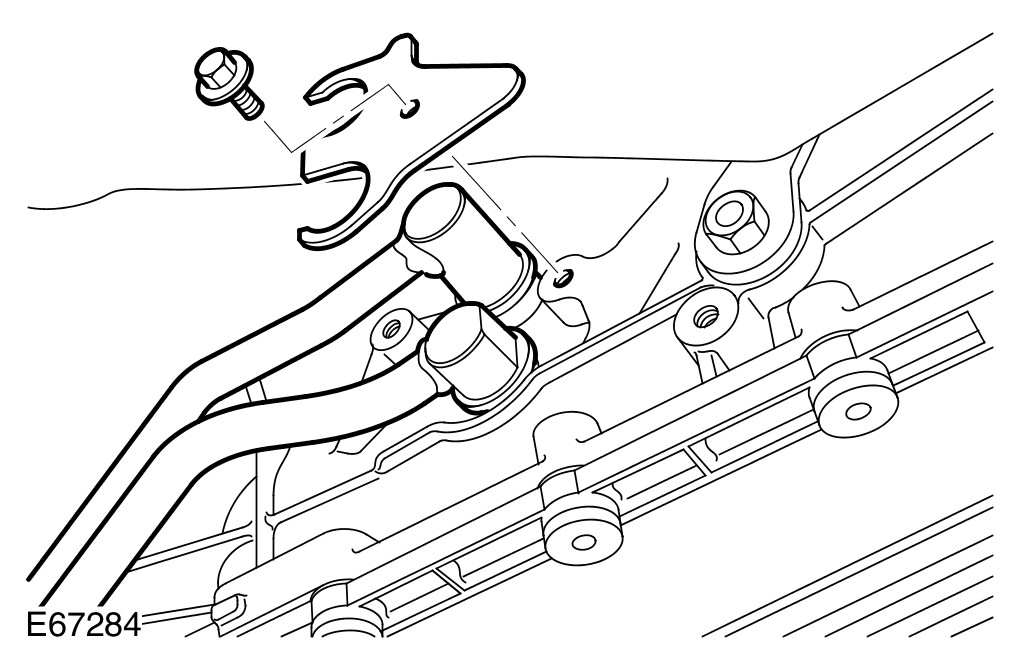
Release the transmission fluid lines.
- Remove the bolt.
- Remove and discard both O-ring seals.
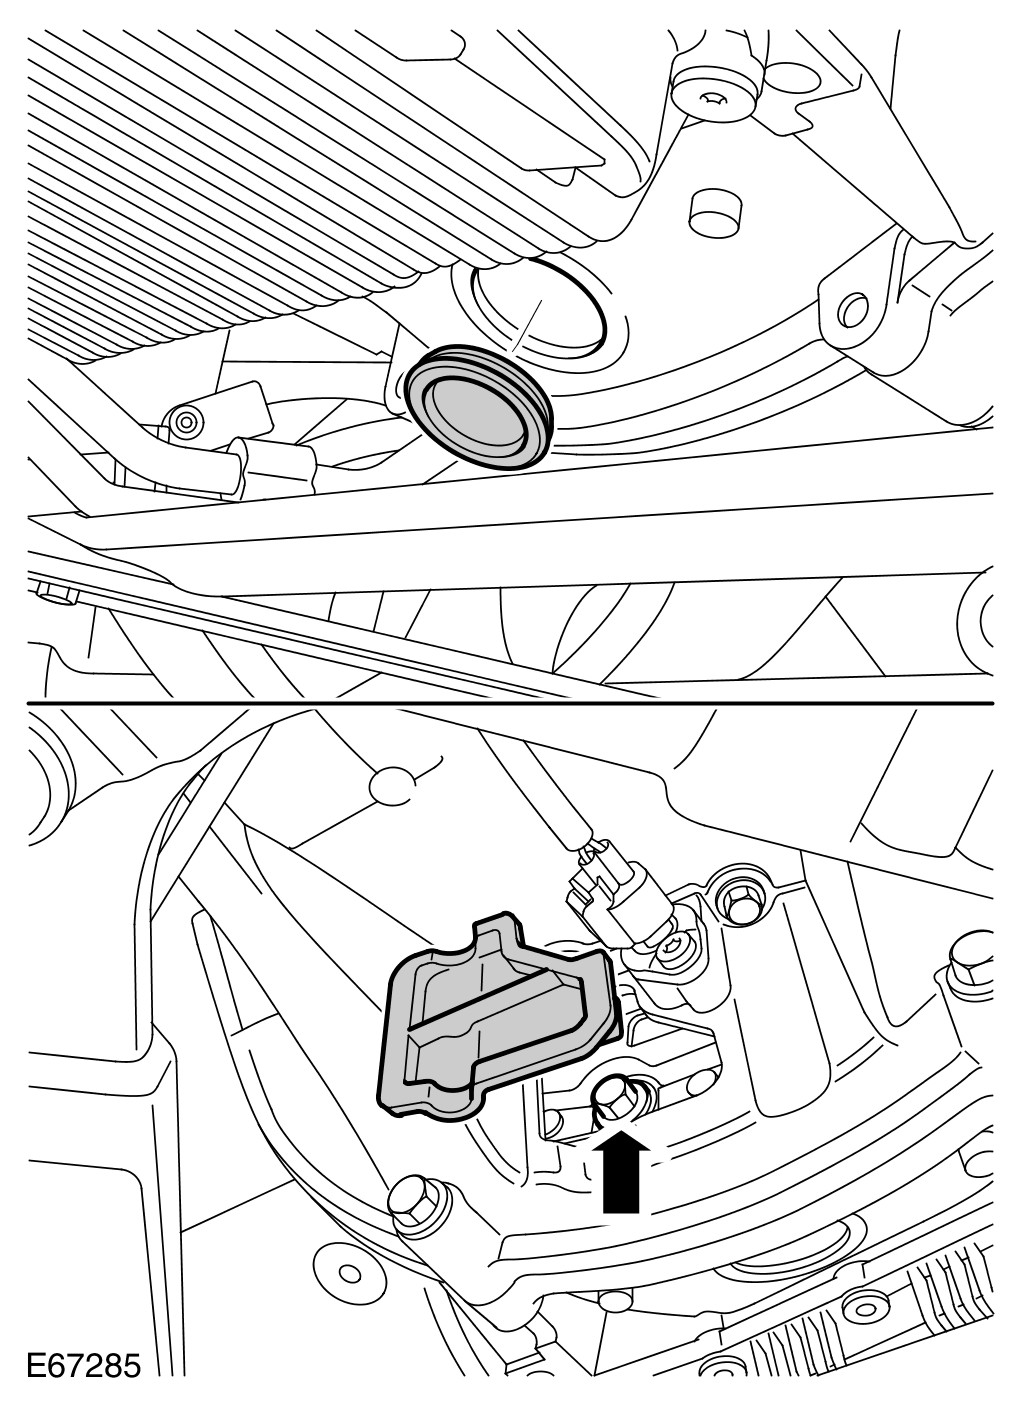
12 Release the flexplate.
- Remove the access plugs.
- Rotate the crankshaft to access the retaining bolts.
- Remove the 3 bolts.
13 Using a transmission jack, support the transmission.
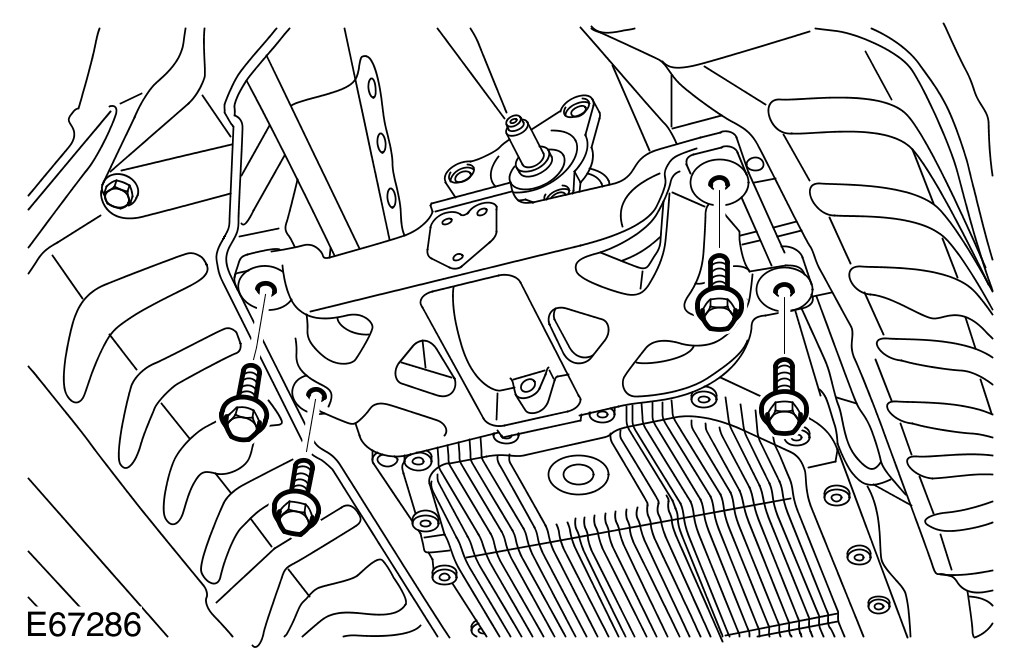
14 Release the transmission support insulator.
- Remove the 4 bolts.
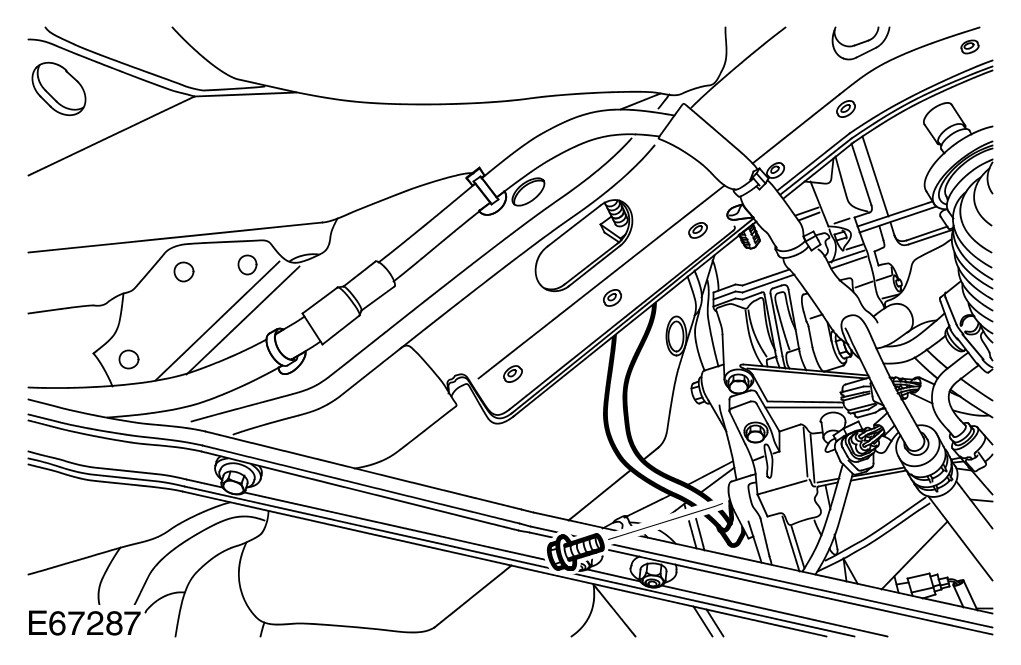
15 Release the engine ground cable.
- Remove the bolt.
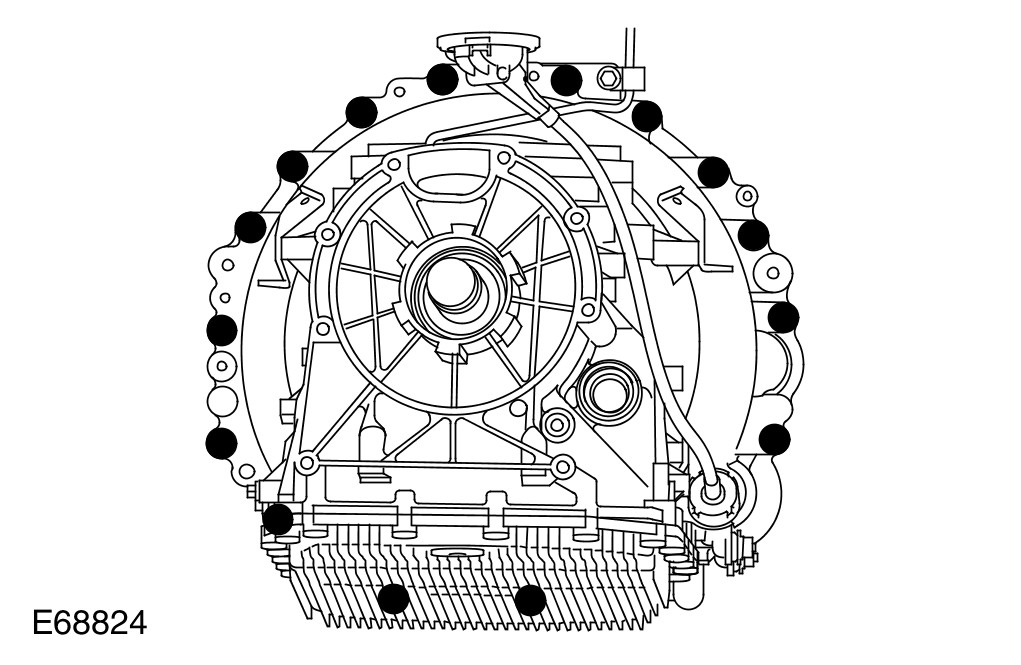
16
WARNING: Secure the transmission to the transmission jack.
WARNING: Support the engine. The engine will fall forward when the transmission is removed.
CAUTION: Make sure the torque converter remains connected to the transmission.
With assistance, release the transmission.
- Remove the 15 bolts.
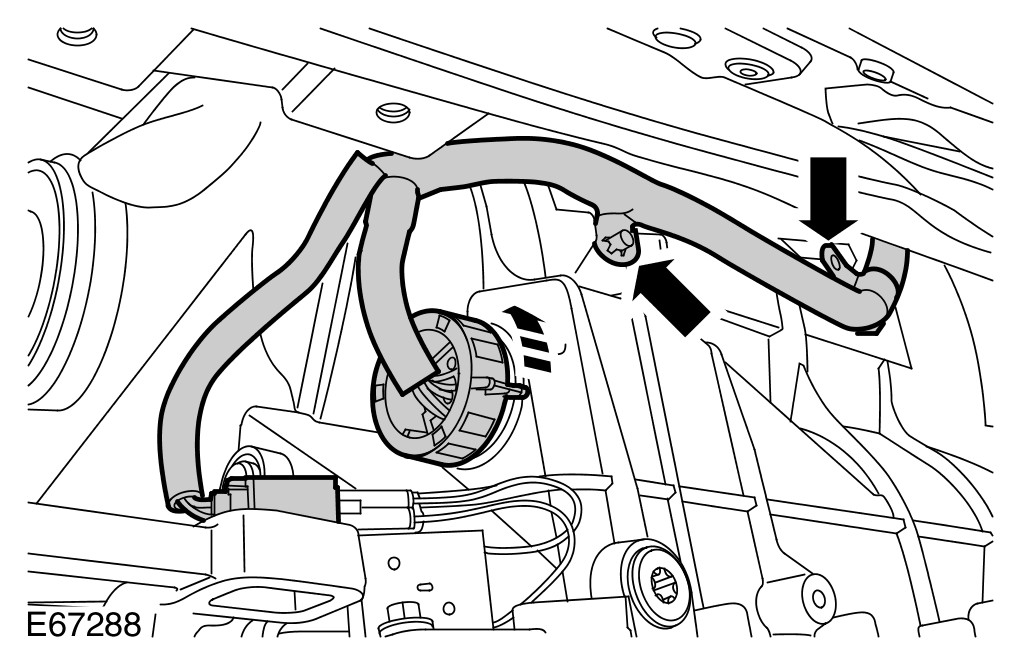
17 Release the wiring harness from the RH side of the transmission.
- Disconnect the 2 electrical connectors.
- Carefully release the 2 clips.
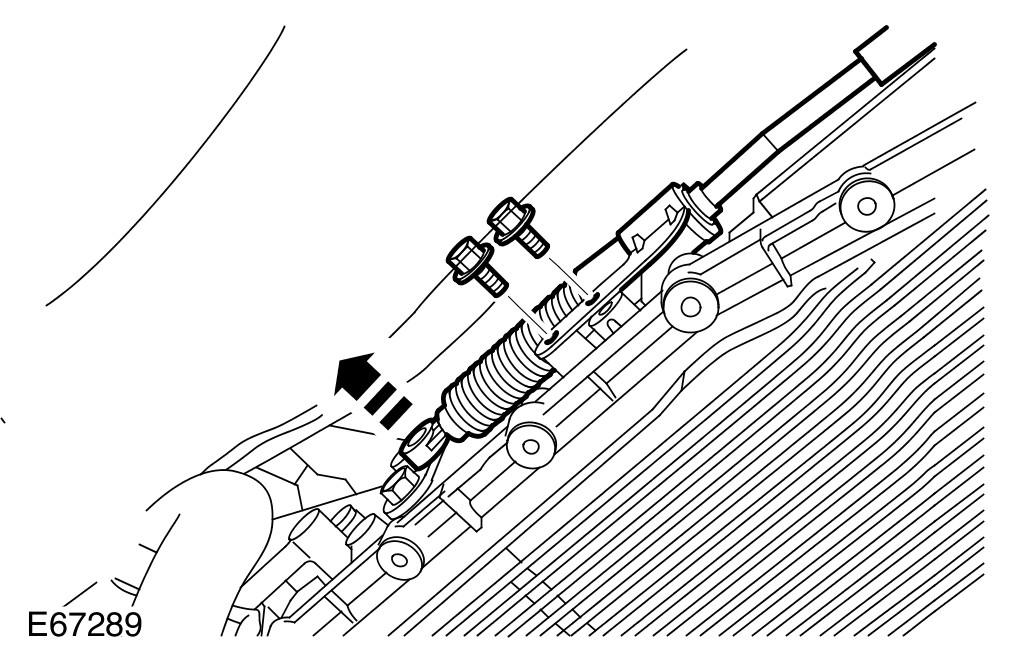
18 Release the selector cable.
- Release the clip.
- Remove the 2 bolts.
19 Install the torque converter retainer.
20
NOTE:
Do not disassemble further if the component is removed for access only.
Remove the transmission from the transmission jack.
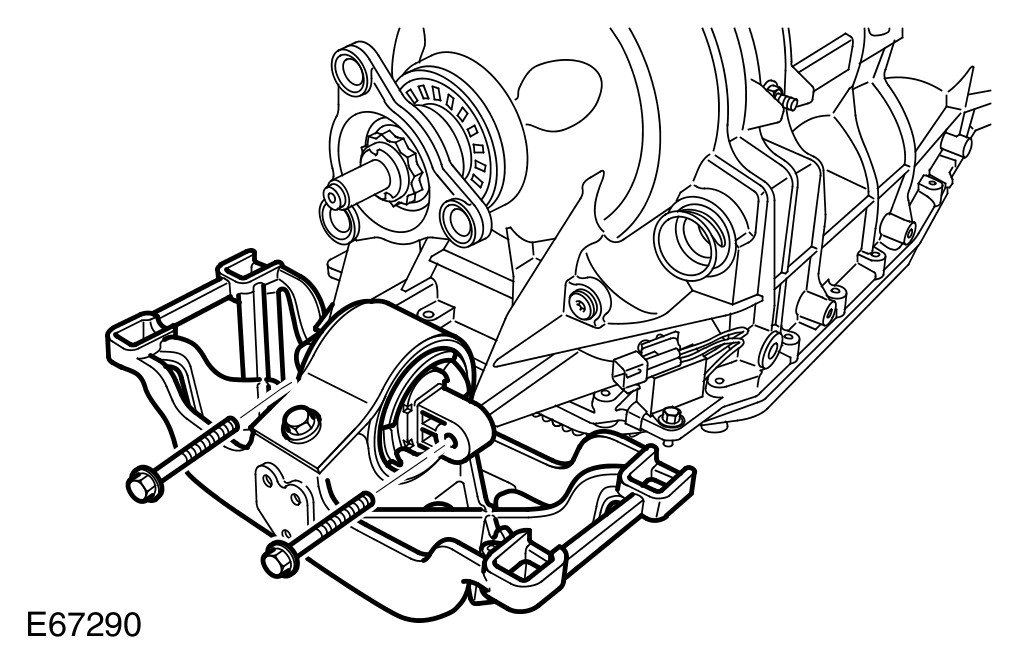
21 Remove the transmission support insulator.
- Remove the 2 bolts.
22 Remove the torque converter retainer.
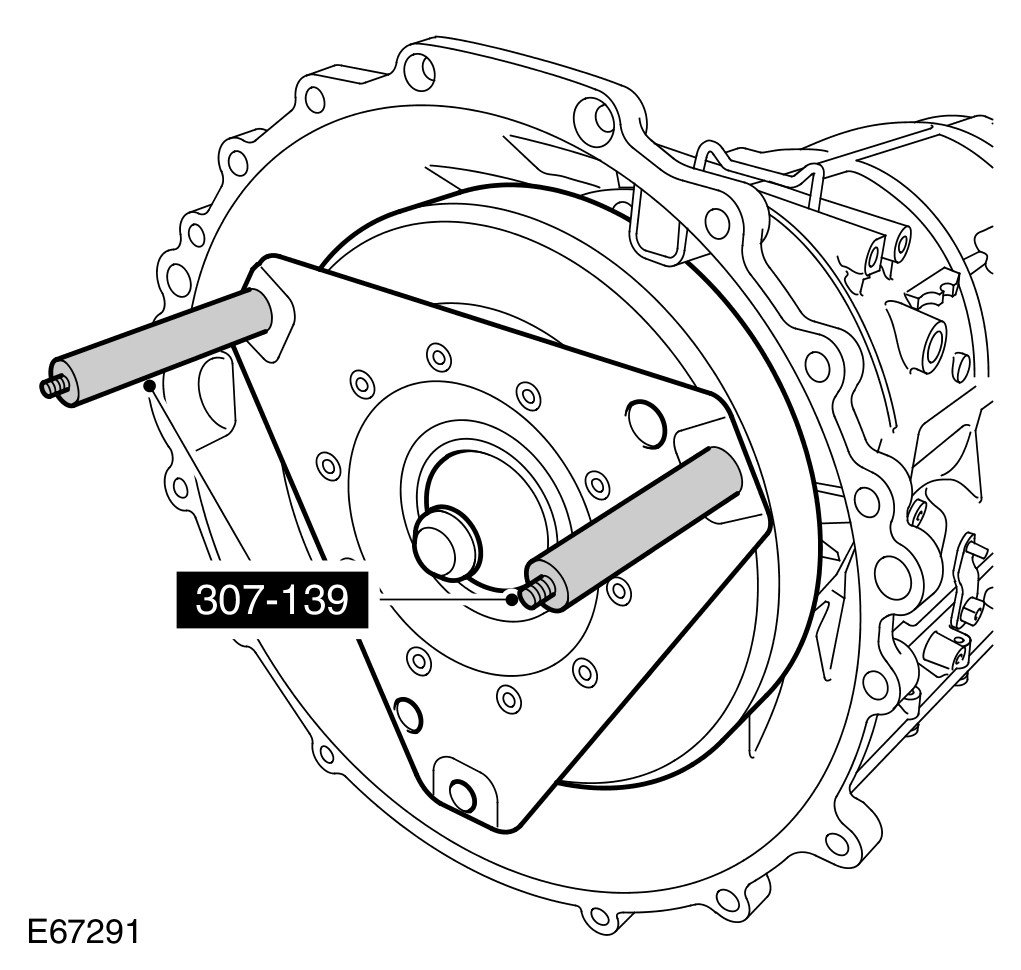
23 Using the special tools, remove the torque converter.
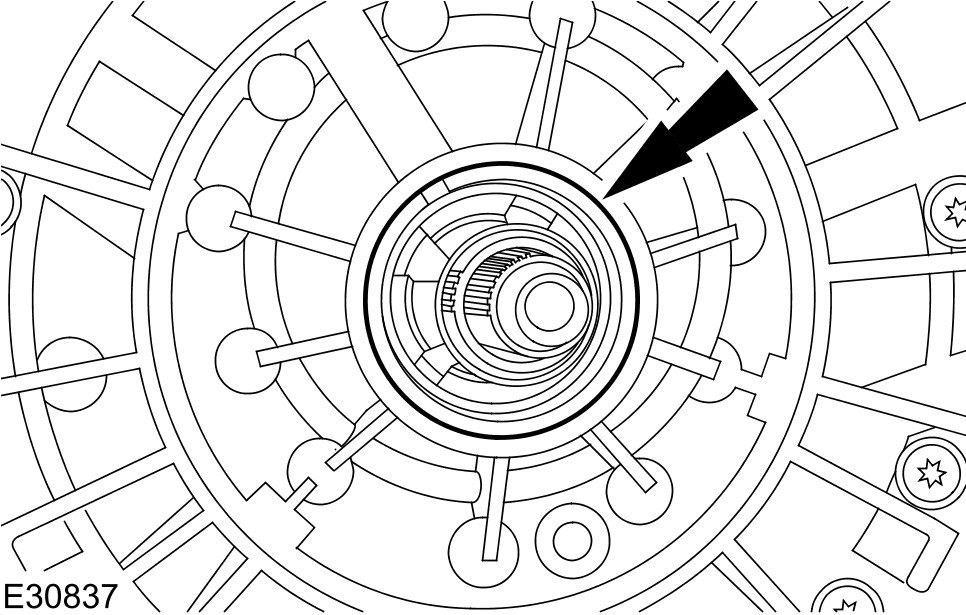
24
CAUTION: Care must be taken to avoid damage to the seal register and running surface.
Carefully remove and discard the torque converter fluid seal.
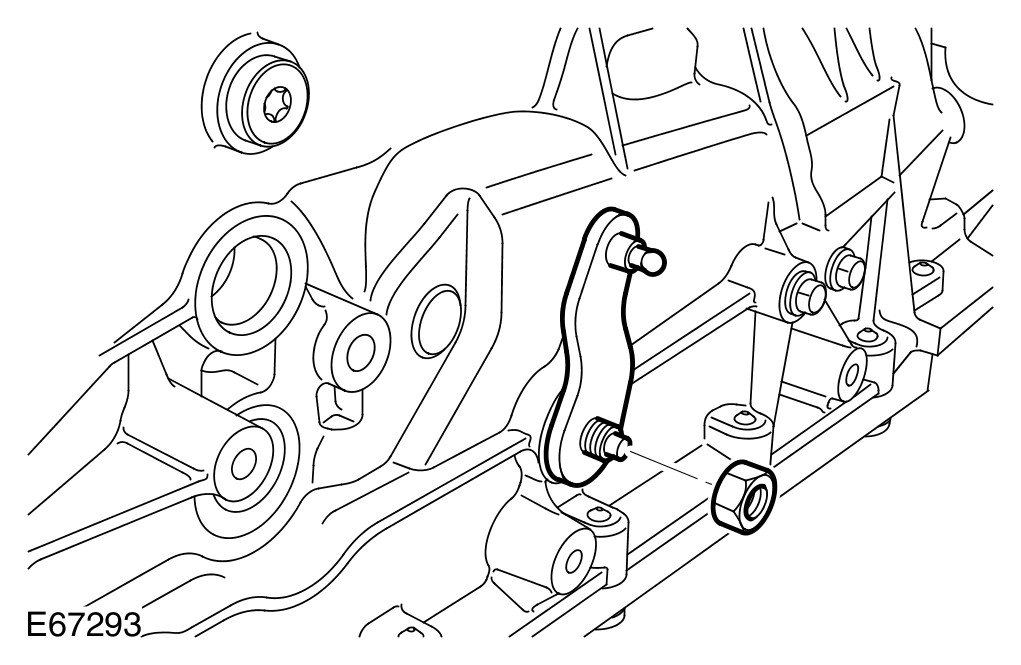
25 Remove the selector lever.
- Remove the nut.
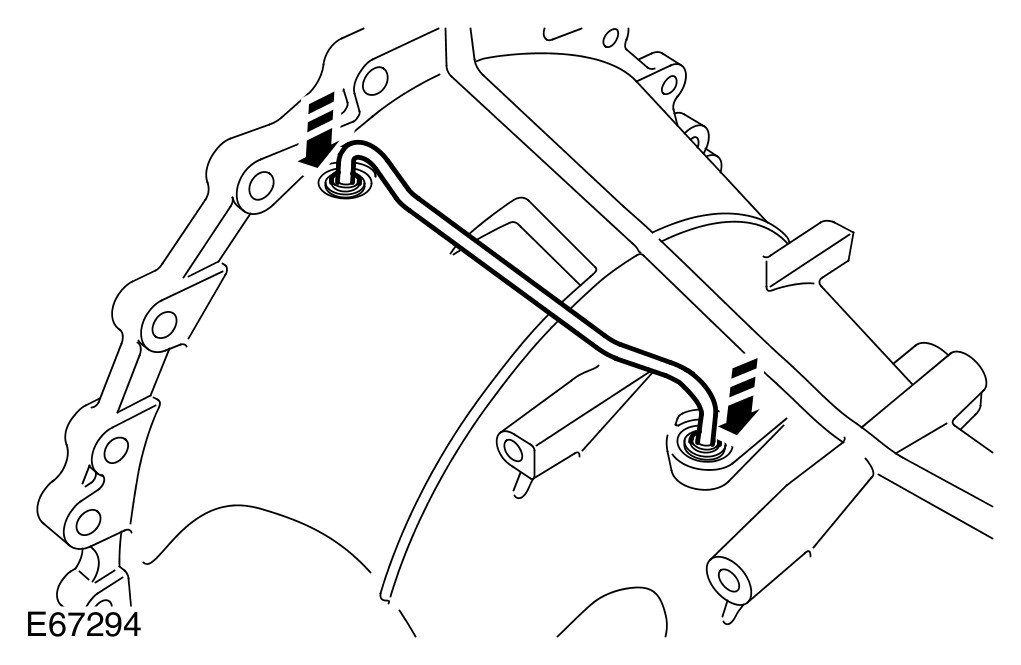
26 Remove the transmission breather line.
- Carefully release the 2 clips.