Passenger Side Register Trim Panel
Passenger Side Register Trim Panel
Removal
WARNING: Persons working on the supplemental restraint system (SRS) must be fully trained and have been issued with the safety guidelines.
WARNING: Allow a period of 10 minutes to elapse after disconnecting the battery before undertaking any work on the SRS.
WARNING: The SRS electrical connectors are unique. DO NOT force, or attempt to connect electrical connectors to the wrong sockets.
WARNING: The correct procedures must always be used when working on SRS components.
WARNING: It is imperative that before any work is undertaken on the SRS system, the appropriate information is read thoroughly.
WARNING: Always disconnect both battery cables before beginning work on the SRS system. Disconnect the ground cable first. Never reverse connect the battery.
WARNING: Take extra care when handling SRS components.
1 Make the air bag supplemental restraint system (SRS) safe. For additional information, refer to Standard Workshop Practices Standard Workshop Practices
2 Disconnect the battery ground cable. For additional information, refer to Specifications Battery and Charging System
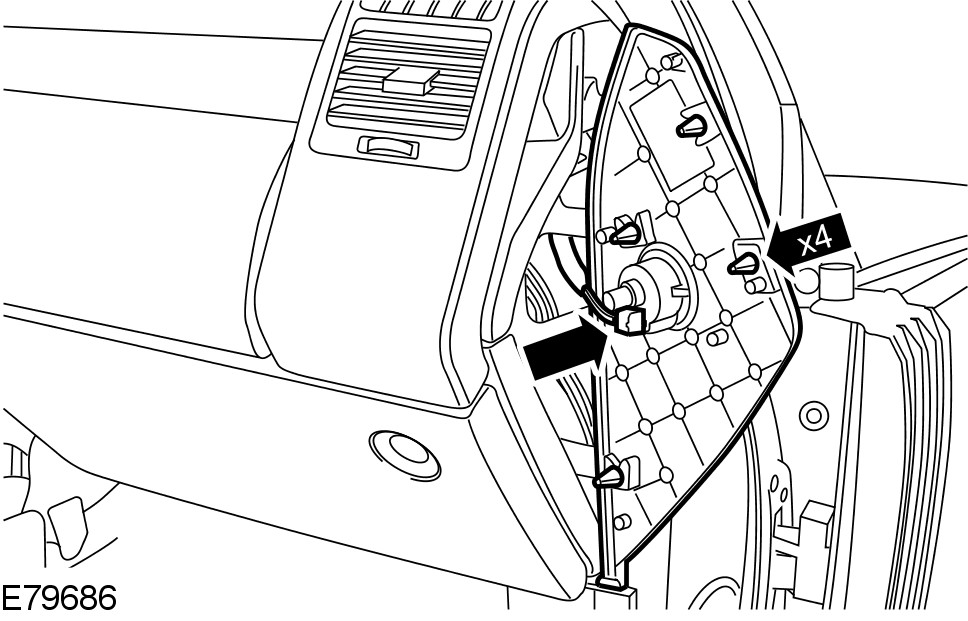
3 Remove the instrument panel end trim panel.
- Release sufficient door aperture seal for access.
- Carefully release the 4 clips.
- Disconnect the electrical connector from the passenger air bag deactivation switch.
4 Remove the passenger side register. For additional information, refer to Passenger Side Register Passenger Side Register
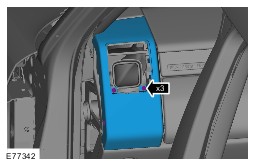
5 Remove the passenger side register trim panel.
- Remove the 3 screws.
Installation
1 Install the passenger side register trim panel.
- Install the 3 screws.
2 Install the passenger side register. For additional information, refer to Passenger Side Register Passenger Side Register
3 Install the instrument panel end trim panel.
- Connect the passenger air bag deactivation switch electrical connector.
- Carefully align and secure the clips.
- Install the aperture seal.
4 Connect the battery ground cable. For additional information, refer to Specifications Battery and Charging System