Lift Cylinder
Lift Cylinder
Special tools, testers and auxiliary items required
• Torque Wrench (V.A.G 1783)
• The illustrations show the procedure for removing and installing the left lift cylinder. The procedure for the right cylinder is the same.
Removing
- Switch off the ignition and all electrical consumers and move the ignition key or start button into the 0 position (preliminary engaged position).
- Loosen the front bumper cover.
- Remove spray jet with cover cap - 1 - up to stop out of bumper cover.
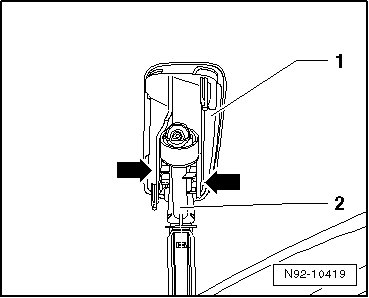
- Unclip the cover cap - 1 - from the retainers on both sides - arrow - of the spray nozzle bracket - 2 -.
- Press and hold the locking clip - arrow - and pull the hose connection - 1 - out from the lift cylinder - 2 -.
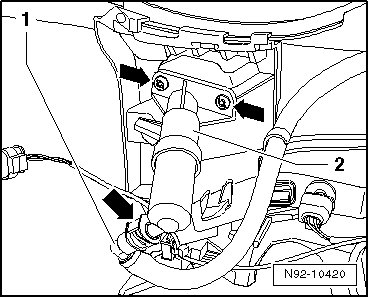
- Remove screws - arrows -.
- Remove lift cylinder - 2 - from bumper cover.
Installing
Install in reverse order of removal. Note the following:
- Make sure the guide - arrow - is inserted correctly before installing the bolts - 1 -.
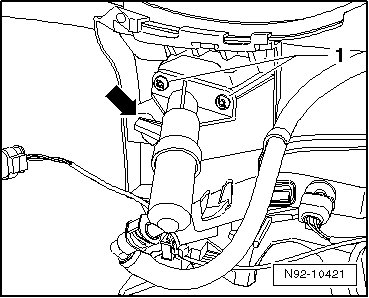
- Tighten the bolts - 1 - to the specification shown in => [ Headlamp Washer System Overview ] Headlamp Washer System Overview.
- Bleed headlamp washer system after completing assembly work. Refer to => [ Headlamp Washer System, Bleeding ] Procedures.