Camshaft Adjustment Valves N205/N318
Camshaft Adjustment Valves N205/N318
Special tools, testers and auxiliary items required
• Socket Wrench (T10072)
• TORX Bit Set (V.A.G 1766)
• Torque Wrench (V.A.G 1783)
• Ratchet Insert 1/4" (VAS 6234)
• Silicone Adhesive Sealant (D 176 501 A1)
• Sealant (D 454 300 A2)
Removing
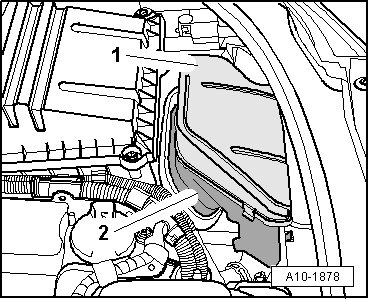
- Release the tabs on the side and remove the cover - 1 - from the air intake duct.
- Unclip the air intake duct - 2 -.
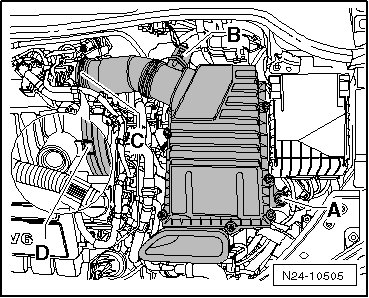
- Remove the bolt - A -, disconnect the connector - B -, loosen the spring clamp - C - and remove the air filter housing and connecting pipe. Pay attention to the mark - D - when installing.
• Before disconnecting the connectors, mark the components.
- Disconnect the following connectors.
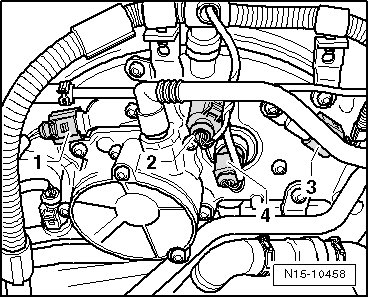
1 - Camshaft Position (CMP) sensor
2 - Camshaft adjustment valve 1
3 - CMP sensor 2
4 - Exhaust camshaft adjustment valve 1
- Free up the electrical wiring harness.
- Remove the coolant pipes from the cover.
- Remove the vacuum pump. Refer to => [ Vacuum Pump ] Vacuum Pump.
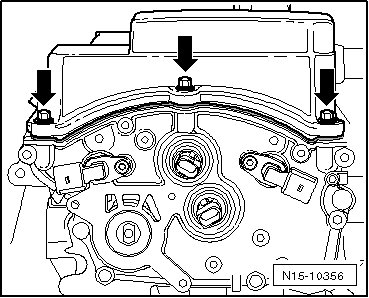
- Remove the 3 bolts - arrows - from the cylinder head cover.
- Remove the upper and lower coolant pipes from the cover.
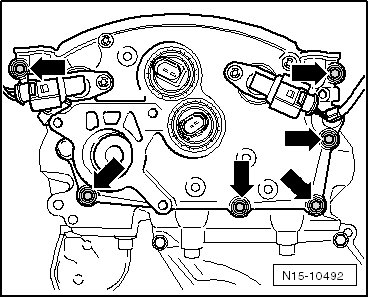
- Remove the cover bolts - arrows - from the cylinder head.
• Carefully cover the lower chain guard to keep other parts from falling inside.
• Do not completely remove the camshaft adjustment valve bolts so that valve is not tilted when removed.
- Remove the bolts from the camshaft adjustment valves using the socket wrench (T10072) approximately 3 mm (5 turns) - arrows -.
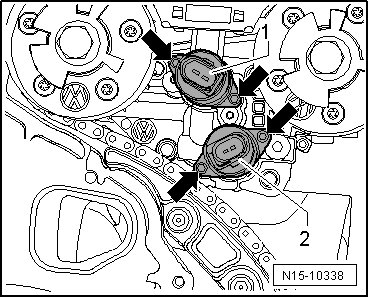
- Pull the camshaft adjustment valve out, against the loosened bolts, from the control housing seal.
- Remove the bolts and pull the camshaft adjustment valve out of the control housing.
Installing
• The valve seat in the control housing must not be scored or scratched.
• The camshaft adjustment valves and control housing must be free of dust and contamination.
• The camshaft adjustment valves must not be subjected to knocks or impacts.
• Remove the new camshaft adjustment valves from their packaging just before installing them.
• Camshaft adjustment valves must not be pulled into valve seat by the bolts. Only press them in by hand.
- Coat the seal with clean engine oil.
- Install the camshaft adjustment valve carefully into the housing and push it all the way in by hand perpendicular to the valve axis.
- Tighten the bolts - arrows - to 3.8 Nm.
- 1 - camshaft adjustment valve 1.
- 2 - exhaust camshaft adjustment valve 1.
- Clean the sealing surface on the cover and cylinder head.
- Check the seals on the camshaft adjuster valves and replace them if necessary. Refer to => [ Cover Seal ] Cover Seal.
- Make sure the seal - arrows - fits correctly inside the cylinder head cover.
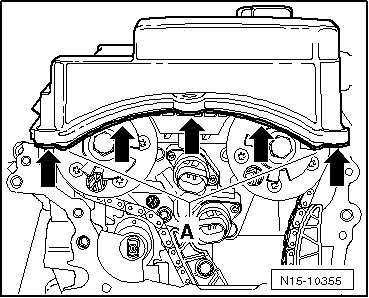
- Remove any remaining sealant - A -.
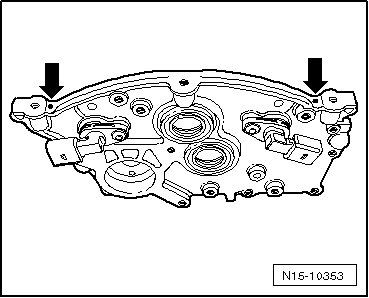
- Apply a thin bead of silicone adhesive sealant (D 176 501 A1) on the clean sealing surface of the cover.
- Apply a little sealant (D 454 300 A2) where it is marked on the cover as well.
• The sealant (D 176 501 A1) hardens quickly.
- Push the cover - slightly tilted - onto the camshaft adjustment valves. Make sure the cylinder head cover seal is not pressed back.
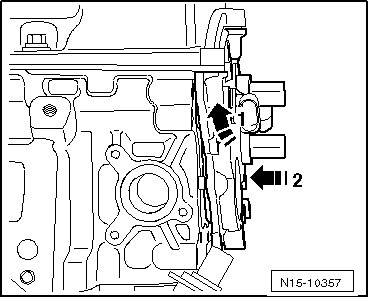
1 - Push the cover upward, under the cylinder head cover gasket.
2 - Push the cover against the cylinder head and onto the alignment pins.
- Make sure the seal - arrows - fits correctly. It must not be pushed back.
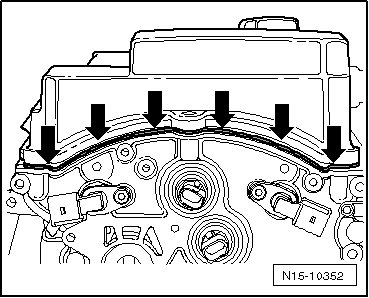
- Install all the bolts - arrows - and tighten them just a little.
- Then, tighten all the bolts to specifications, see - item 18 - in the => [ Cylinder Head and Cover Overview ] Cylinder Head and Cover Overview.
- Tighten the 3 cylinder head cover bolts - arrows - to specification, see - item 5 - in the => [ Cylinder Head and Cover Overview ] Cylinder Head and Cover Overview.
- Install the vacuum pump. Refer to => [ Vacuum Pump ] Vacuum Pump.
Further installation is in the reverse order of removal.