Front Window Guide
Front Window Guide
• The following describes removing and installing the left window guide. Removing and installing the right window guide is identical.
• Do not bend the window guide when removing it.
Removing
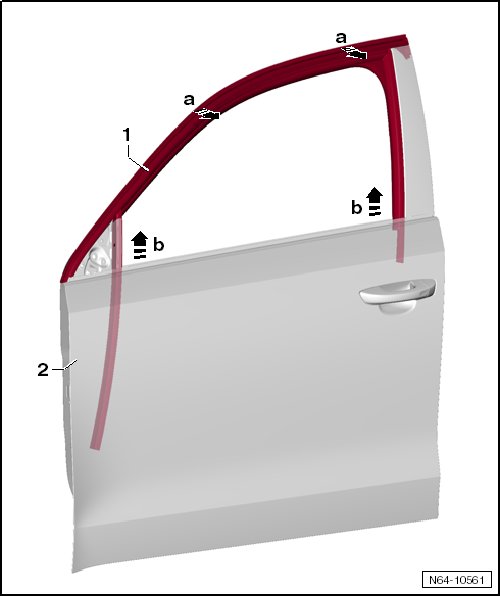
- Remove the front door trim panel.
- Remove the door window. Refer to => [ Front Door Window ] Front Door Window.
- Remove the inner window shaft strip. Refer to => [ Inner Front Door Window Shaft Seal ] Inner Front Door Window Shaft Seal.
- Remove the outer window shaft strip. Refer to => [ Outer Front Door Window Shaft Seal ] Outer Front Door Window Shaft Seal.
- Remove B-pillar trim => [ Front Door B-Pillar Trim ] Front Door B-Pillar Trim
- Roll the sealing lip on the window guide - 1 - off the door flange.
- Remove the window guide - 1 - - arrows a - from the door flange all the way around.
- Remove the window guide - 1 - from the mounts on the front door - 2 - - arrows b -.
Installation
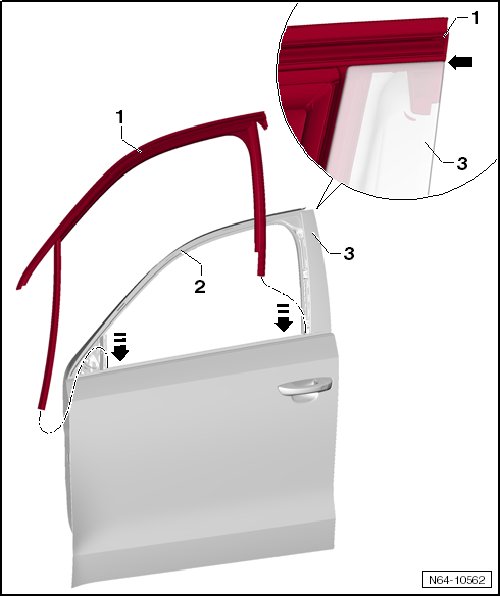
• Some models may have a chrome trim piece that may have to be transferred over to the new window guide. For removal and installation instructions refer to => [ Front Window Guide Decorative Strip Assembly Overview ] Front Window Guide Decorative Strip Assembly Overview
- Spray the window guide with soapy water to make it easier to install.
- Install the upper corner of the B-pillar - 3 - - arrow -.
- Install the window guide - 1 - forward moving along the door flange - 2 -.
- Insert the window guide - 1 - into the door at the B-pillar - 3 -.
- Insert the window guide - 1 - into the door at the A-pillar.
- Insert the A-pillar support into the guide rail starting from the top to the bottom in - direction of arrow -.
- Pull the sealing lip on the window guide onto the door flange - 2 -.
• Make sure the window guide - 1 - fits evenly when installing it (wind noises).
Install in reverse order of removal.