Removal and Disassembly
WARNING:- Never use an air hose or dry brush to clean brake assemblies.
- Use an OSHA-approved vacuum cleaner to avoid breathing brake dust.
- Contaminated brake discs or pads reduce stopping ability.
- When reusing the pads, always reinstall the brake pads in their original positions to prevent loss of braking efficiency.
CAUTION:
- Do not spill brake fluid on the vehicle it may damage the paint; if brake fluid does contact the paint, wash it off immediately with water.
- To prevent spills, cover the hose joints with rags or shop towels.
- Clean all parts in brake fluid and air dry; blow out all passages with compressed air.
REMOVAL
1. Remove the banjo bolt and disconnect the brake hose from the caliper.
Caliper Bolts:
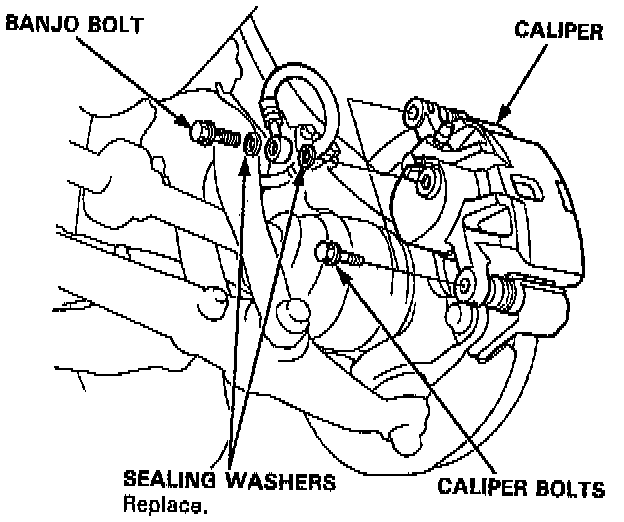
2. Remove the caliper bolts (pin A and pin B), then remove the caliper from the bracket.
Pin Boots:
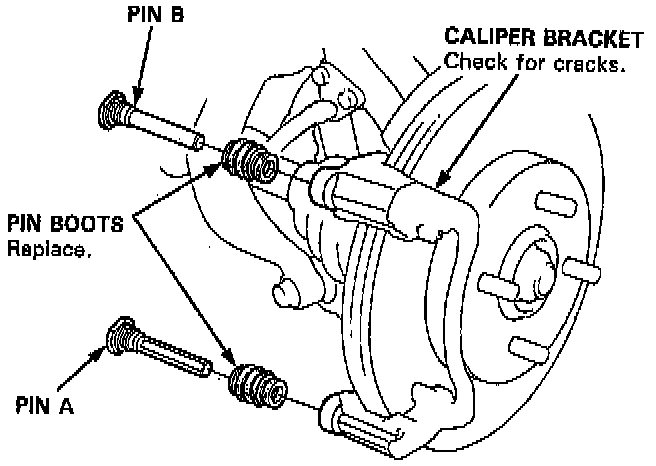
3. Remove the pin boots from the caliper bracket.
DISASSEMBLY
WARNING: Do not place your fingers in front of the piston. Do not use high air pressure; use an OSHA-approved 30 PSI nozzle.
Remove Piston With Compressed Air:
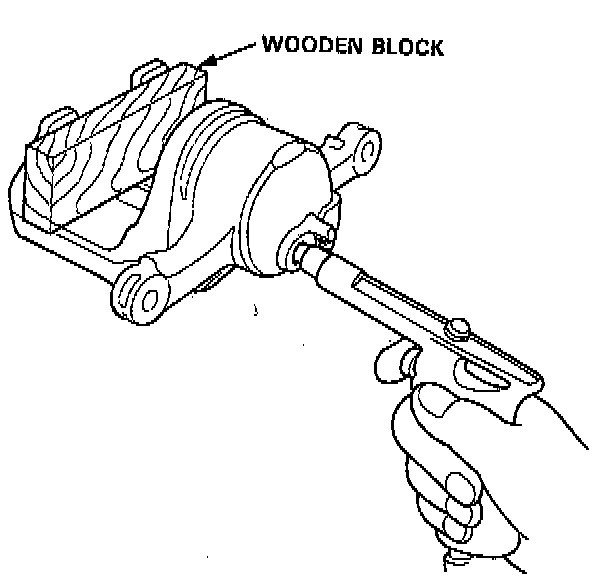
1. If necessary, apply compressed air to the caliper fluid inlet to get the piston out. Place a shop rag or wooden block as shown to cushion the piston when it is expelled Use low pressure air in short spurts.
2. Remove the piston from the caliper, and check the piston for scoring on surface.
Piston Boot And Piston Seal:
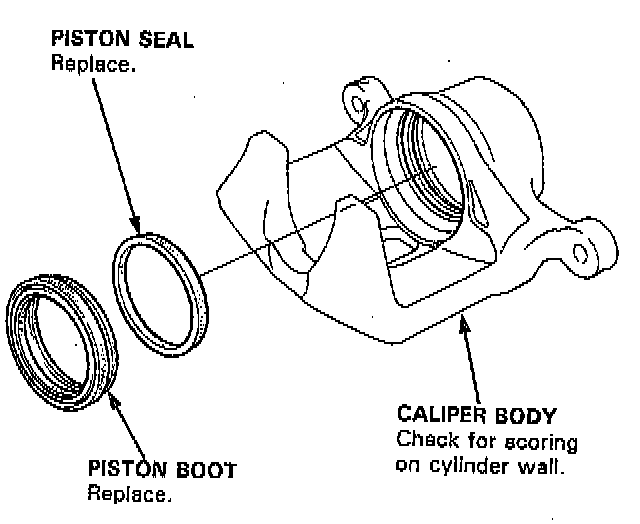
3. Remove the piston boot and piston seal.
CAUTION: Take care not to damage the cylinder bore.