Installation
NOTE: Before installing the crankshaft, apply a coat of engine oil to the main bearings and rod bearings.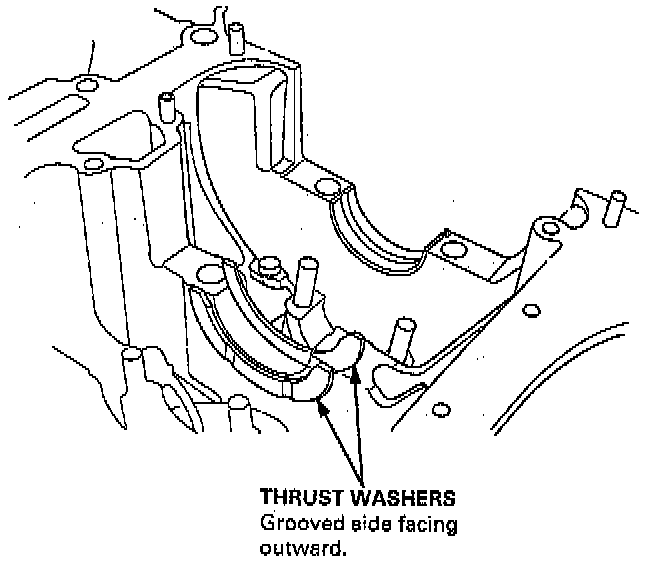
1. Install the thrust washers in the No. 4 journal of the cylinder block.
2. Insert bearing halves in the engine block and connecting rods.
3. Hold the crankshaft so rod journals for cylinders No. 2 and No. 3 are straight up.
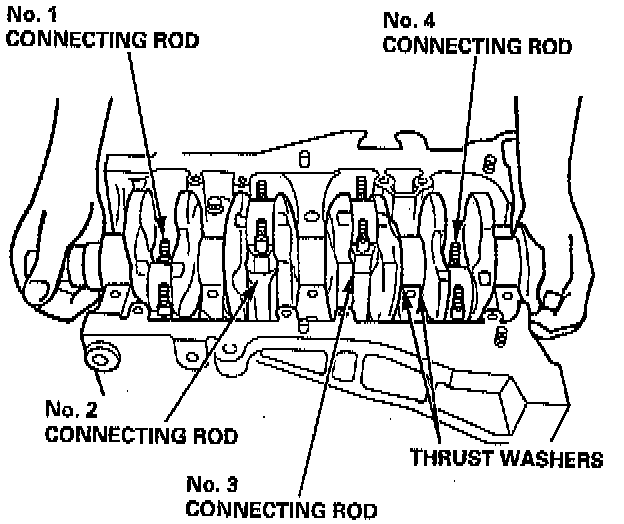
4. Lower the crankshaft into the block, putting the rod journals into connecting rods No. 2 and No. 3. Install the rod caps and nuts finger-tight.
5. Rotate the crankshaft clockwise, put journals into connecting rods No. 1 and No. 4, and install the rod caps and nuts finger-tight.
NOTE: Install caps so the bearing recess is on the same side as the recess in the rod.
6. Check rod bearing clearance with plastigage, then tighten the capnuts in 2 steps.
- 1st step: 20 Nm (14 ft. lbs.)
- 2nd step: 44 Nm (33 ft. lbs.)
NOTE: Reference numbers on connecting rod are for big-end bore tolerance and do NOT indicate the position of piston in the engine.
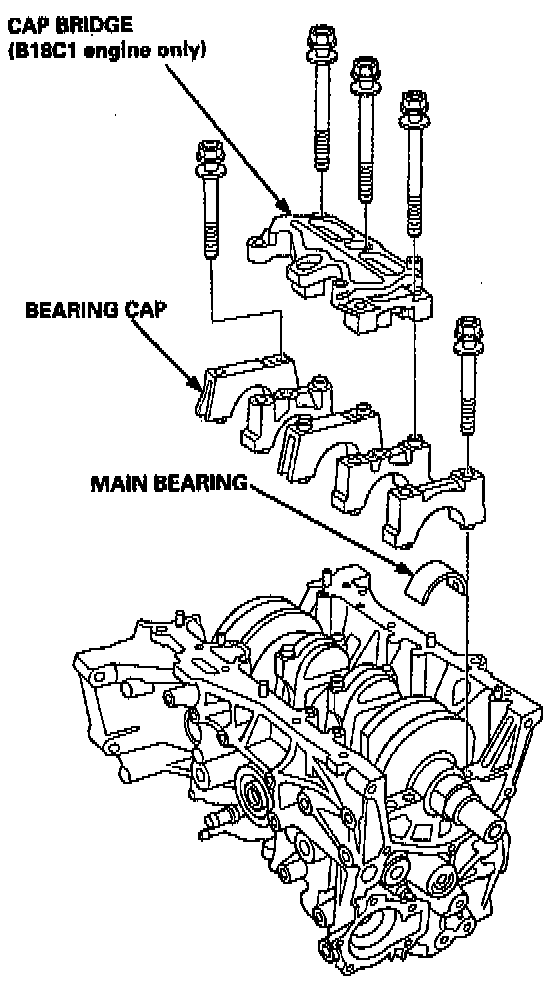
7. Install the main bearings/caps and cap bridge.
NOTE: Coat the bolt threads with oil.
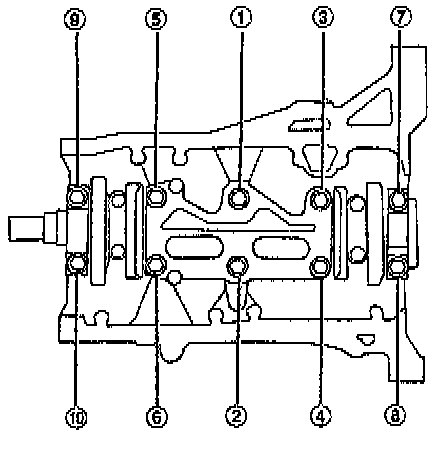
8. Check clearance with plastigage, then tighten bearing cap bolts in 2 steps.
- 1st step: 29 Nm (22 ft. lbs.)
- 2nd step:
- No. 1, 5 cap bolts: 73 Nm (54 ft. lbs.)
- No. 2, 3, 4 cap bolts: 64 Nm (49 ft. lbs.)
CAUTION: Whenever any crankshaft or connecting rod bearing is replaced, it is necessary after reassembly to run the engine at idling speed until it reaches normal operating temperature, then continue to run it for approximately 15 minutes.
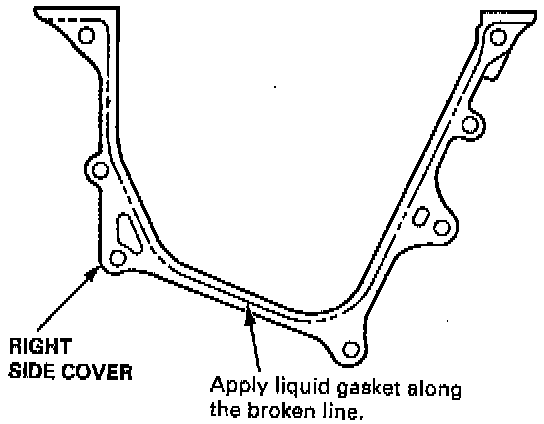
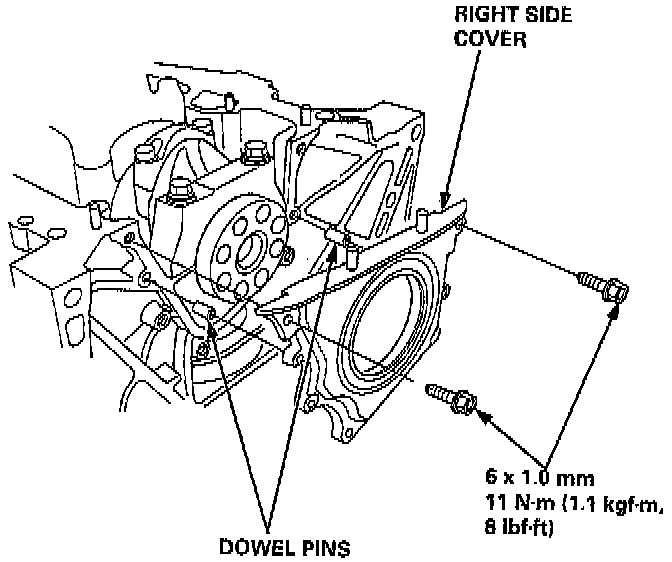
9. Apply non-hardening liquid gasket to the block mating surface of the right side cover, and install it on the cylinder block.
NOTE:
- Use liquid gasket, Part No. 08718-0001, or equivalent.
- Check that the mating surfaces are clean and dry before applying liquid gasket.
- Apply liquid gasket as an even bead, centered between the edges of the mating surface.
- To prevent leakage of oil, apply liquid gasket to the inner threads of the bolt holes.
- Do not install the parts if 5 minutes or more have elapsed since applying the liquid gasket. Instead, reapply liquid gasket after removing the old residue.
- After assembly, wait at least 20 minutes before filling the engine with oil.
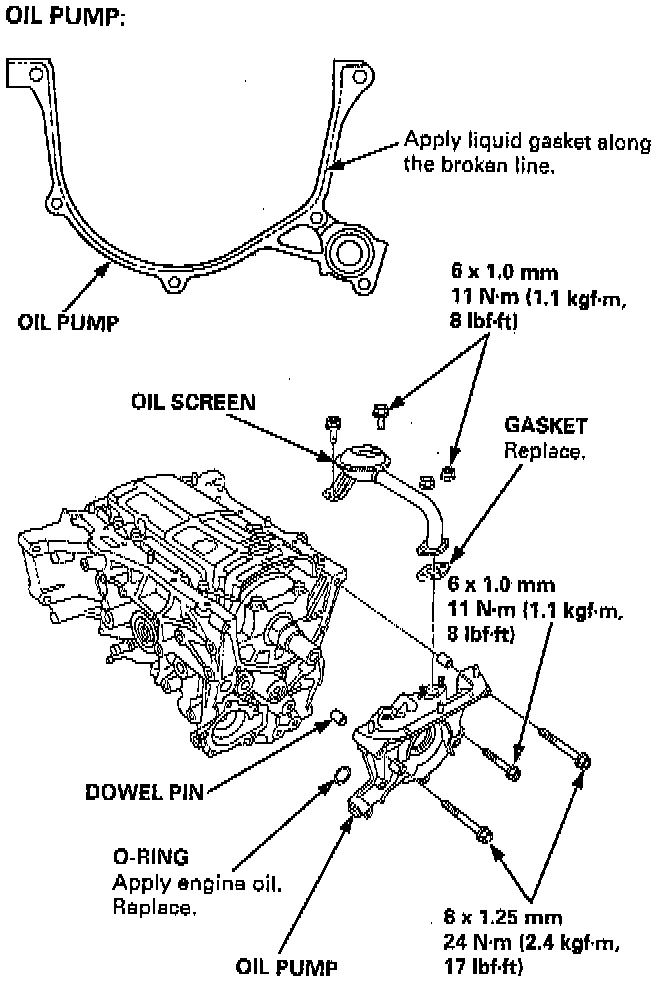
10. Apply non-hardening liquid gasket to the block mating surface of the oil pump, and install it on the cylinder block.
11. Install the oil screen.
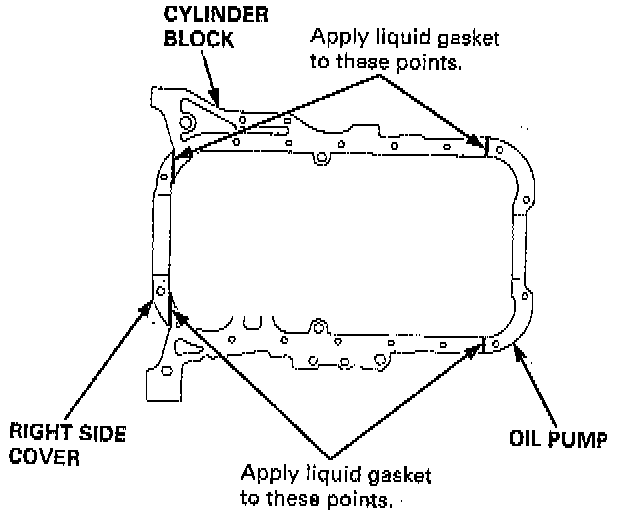
12. Apply liquid gasket on oil pump and right side cover mating areas as shown below.
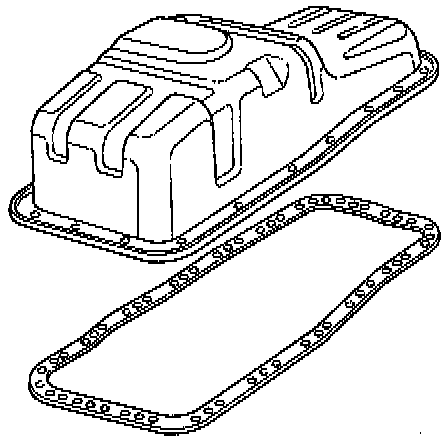
13. Install the oil pan gasket and oil pan.
NOTE: Use a new oil pan gasket.
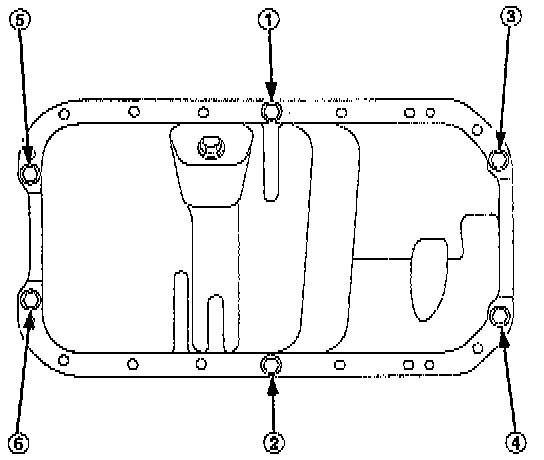
14. Tighten bolts and nuts finger tight at six points as shown below.
15. Tighten all bolts and nuts to 12 Nm (107 in. lbs.) starting from bolt (1) clockwise in three steps.
NOTE: Excessive tightening can cause distortion of oil pan gasket and oil leakage.