Valve Clearance: Adjustments
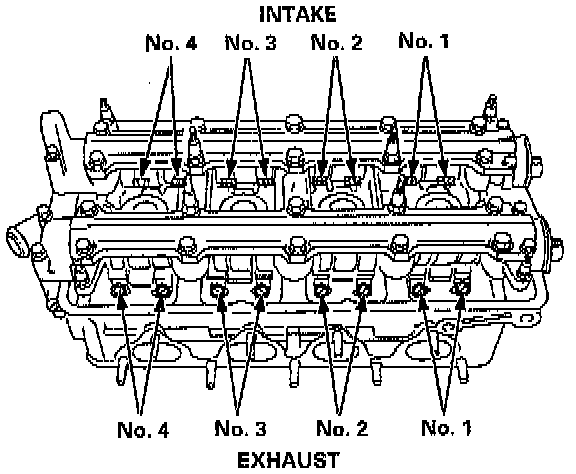
NOTE:
- Valves should be adjusted cold; at a cylinder head temperature of less than 100°F (38°C).
- Adjustment procedure is the same for both intake and exhaust valves.
- After adjusting, retorque the crankshaft pulley bolt to 177 Nm (130 ft. lbs.).
PROCEDURE
1. Remove cylinder head cover.
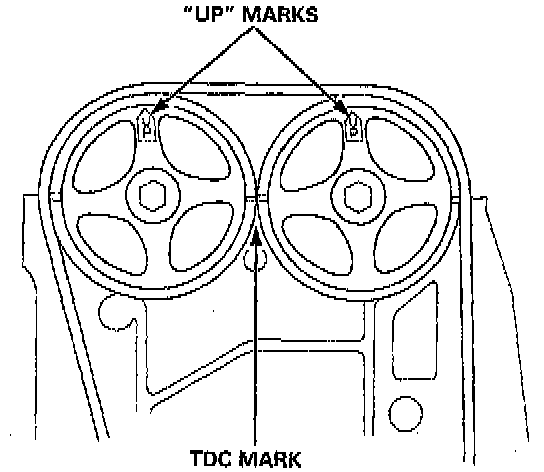
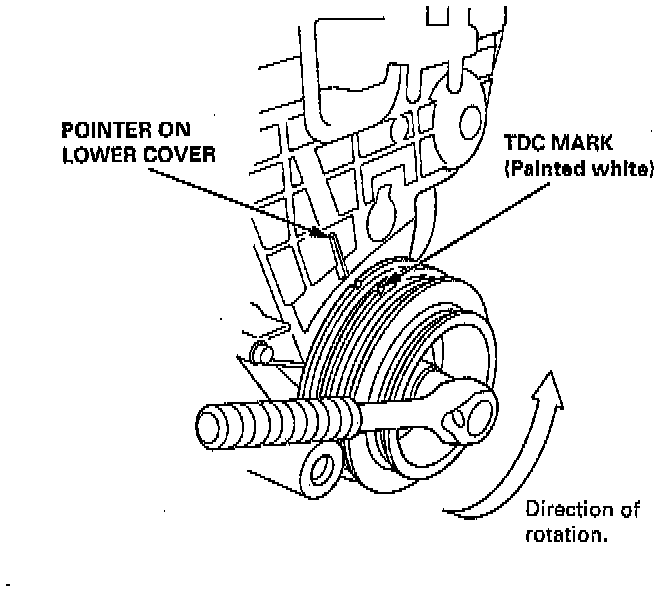
2. Set the No. 1 piston at Top Dead Center (TDC). "UP" mark on the pulley should be at the top, and the TDC grooves on the pulley should align with the TDC groove on timing belt back cover. TDC mark (painted white) on the crankshaft pulley should align with pointer on the timing belt
3. Adjust valve clearances on No. 1 cylinder.
- Intake: 0.15 - 0.19 mm (0.006 - 0.007 inch).
- Exhaust: 0.17 - 0.21 mm (0.007 - 0.008 inch).
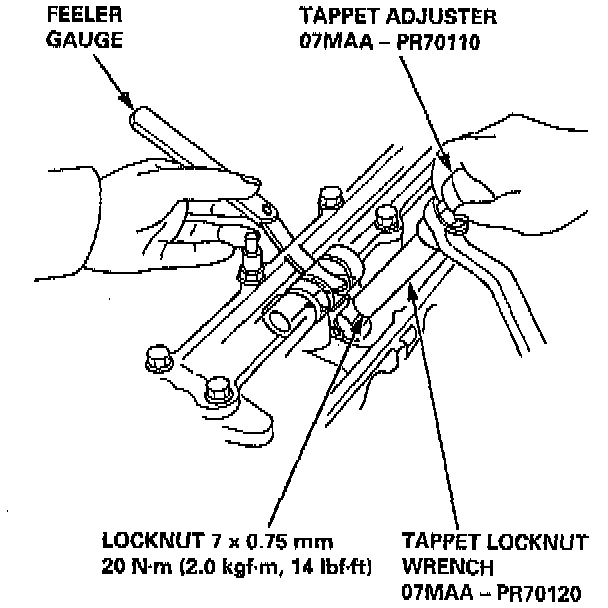
4. Loosen the locknut and turn the adjusting screw until feeler gauge slides back and forth with a slight amount of drag.
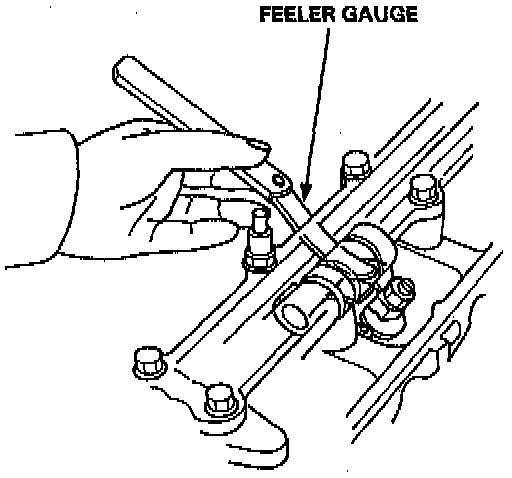
5. Tighten the locknut and recheck clearance again. Repeat adjustment if necessary.
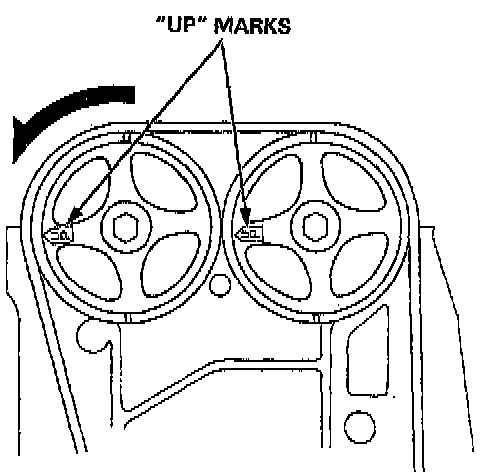
6. Rotate the crankshaft 180° counterclockwise (camshaft pulley turns 90°). The "UP" mark should be on the exhaust side. Adjust valves on No. 3 cylinder.
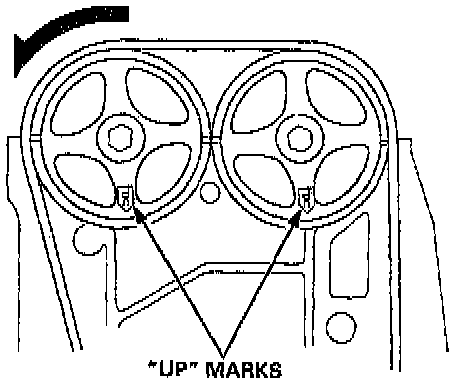
7. Rotate the crankshaft 180° counterclockwise to bring No. 4 piston to TDC. The "UP" mark should be pointing straight down. Adjust valves on No. 4 cylinder.
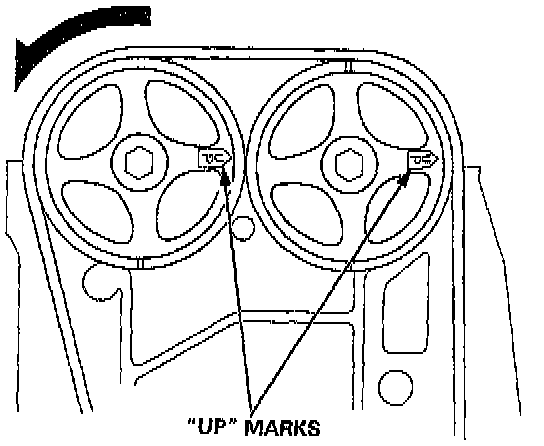
8. Rotate the crankshaft 180° counterclockwise to bring No. 2 piston to TDC. The "UP" mark should be on the intake side. Adjust valves on No. 2 cylinder.
9. Install cylinder head/valve cover.