Bolted Windows
Bolted Windows
=> [ Front Door Window ]
=> [ Rear Door Window ]
Front Door Window
Window Frame Installed
- Door trim removed.
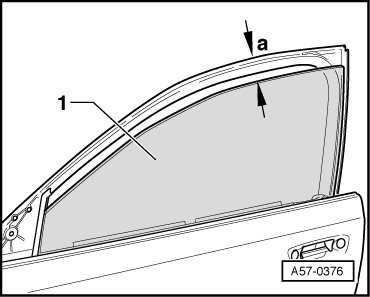
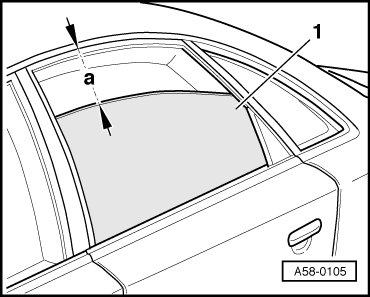
- Drive down window with approximately 10 cm in distance - a -.
- Remove the window regulator motor.
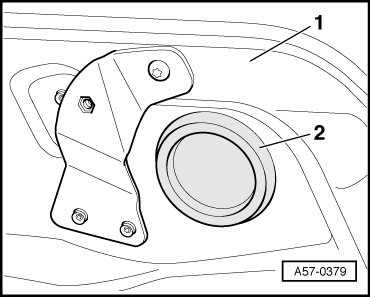
- Remove plastic covers - 2 - from assembly carrier - 1 -.
- Remove bolts - 4 -.
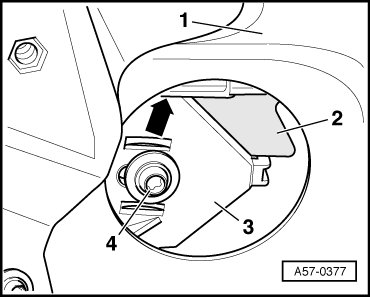
- Slide driver - 3 - of window regulator downward by hand.
• For alternative operation of window regulator, the manual window regulator drives (left or right side) of rear doors of Audi A4 from 2001 with window crank may also be used.
• These drives fit onto threaded pins of window regulator.
- Slide down front section of door window as shown.
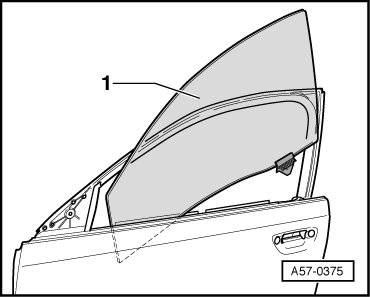
- Pull window trim diagonally upward out of window frame.
- To install, perform the steps used in removal in reverse order.
Assembly Carrier Cover
- When removing assembly carrier - 2 - or door window, cover - 1 - must be pulled out.
Front Driver
- When removing door window or assembly carrier - 1 -, remove mount - 2 - of door window driver - 3 -.
- Tighten bolt - 4 - to 4 Nm when installing.
- When installing, make sure window mount - 2 - lies on upper edge of drive - 3 -.
Rear Driver
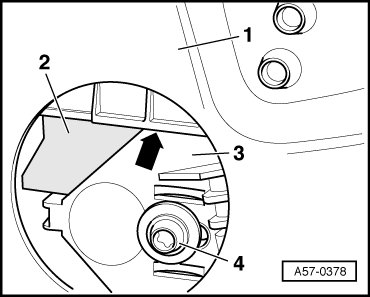
- When removing door window or assembly carrier - 1 -, unscrew mount - 2 - of door window driver - 3 -.
- Tighten bolt - 4 - to 4 Nm when installing.
- When installing, make sure window mount - 2 - lies on upper edge of drive - 3 -.
Window Frame Installed
• With window frame removed, proceed as described in the following
- Slide door window into guides on window frame from bottom to top.
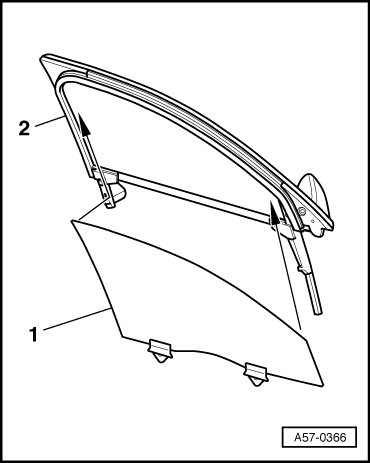
- Secure window at a distance of approximately 10 cm from top of window frame - 1 - with adhesive tape - 2 - as shown.
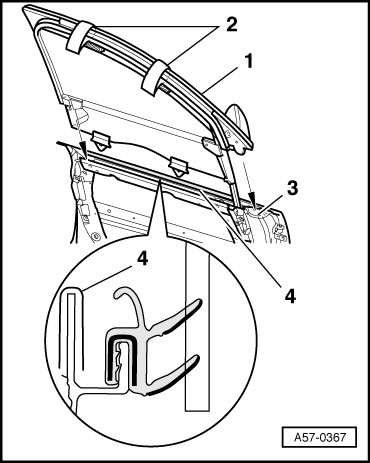
• When inserting window frame, window recess seal must not be pinched.
- Insert window frame with door window into door from above.
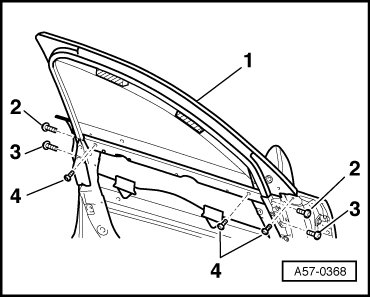
- Loosely screw in Bolt - 2 - first.
- Window frame height is already adjusted by Bolts - 2 -.
- Loosely thread in the remaining bolts as well.
• Follow bolt tightening sequence
- Tighten bolts - 2 - to 32 Nm first at front, then at rear.
- Then tighten bolts - 3 - to 32 Nm first at front, then at rear.
- Finally, tighten bolts - 4 - to 10 Nm from front toward rear.
Rear Door Window
- Door trim removed.
- Drive down window to distance - a - is approximately 10 cm and secure against falling off with adhesive tape.
- Remove window regulator motor.
- Remove plastic covers - 2 - from assembly carrier - 1 -.
- Remove bolts - 4 -.
- Remove window regulator motor.
- Slide driver - 3 - of window regulator downward by hand.
- Disconnect all electrical harness connectors.
- Remove assembly carrier. Refer to => [ Rear Door Assembly Carrier ] Rear Door Assembly Carrier.
- Remove window frame. Refer to => [ Rear Door Window Frame and Window Regulator ] Rear Door Window Frame and Window Regulator.
- Pull door window downward out of guides.
- To install, perform the steps used in removal in reverse order.
Window Regulator Motor, Removing
- Door trim removed.
• The power window motor can be removed or installed with the motor or side window in any position.
• Before removing motor, disconnect electrical harness connectors.
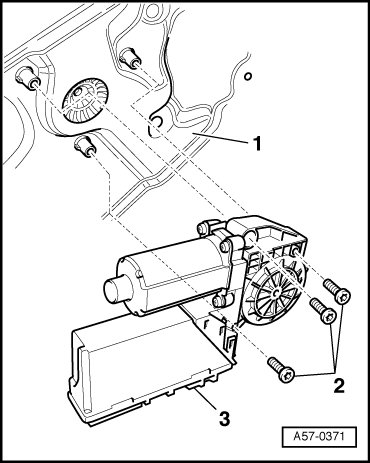
- Remove bolts - 2 - (T30) and remove motor.
Installation
- When installing, make sure that threaded pins - arrows - are engaged in inner door plate.
- Slide on window regulator motor - 3 - and secure with bolts - 2 -.
- Tightening specification 3.5 Nm
• Only switch ignition on and off after installing motor and connecting wires.
• Then move door window upward to stop and keep pressing switch for window regulator for approximately 2 seconds longer.
• This position is the base position and the high- and low-running function is activated.