Lock Carrier Service Position
Lock Carrier Service Position
• Do not remove noise insulation, only loosen front quick release screws => [ Noise Insulation Panel Assembly Overview ] Noise Insulation Panel Assembly Overview.
• Bumper removed.
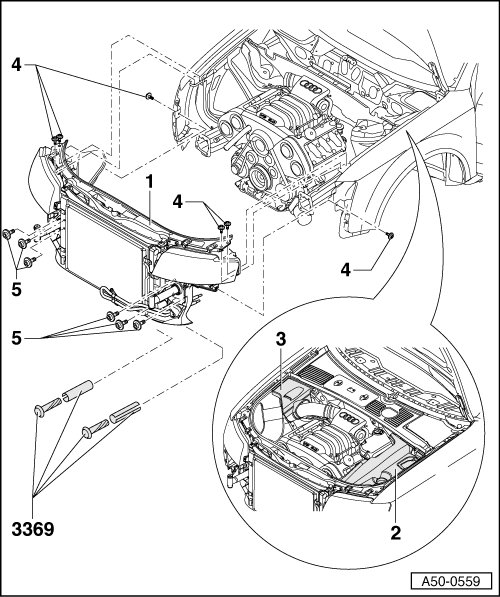
1 - Lock carrier
• Service position
• Remove engine cover.
• Unscrew intake air duct between lock carrier and air cleaner housing at lock carrier and remove.
• On the left side, screw in special tool 3369 in threaded hole => [ Screw in special tool 3369 ]
• On the right side, screw in special tool 3369.
• Unscrew mounting bolts - 5 - at left and right.
• Unscrew mounting bolts - 4 - and pull lock carrier - 1 - toward front.
• Secure lock carrier => [ Secure lock carrier ].
2 - Left engine cover
3 - Right engine cover
4 - Combination bolt
• 10 Nm
5 - Combination bolt
• 50 Nm
• For service position, screw in special tool 3369.
• After assembly of lock carrier, check headlight positioning and adjust if necessary.
Screw in special tool 3369
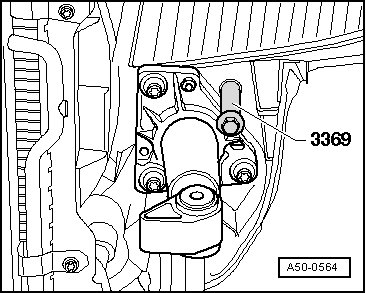
- Screw in special tool 3369 left and right as shown.
- Pull lock carrier forward until rear hole in lock carrier aligns with front threaded hole in fender flange.
Secure lock carrier
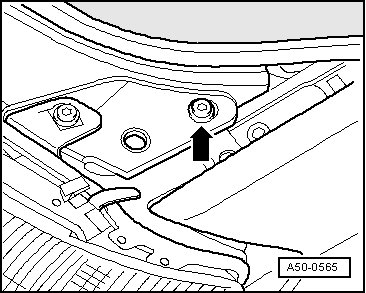
- Secure lock carrier at left and right with bolts.