Lock Carrier, Moving Into Service Position
Lock Carrier, Moving into Service Position
Special tools, testers and auxiliary items required
• Support tool (3369)
Work procedure
- Remove both front wheels.
- For vehicles with auxiliary heater, remove bolts - arrows - for exhaust pipe of parking heater/auxiliary heater on noise insulation.
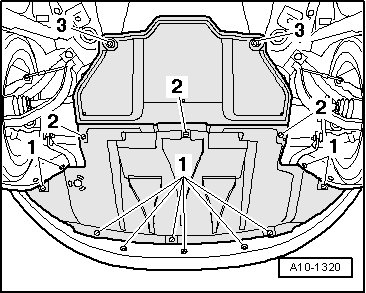
- Loosen quick-release fasteners - 1 - and - 2 - and remove front noise insulation.
- Remove front bumper cover.
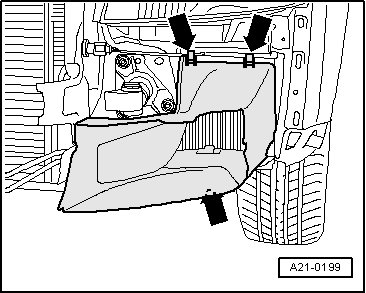
- Remove air duct from in front of charge air cooler at left and right - arrows -.
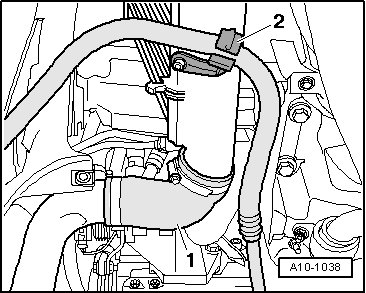
- Remove air duct hose - 1 - to charge air cooler at lower left on lock carrier.
CAUTION!
The air conditioning refrigerant circuit must not be opened.
- Unhook refrigerant line from bracket - 2 -.
- Remove bolts - arrows -.
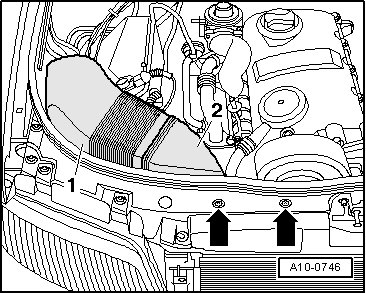
- Remove air duct - 1 - and - 2 -.
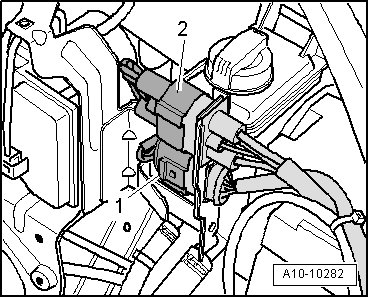
- Remove electrical harness connectors - 1 - and - 2 - from bracket and free up electrical wiring.
- Remove hood seal from lock carrier and fender edges.
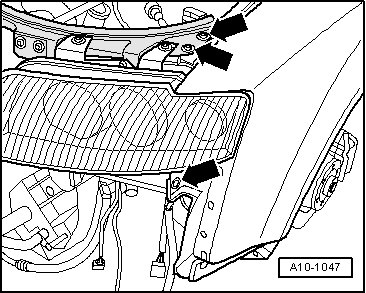
- Remove bolts - arrows - at left and right side of bumper.
- Thread support tool (3369) into empty bores at left and right.
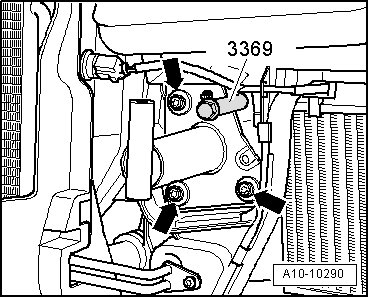
- Remove bolts - arrows - at left and right impact absorbers.
- Carefully pull lock carrier toward front.
Installing
Installation is in reverse order of removal, note the following:
• Hose connections and charge air system hoses must be free of oil and grease before installing. Do not use lubricant under any circumstances.
• Secure all hose connections using hose clamps appropriate for the model type.
- Install lock carrier with attachments. Refer to => Radiator Support Radiator Support
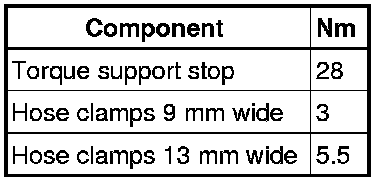
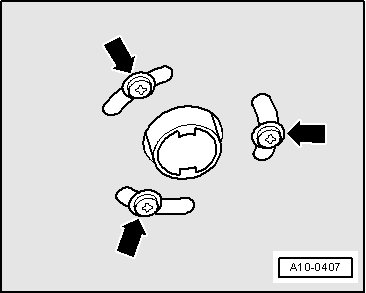
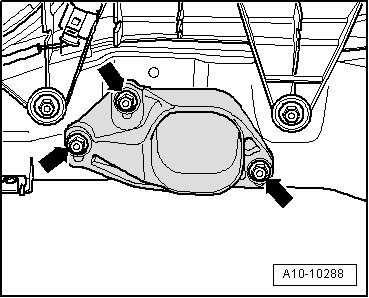
- Place torque support stop onto rubber buffer for torque support under its own weight and tighten the nuts - arrows -.
- Install front bumper cover.
- Check headlight adjustment.
Tightening Specifications