Heated Oxygen Sensor 2
Heated Oxygen Sensor 2
Special tools, testers and auxiliary items required
• Ring Spanner 7-Piece Set (3337)
Removing
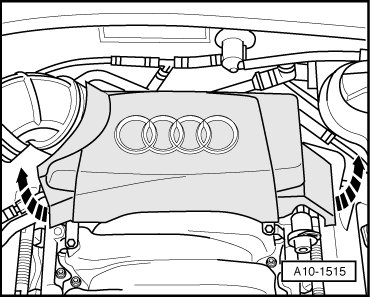
- Pull rear engine cover off - arrows -.
- Remove the coolant reservoir - arrows -.
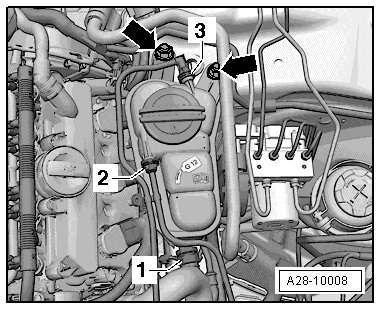
- Disconnect the electrical connector to the engine coolant level warning switch (F66) on the bottom of the coolant reservoir and lay the reservoir aside with the coolant hoses - 1 and 2 - and - 3 - attached.
- Disconnect the electrical connector - 2 - for the heated oxygen sensor 2 (G108).
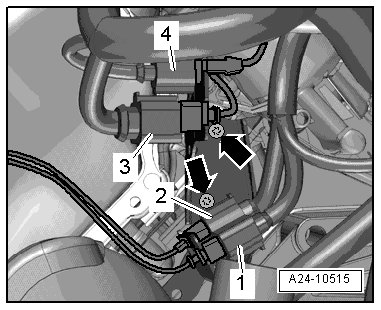
- Remove the heated oxygen sensor 2 - 1 - using a tool from the (3337).
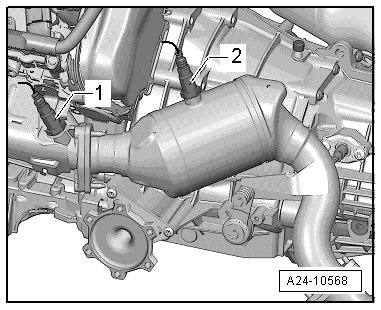
• The installation location is shown with the engine removed.
Installing
Installation is in the reverse order of removal, note the following:
• Tightening specification, refer to => [ Oxygen Sensors Assembly Overview ] Oxygen Sensors Assembly Overview
• New oxygen sensors are coated with assembly paste; the paste must not get into slots of oxygen sensor body.
• For a used oxygen sensor, only coat threads with hot bolt paste. This paste must not come into contact with sensor slots. Hot bolt paste, refer to the electronic parts catalog ETKA
• Electrical wire of oxygen sensor must always be secured in the same position when installing so that contact with the exhaust pipe is avoided.
• During installation, all cable ties must be installed at the same location.