Side Window
Side Window
Undamaged side window, removing
When removing a window, always wear protective eye-wear and leather gloves.
Remove the following trim pieces:
- Side luggage compartment trim panel.
- D-pillar trim.
- Trim above the rear side window.
- C-pillar trim.
Side window with gloss package
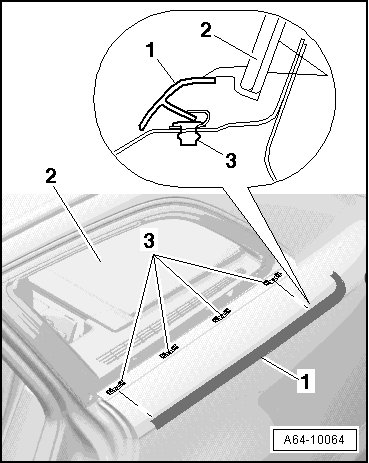
- Remove the trim molding - 1 - from C-pillar beginning at clips - 3 - below side window molding - 2 -.
- Remove the trim molding from the roof trim molding.
• To prevent damage to paint when removing and installing trim molding, cover area below side window and on side panel using adhesive tape.
• Also, a slightly bent roof trim molding is damaged and must be replaced.
All:
- Pierce through adhesive sealing material using a guide needle with handle from (V.A.G 1755) window removing kit.
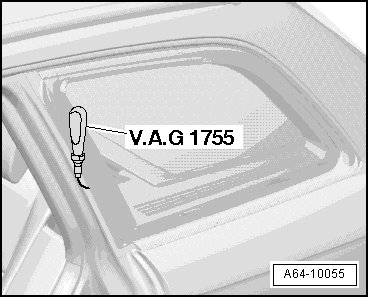
- Remove handle and thread cutting cord through eye of the guide needle.
- Pull cutting cord end - A - inward (use pliers and protective gloves) to opposite window side with guide needle from (V.A.G 1755) window removing kit.
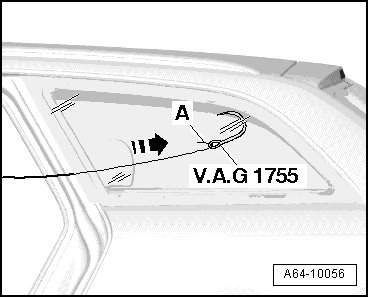
- Pull cutting cord - B - with small tube from (V.A.G 1755) window removing kit under polyurethane molding of side window.
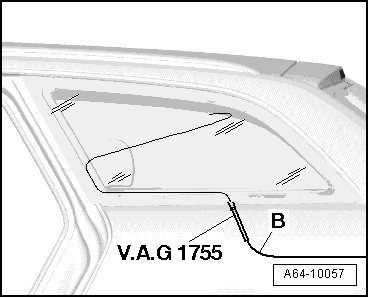
- Insert cutting cord completely around window.
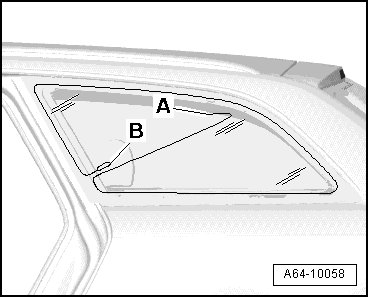
- Pierce through adhesive sealing material using a guide needle with handle from (V.A.G 1755) window removing kit.
- Remove handle and thread end of cutting cord - B - through eye of the guide needle.
- Pull through cutting cord end - B - with guide needle inward (use pliers and protective gloves).
- Secure cutting cord end - B - to belt guide console.
- Attach spooling tool (V.A.G 1654) as shown together with cutting cord.
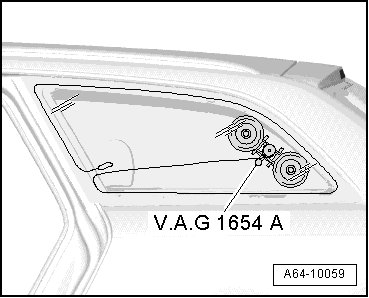
- Cut first area at C-pillar and window bottom.
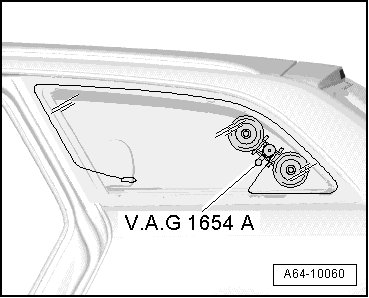
• Press cutting cord in direction of chassis during cutting procedure.
- Install the idler roller (V.A.G 1474/1) as illustrated.
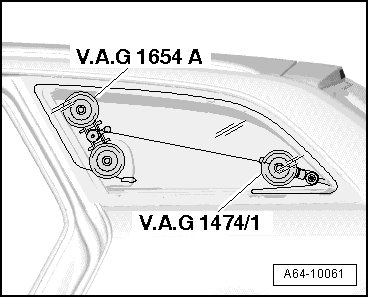
- Move spooling tool (V.A.G 1654) and continue cutting.
- Install the idler roller (V.A.G 1474/1) as illustrated.
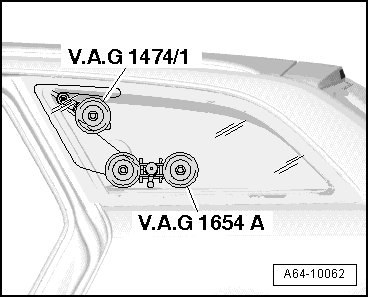
- Move spooling tool (V.A.G 1654) and continue cutting.
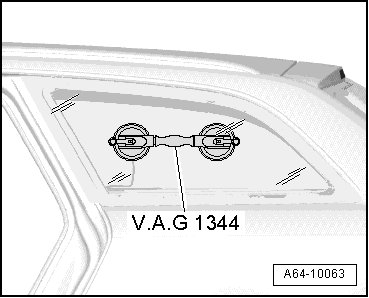
- Remove side window using (V.A.G 1344) double suction cups.
Damaged Window Glass, Removing
- Protect body and interior from glass splinters.
- Bond flange all around with fabric reinforced adhesive tape.
- Disconnect the connectors for the antennas and amplifiers.
- Remove glass pieces from adhesive material.
When removing a window, always wear protective eye-wear and leather gloves.
- Remove adhesive material (with glass residue) from window opening using electric cutter (V.A.G 1561A) and knife (V.A.G 1561/11) (with stopper roll).
Installing an Undamaged Window Glass
- If the windshield flange was damaged, then it must be repainted and if necessary, corrosion protected.
- First clean corrected area with Cleaning Solution (D 009 401 04) and then apply Glass and Paint Primer (D 009 200 02).
- When reusing an undamaged rear window, cut remaining adhesive sealing material on window and flange using a carpet knife so that it is even, but do not remove completely!
- Residual material acts as a base for the new adhesive sealing material.
• Keep adhesive surface free of dirt and grease.
• Only cut back adhesive surface shortly before installation.
• Do not prime or use a cleaning solution on the adhesive surface.
- Apply adhesive onto residual adhesive bead
• Bead width = 8 ± 2 mm
• Bead height = 13.5 ± 1.5 mm
• Adhesive sealing material DH 009 100 03 (small cartridge) is recommended when bonding a single window; D 004 300 05 (2K- adhesive) is recommended when bonding more than one window.
With New Window
- Clean windshield in adhesion area using D 009 401 04 and prime using D 009 200 02 glass/paint primer.
- Ensure an air drying time of 10 minutes for primer.
- Apply adhesive.
• Bead width - a - = 8 ± 2 mm
• Bead height = 13.5 ± 1.5 mm
• The distance to the edge of the window glass is reached when the adhesive is applied directly next to the molding.
• Install the lower trim molding before installing the side window
- Position window at lower side panel and press into opening for the window glass.
- Secure window in opening using adhesive tape.