Front Fender: Service and Repair
Fender Assembly Overview
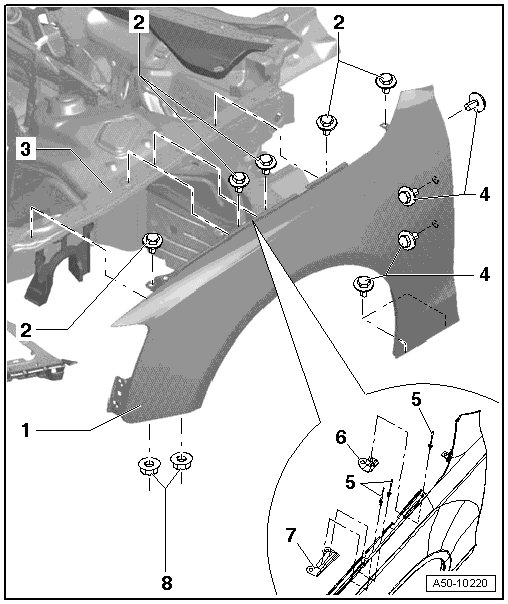
1 Fender
• Removing
- Remove front bumper.
- Remove wheel housing liner. Refer to => [ Front Wheel Housing Liner ] Front Wheel Housing Liner.
- Remove the bolts - 2 - and - 4 - and nuts - 7 - and the fender.
• Installing: in reverse order
2 Bolt
• 10 Nm
3 Fender flange
4 Bolt
• 8 Nm
5 Pop rivet
6 Rear bracket
• Riveted to the fender
7 Front bracket
• Riveted to the fender
8 Nuts
• 4 Nm
Fender brace
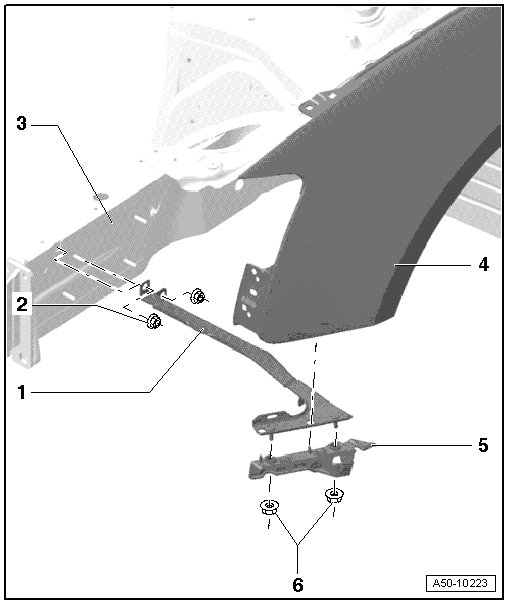
1 Brace
- The bumper is removed and press the wheel housing liner to the side in the area of the brace.
- Remove the nuts - 2 - to remove it.
2 Nut
• 8 Nm
• The brace is secured on the right side with bolts tightened to 10 Nm.
3 Longitudinal member
4 Fender
5 Bumper cover mount
• Different versions, refer to the Parts Catalog
6 Nut
• 4 Nm
Fender seal
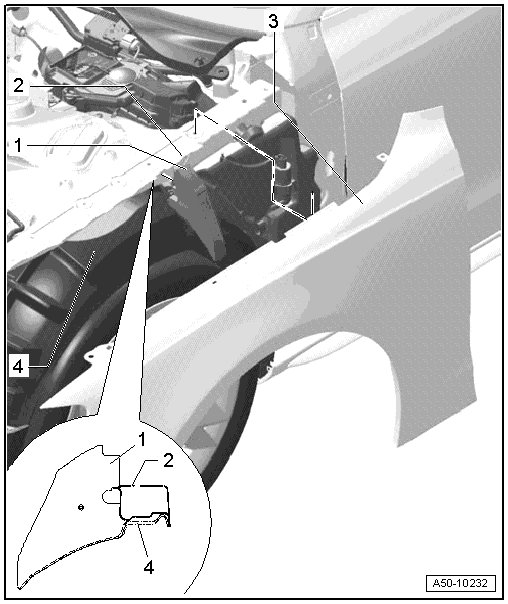
1 Seal
• Self-adhesive.
• Remove the protective film and slide the seal onto the fender mounting flange under the wheel housing liner as illustrated.
2 Fender flange
• Slide the seal onto the fender flange between the wheel housing liner and the inside of the fender.
3 Fender
4 Wheel housing liner
End plate, removing and installing
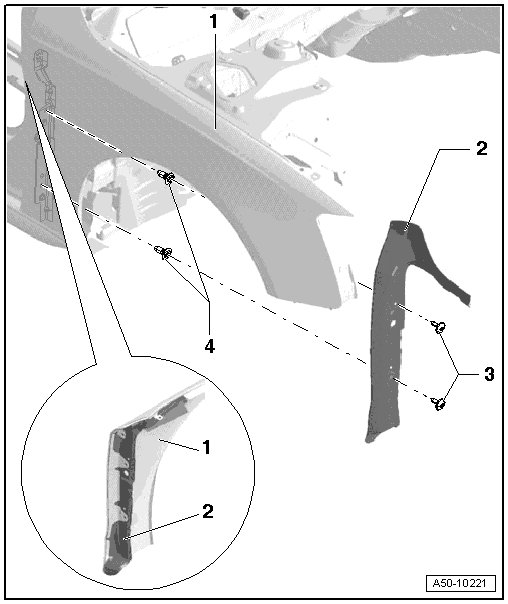
1 Fender
2 End plate
- Remove front wheel.
- Remove the rear part from the wheel housing liner. Refer to => [ Front Wheel Housing Liner ] Front Wheel Housing Liner.
• Loosen the windshield washer fluid reservoir on the left side
- Remove the bolts - 3 -, unclip the end plate from the fender rear bracket => [ (Item 6) Rear bracket ] and slide it downward.
3 Screws
• 1.5 Nm
4 Clip
• Quantity: 2
Unclip the end plate
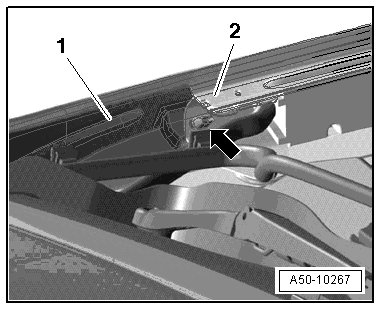
- Before the end plate - 1 - can be removed downward, it must first be unclipped from the bracket - arrow - for the fender - 2 -.