Fender Assembly Overview
Fender Assembly Overview
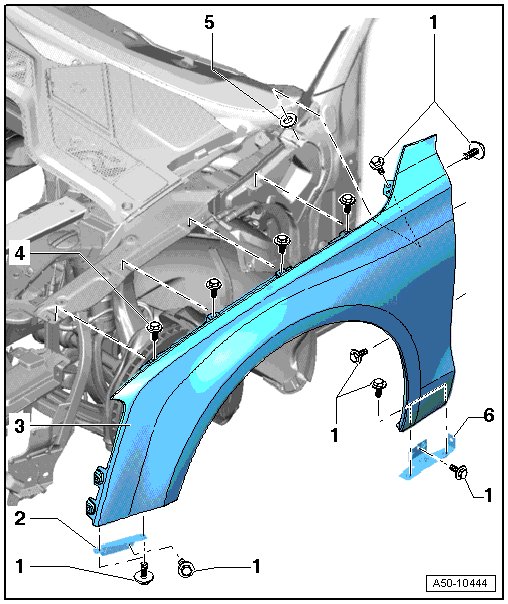
1 Bolt
• 12 Nm
2 Front fender bracket
Removal
3 Fender
• Removing
- Remove front bumper. Refer to => [ Front Bumper Cover ] Front Bumper Cover.
- The windshield washer fluid reservoir on the right side must also be removed.
- Remove the sill panel trim. Refer to => [ Front Bracket for Sill Panel Trim ] Front Bracket for Sill Panel Trim.
- Remove the back part of the wheel housing liner. Refer to => [ Front Wheel Housing Liner Rear Section ] Front Wheel Housing Liner Rear Section.
- End plate, removing
- Remove the bolts - 1 - and then remove the fender.
• Installing: in reverse order.
4 Bolt
• 12 Nm
5 Washer
• Installed between the fender and the body.
6 Lower fender mount
• Removal
Removing the fender bracket
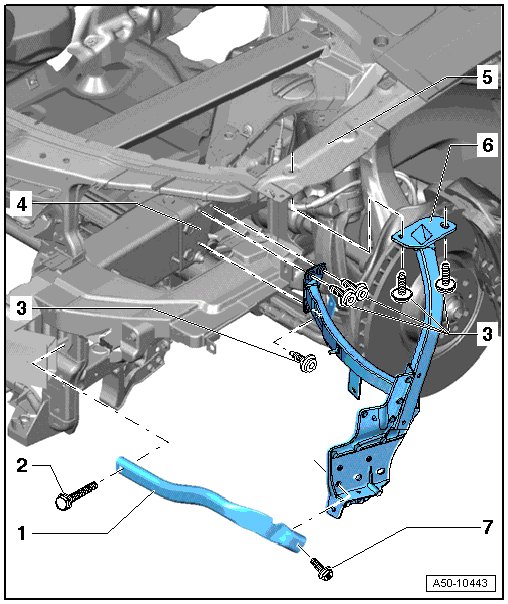
1 Brace
- The bumper is removed and press the wheel housing liner to the side in the area of the brace.
2 Bolt
• 23 Nm
3 Bolt
• 24 Nm
4 Longitudinal member
5 Fender flange
6 Fender mount
• The wheel housing liner is removed.
• Remove the fender from the front lower fender bracket.
• Remove the bolts - 3 - from the longitudinal member, - 6 - from the fender flange - 7 - and from the front fender bracket.
7 Bolt
• 9 Nm
Front fender bracket
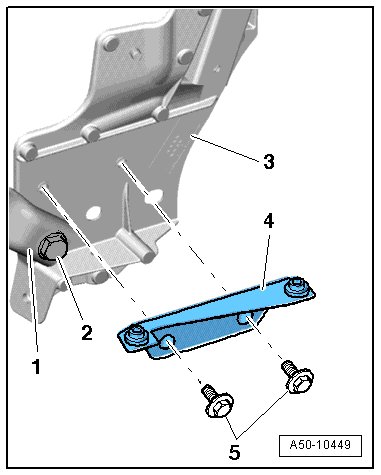
• 1 = Brace.
• 2 = Tighten to 9 Nm.
• 3 = Fender bracket.
• 4 = Front bracket.
• 5 = Tighten to 12 Nm.
Lower fender bracket
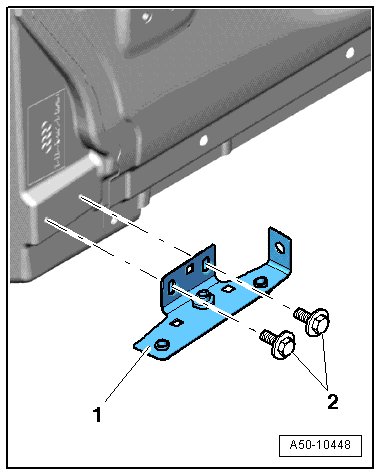
• 1 = Rear bracket
• 2 = Tighten to 12 Nm.
End plate, removing and installing
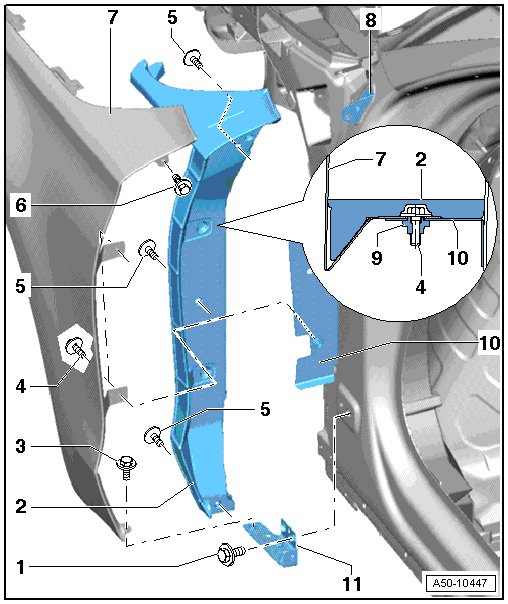
1 Bolt
• 12 Nm
2 End plate
- Remove front wheel.
- Remove the rear part of the wheel housing liner.
- Remove the clip - 5 - and then remove the end plate.
3 Screws
• 12 Nm
4 Bolt
• 12 Nm
• Covered by the end plate.
5 Clip
6 Bolt
• 12 Nm
7 Fender
8 Upper fender mount
9 Internally threaded pop rivet
10 Fender mount
11 Lower fender mount