Rear Window
Rear Window
Removing Undamaged Rear Window
- Remove the rear lid trim.
- Remove the rear wiper.
- Disconnect rear window defroster and window antenna connectors and secure to center of window with adhesive tape.
When removing a window, always wear protective eyewear and leather gloves.
- From the wire spool (VAS 6452/1), pull out approximately 6.5 meter of cutting wire (about 6 turns) and cut it.
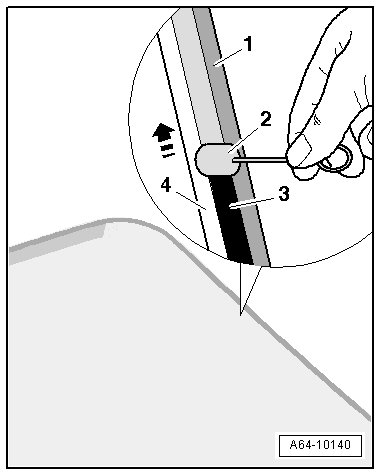
- Cover the awl outlet under the body flange with tape - 1 - to prevent damaging it.
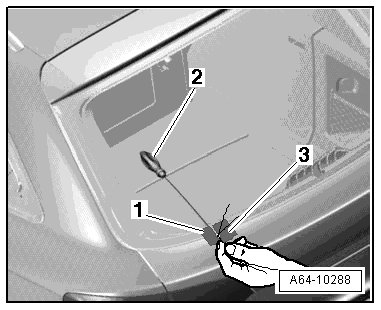
- Feed both cutting wire ends - 3 - into the awl - 2 - and pull it in.
- Place the cutting wire all the way around under the windshield as illustrated.
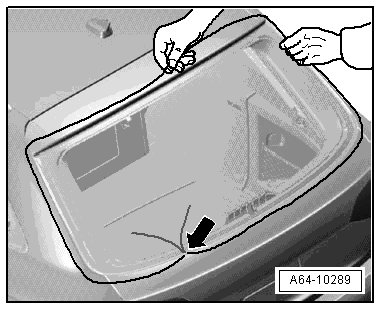
- Route cutting wire around rear window under the glass as shown in the illustration.
The ends of the wire must not be twisted when cutting through the adhesive - arrow -.
- Mount both spools on the inside of the windshield as illustrated.
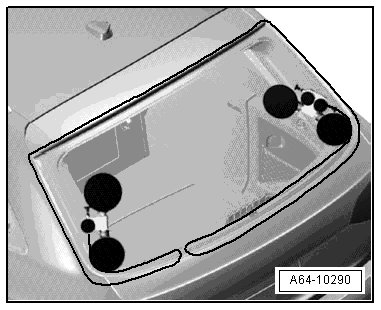
- Insert the ends of the cutting wire- 1 - into the spool - 2 -
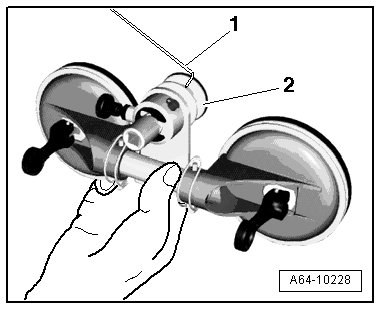
- Tension the cutting wire using the spool - 1 - and insert the plastic film - 2 - taken from the cutting tool kit (VAS 6452) to protect the wire and the glass.
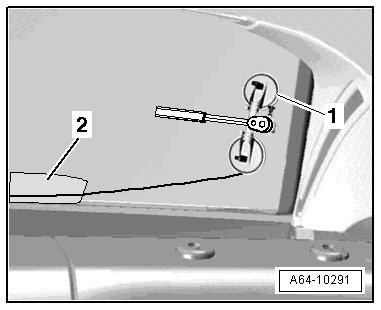
- Cut the first section open, while doing this, the wire is guided into the integrated roller - arrow - on the spool
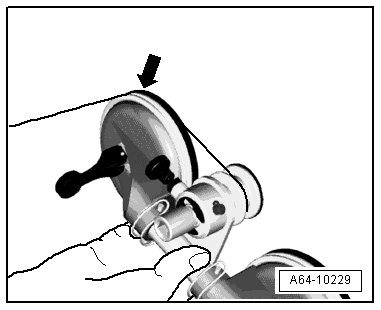
- Insert an additional guide awl - 2 - into the adhesive and secure it to the windshield with the suction cup as illustrated to make sure that the wire runs as close to the windshield as possible.
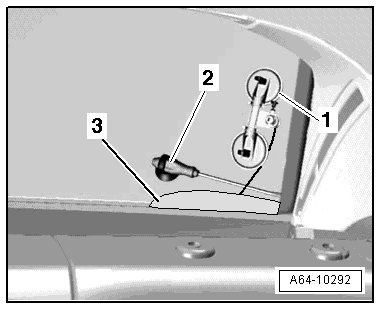
- Move the spool and the guide awl as illustrated and cut free the section along the D-pillar.
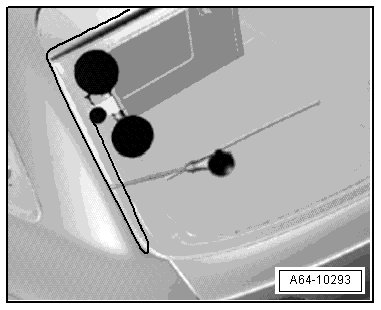
- Cut free the windshield further up to about the center.
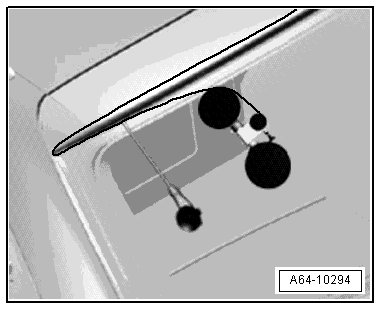
- Cut free the lower section of the windshield with the second spool
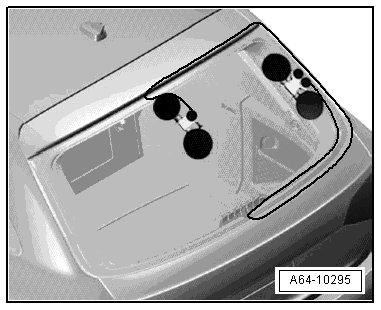
- Move the spool upward and insert the guide awl as illustrated.
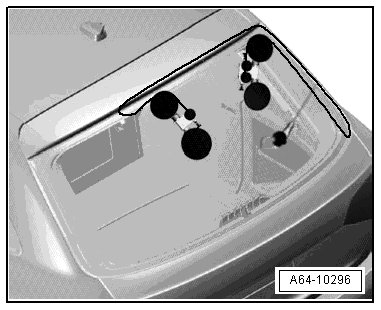
- Cut free the windshield along the D-pillar upward.
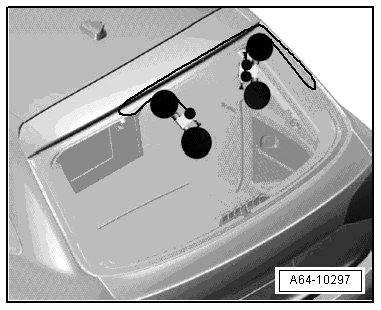
- Move the spool over the center of the windshield as well as over the first spool as illustrated and cut free the rest of the windshield along the top.
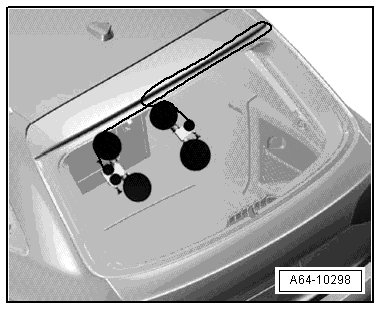
- Remove window with double suction cups.
Removing damaged rear window
When removing a window, always wear protective eyewear and leather gloves.
- Protect body and interior from glass splinters.
- Remove glass pieces from adhesive material.
- Disconnect rear window defroster and window antenna connectors.
- Bond flange all around with fabric reinforced adhesive tape.
- Remove adhesive material (with glass residue) from window opening using electric cutter (V.A.G 1561A) and knife (V.A.G 1561/10) (with stopper roll).
Preparation for Installing Rear Window
• When reusing the undamaged window, cut rest of adhesive material on window and flange with electric cutter (V.A.G 1561 A) and scraper (25 mm) (V.A.G 1561/8) so it is even, but do not remove completely.
• Residual material acts as a base for the new adhesive sealing material.
• Keep adhesive surface free of dirt and grease.
• Only cut back adhesive surface shortly before installation.
• Do not prime or use a cleaning solution on the adhesive surface.
With New Window
- Clean window all around in adhesive area using cleaning solution (D 009 401 04).
• The ceramic application on the window is not primer.
• It must be primed before the application of adhesive sealing material!
- Apply glass and paint primer (D 009 200 02) as described.
Applying Primer
- Apply primer - 3 - evenly in one stroke between the adhesive stop profiles on the window - 4 - using the applicator - 2 -.
- Beginning applying with saturated felt.
• Curing time 10 minutes
Primer conducts electricity and must not touch rear window defroster distributing wire.
Window Flange
- If the windshield flange was damaged, then it must be repainted and if necessary, corrosion protected.
- Clean the repaired area with cleaning solution (D 009 401 04) and then apply glass and paint primer (D 009 200 02).
Installation
• Cross-section thickness of adhesive bead is determined by dimension of opening in nozzle tip and rate of application.
Dimensions for Adhesive Application
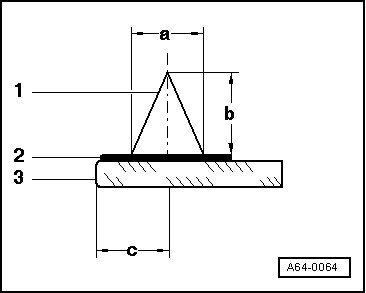
1. Adhesive sealing material
2. Primer
3. Window
• Dimension - a - = 8 mm ±2 mm
• Dimension - b - = 12 mm 2 mm
• Dimension - c - = note varying spacing dimensions to window edge. Refer to => [ (Item 2) Adhesive Sealing Material ] Rear Lid Window Assembly Overview
- Position the entire nozzle surface - 2 - on the window.
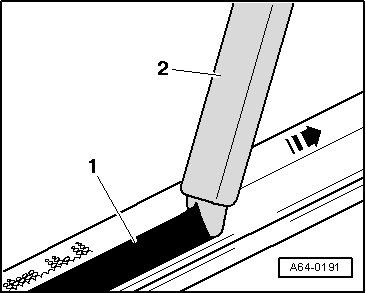
• Application direction - arrow - for adhesive bead - 1 -.
- Apply adhesive sealing material all around.
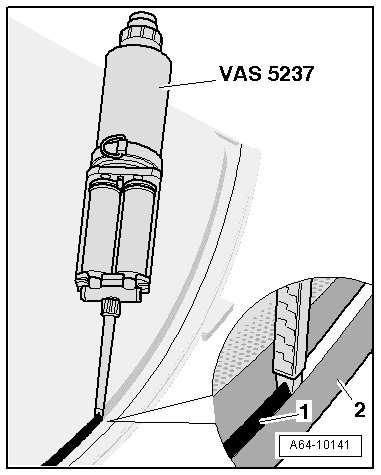
- With an undamaged removed window, apply adhesive to remaining bead.
- Insert the rear window into window cutout using double suction cups.
The window must be installed within 15 minutes or the adhesive sealing material will not adhere properly.
- Center window along sides.
- Observe minimum curing time. Refer to => [ Minimum Curing Times ] Flush-Bonded Windows.