Installation
1. Install the new antenna amplifier (2 screws, 2 connectors).2. Starting at the rear parcel shelf, route the new antenna cable (Avoid attaching the new antenna cable to pre-existing wire harnesses to prevent electrical interference):
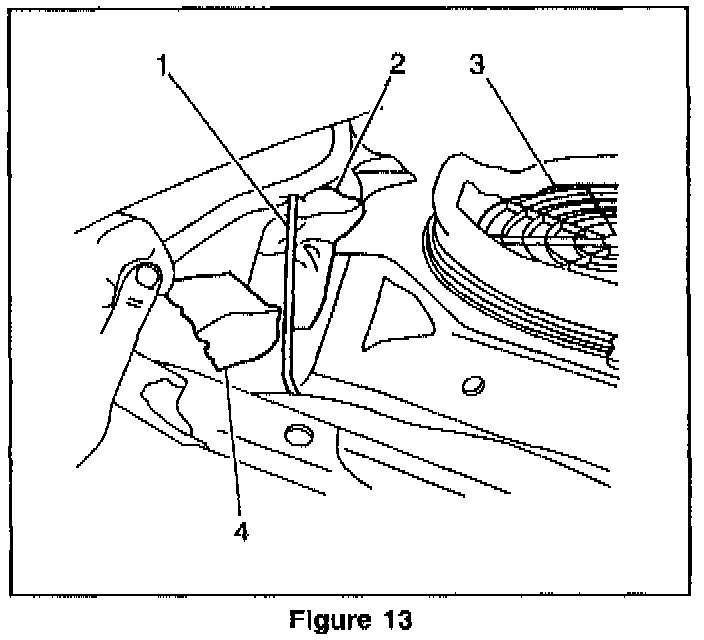
^ Place the tape (4) around the edge of the hole (2) in the rear seat-to-back window panel to prevent chafing of the new antenna cable (1). Refer to Figure 13.
^ Route the antenna cable through the hole in the rear seat-to-back window panel.
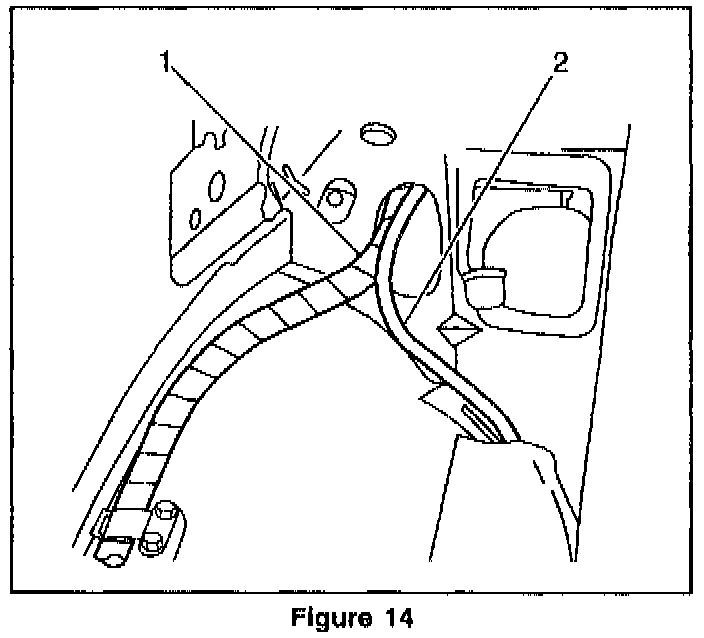
^ Run the antenna cable down the inboard side of the wheel well. Refer to Figure 14.
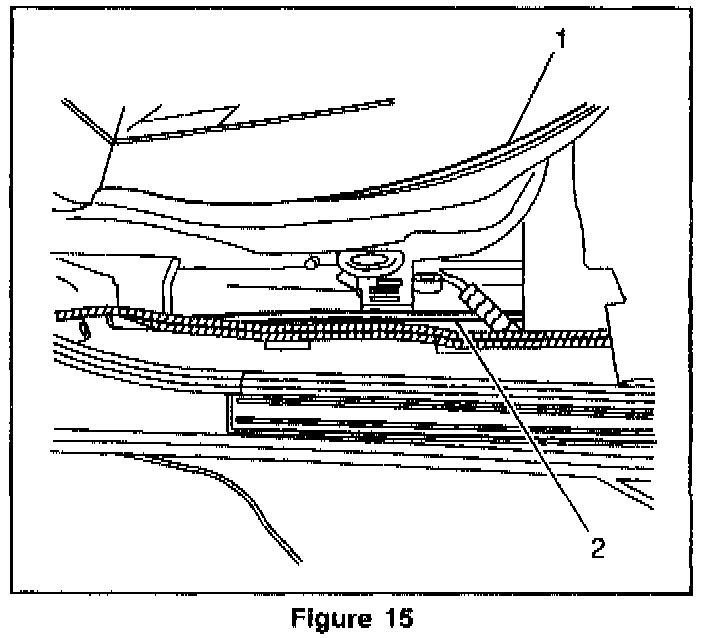
^ Run the antenna cable (2) along the RH side of the vehicle to the front kick panel. Refer to Figure 15.
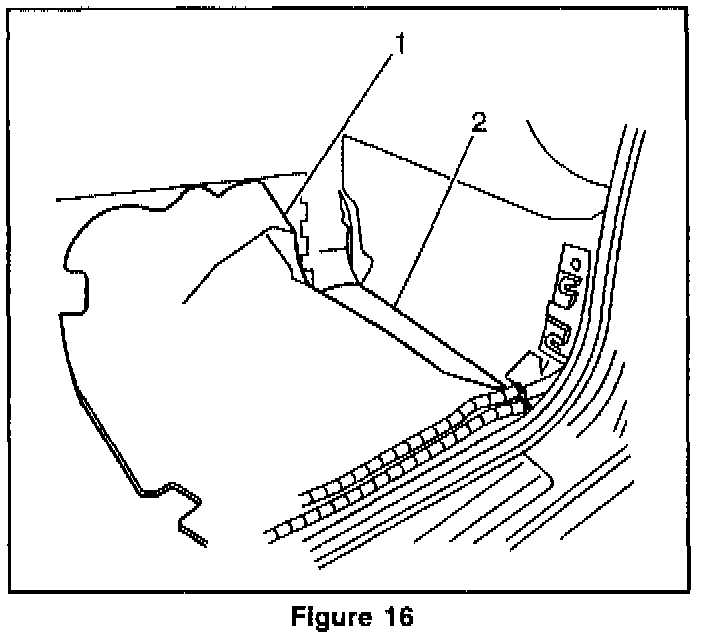
^ Pull back on the RH side front carpet (1) to expose the wire channel (2) on the floorpan. Refer to Figure 16.
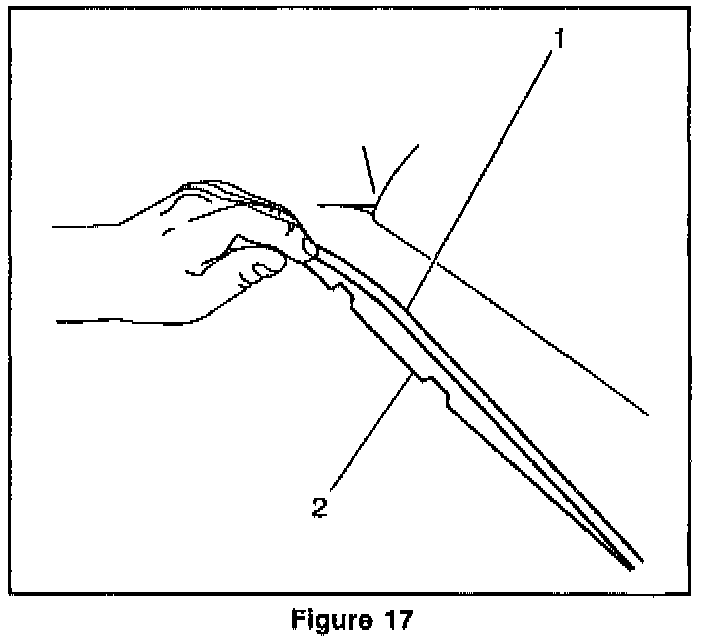
^ Route the antenna cable (1) in the track (2) of the existing plastic wire harness located on the front floor pan. Refer to Figure 17.
^ Route the antenna cable up to the radio along the side of the HVAC module.
3. Plug the antenna cable into the radio.
4. Connect the new cable into the antenna amplifier.
5. Secure the new cable to the rear seat-to-back window panel and floor pan with duct tape to prevent vibration.
6. Install the radio and Electronic Climate Control (ECC) head (6 screws).
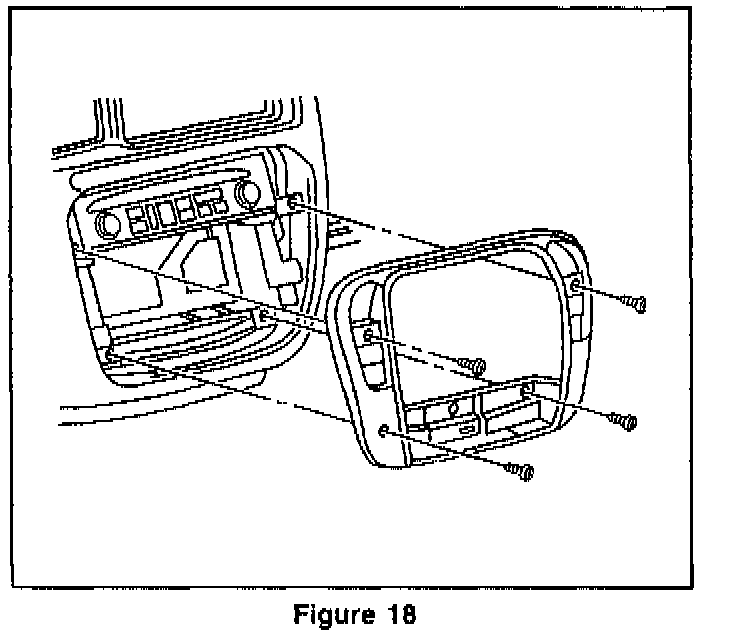
7. Install the radio bezel (Refer to Figure 18):
^ Install the electrical connectors to the radio bezel.
^ Install the radio bezel (4 screws).
^ Install the ashtray.
^ Install the switch screw covers and the trunk, fuel door and heated seat (if equipped) switches.
^ Install the Traction Control and Hazard switch covers.
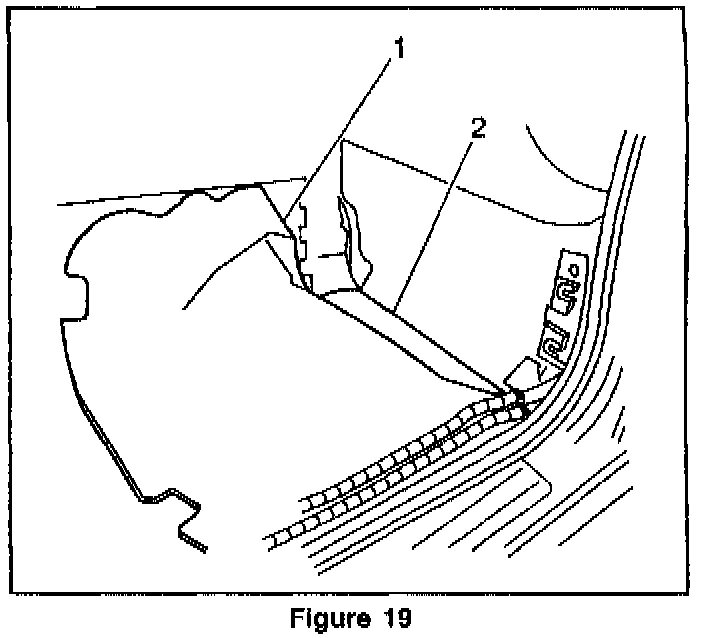
8. Reposition the RH side front carpet (1). Refer to Figure 19.
9. Install the RH side front kick panel (2 screws).
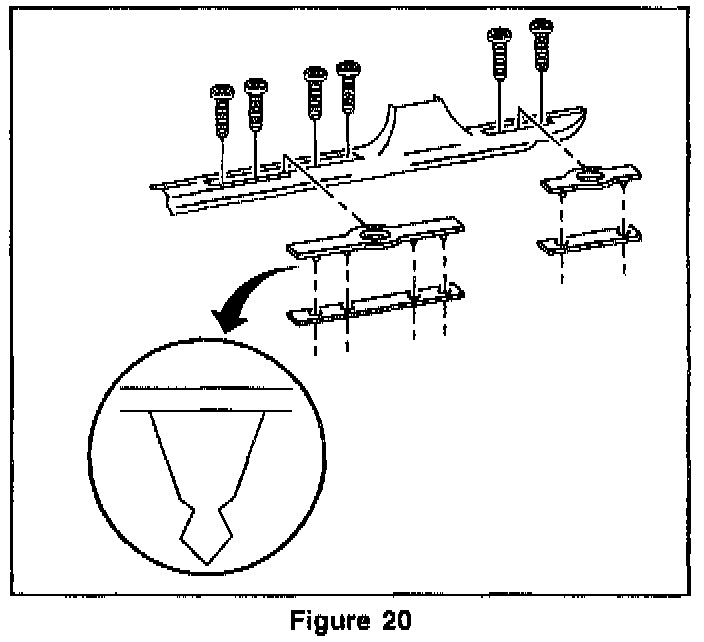
10. Install the RH side carpet retainer (7 screws). Refer to Figure 20.
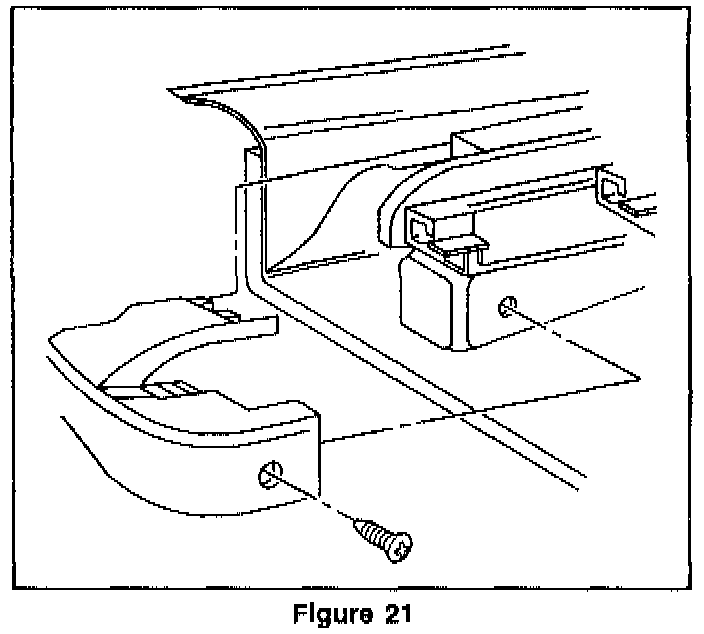
11. Install the RH side seat track cover (1 screw). Refer to Figure 21.
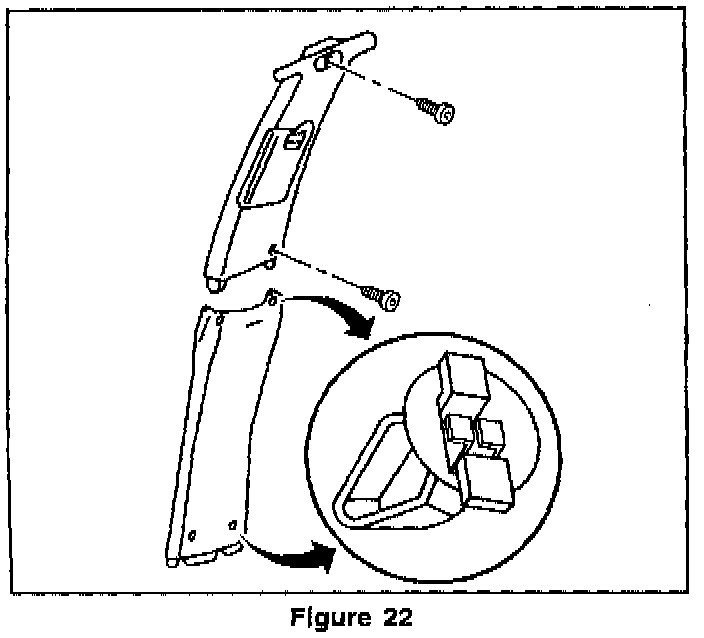
12. Install the RH side center pillar lower trim piece. Refer to Figure 22.
13. Install the RH side carpet retainer screw covers. Refer to Figure 20.
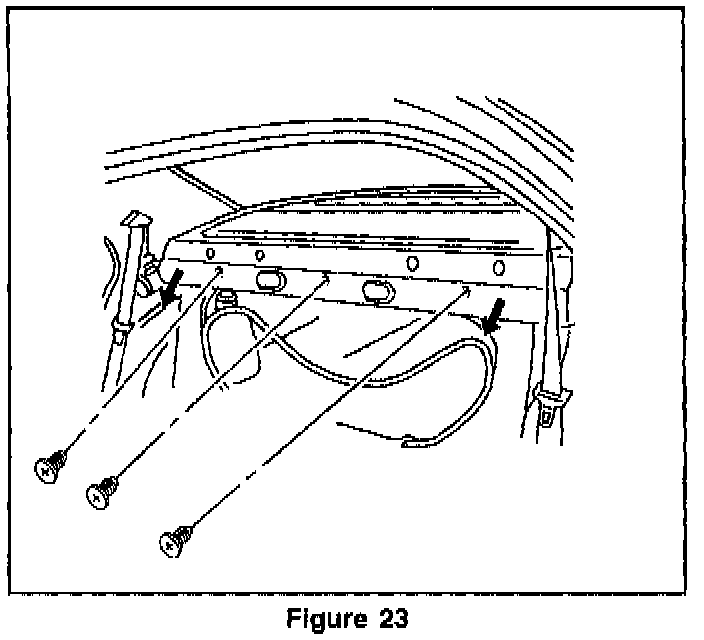
14. Install the rear seat-to-back window trim panel. Refer to Figure 23.
15. Connect the rear sunshade electrical connector (1998 vehicles only - if equipped).
16. From inside the trunk, install the rear sunshade nuts to the rear seat-to-back window panel (1998 vehicles only - if equipped).
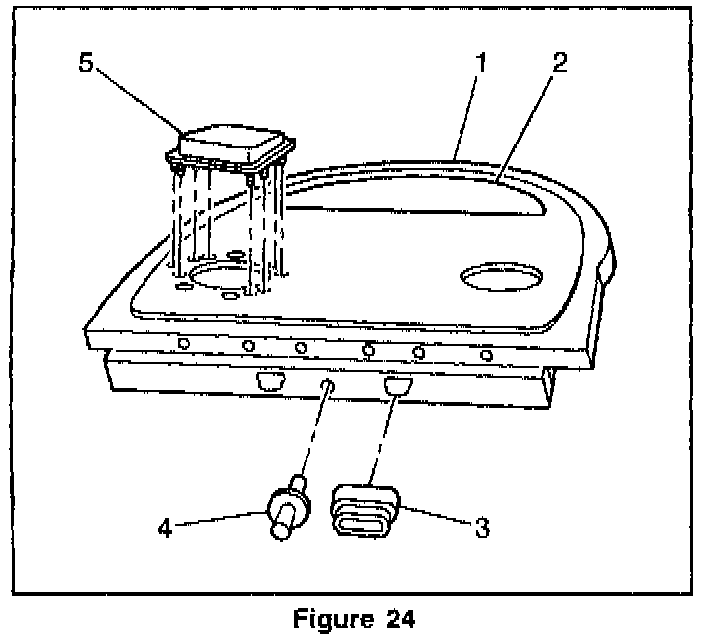
17. Install the rear air vent (1) to the rear seat-to-back window trim panel. Refer to Figure 24.
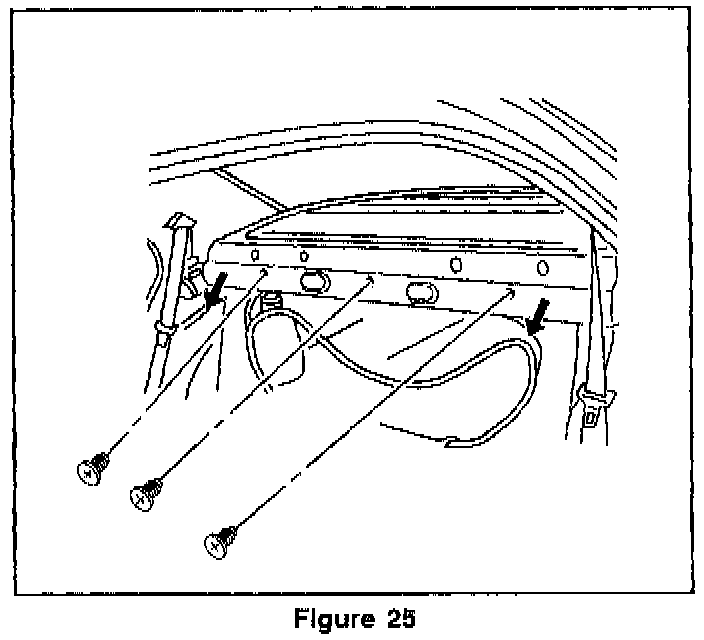
18. Install the 3 "Christmas Tree" pins to the rear seat-to-back window trim panel. Refer to Figure 25.
19. Install the rear center arm rest anchor pin (4) to the rear seat-to-back window trim panel. Refer to Figure 24.
20. Reposition the edge trim to the trunk opening.
21. Install the folding rear seat-back anchor covers (3) to the rear seat-to-back window trim panel. Refer to Figure 24.
22. Install the speaker grilles (5) (if equipped). Refer to Figure 24.
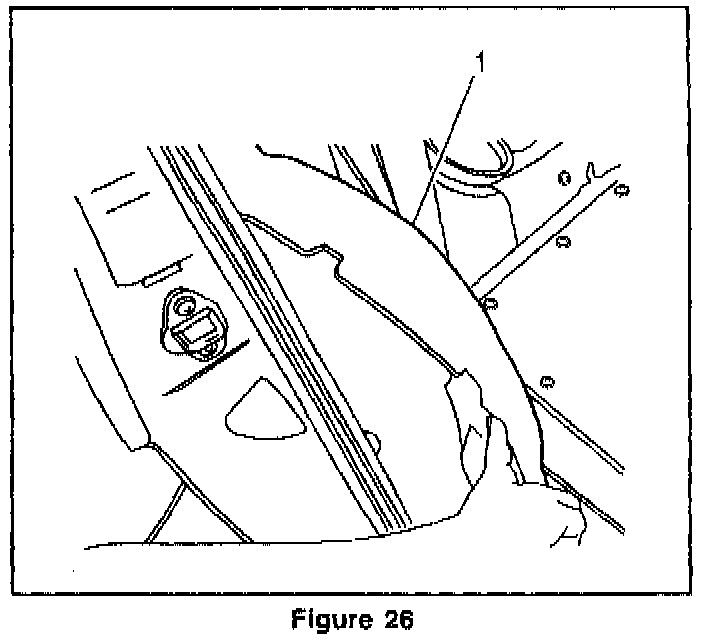
23. Install the RH side rear seat-to-back outer cushion wheel well insulator (1). Refer to Figure 26.
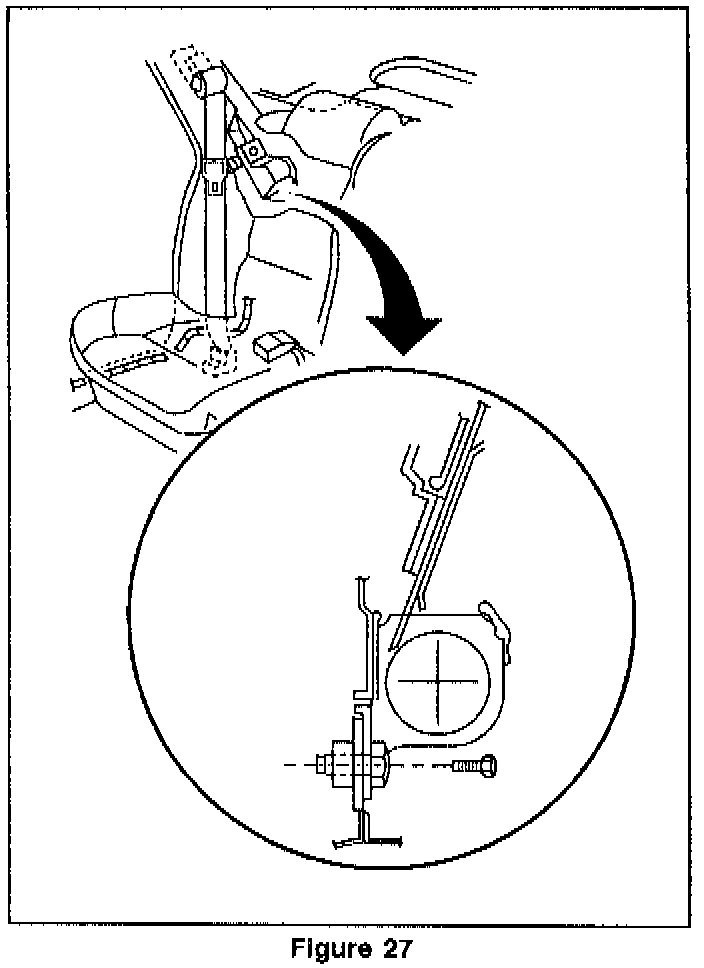
24. Install the rear seat side belt outer retractors (Refer to Figure 27):
^ Install the retractor bolts. Tighten to 35 N.m (26 lb ft.).
^ Release the seat belt.
25. Install the rear center seat belt retractor cover and retractor. (1998 vehicles only).
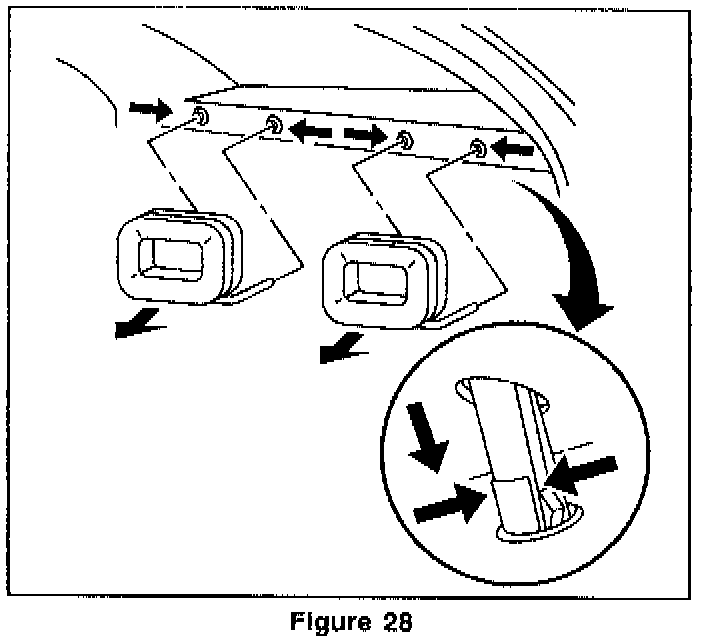
26. Install the rear headrest retainers to the rear seat-to-back window trim panel. Refer to Figure 28.
27. Install the rear head rests.
28. Install the rear seat-back outer cushions.
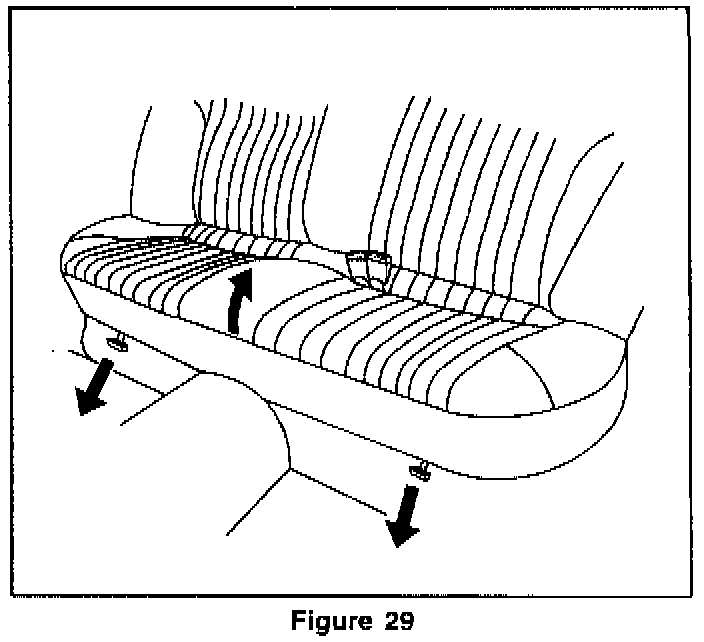
29. Install the rear seat cushion. Refer to Figure 29.
30. Connect the seat belt latch to the buckle on the center seat belt. (1998 vehicles only).