Front Door Opening Weatherstrip Replacement
Front Door Opening Weatherstrip Replacement
Removal Procedure
1. Remove the carpet retainer. Refer to Front Carpet Retainer Replacement (Front Carpet Retainer Replacement) in Interior Trim.
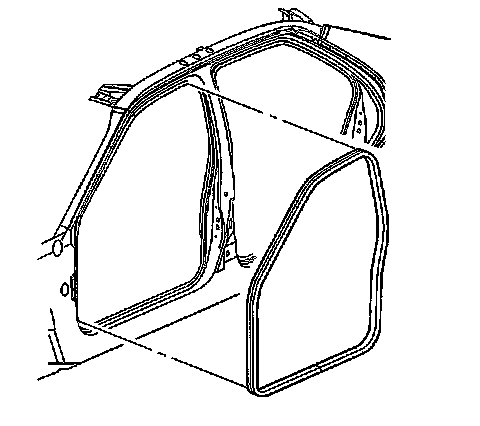
2. Start at the joint at bottom of door opening and pull the weatherstrip away from the pinch weld flange.
3. Work around the door opening and remove the weatherstrip.
Installation Procedure
Important: One paint dot on the weatherstrip indicates RH weatherstrip starting point, and two paint dots on the weatherstrip indicates LH weatherstrip starting point.
1. Position the paint dot in the upper corner of the center pillar.
2. Working downward along the rear edge, install the weatherstrip on the pinch weld flange, making sure that the carrier is fully seated in the corners.
3. From the center pillar corner working forward, install the weatherstrip along the roof rail and the front body hinge pillar flange, making sure that the carrier is fully seated in the corners.
4. Using a rubber mallet, ensure that the weatherstrip is seated on the entire pinch weld flange.
5. Using a plastic trim stick or equivalent, position the closeout lip over the interior trim around the door opening, or use the pull-string under the closeout lip of the new weatherstrip.
6. Install the carpet retainer. Refer to Front Carpet Retainer Replacement (Front Carpet Retainer Replacement) in Interior Trim.