Fluid Line/Hose: Service and Repair
Transmission Fluid Cooler Hose/Pipe Replacement^ Tools Required
- J 41623-B Cooler Quick Connect Tool
Removal Procedure
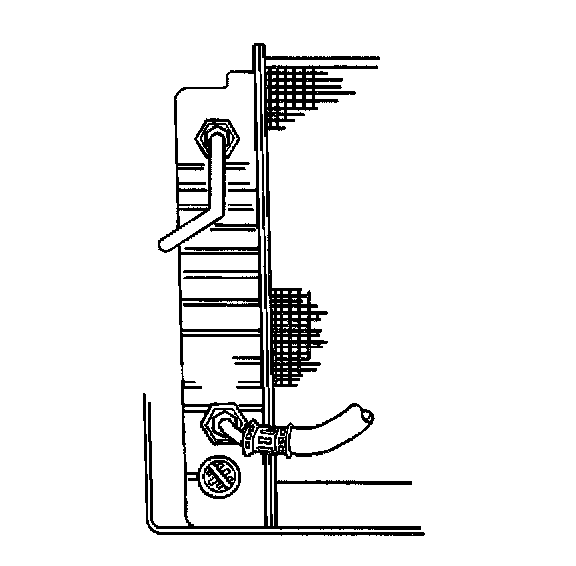
1. Remove the upper filler panel.
2. Remove the air cleaner assembly.
3. Remove the upper transaxle oil cooler pipe fitting from the radiator.
4. Remove the lower transaxle oil cooler pipe fitting from the radiator.
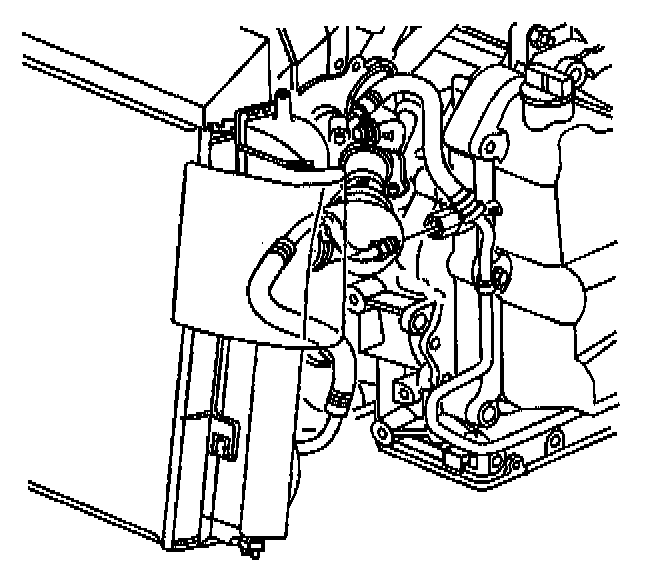
5. Slide the plastic cap off the lower transaxle oil cooler pipe quick connect fitting.
6. Disconnect the lower transaxle oil cooler pipe from the transaxle using the J41623-B.
7. Remove the lower transaxle oil cooler pipe from the vehicle.
8. Raise and support the vehicle. Refer to Vehicle Lifting.
9. Remove the rear exhaust manifold pipe in order to gain access to the upper transaxle oil cooler pipe quick connect fitting.
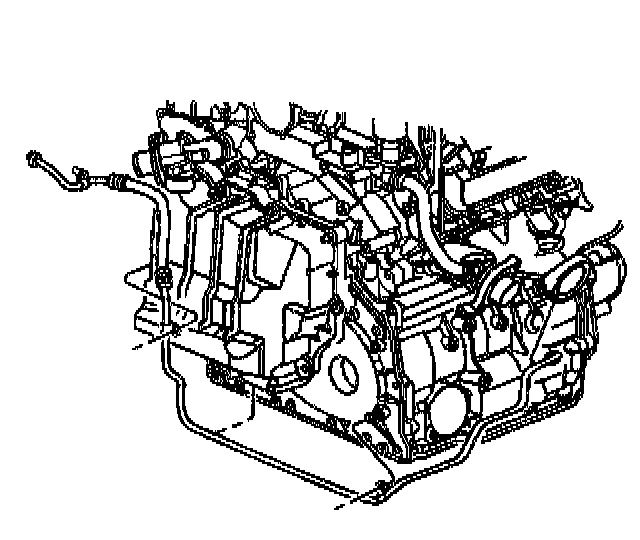
10. At the rear of the transaxle slide the plastic cap off the upper transaxle oil cooler pipe quick connect fitting.
11. Disconnect the upper transaxle oil cooler pipe from the transaxle using the J41623-B.
12. Remove the upper transaxle oil cooler pipe wire retainers from the oil cooler pipe.
13. Remove the upper transaxle oil cooler pipe from the vehicle.
Installation Procedure
Notice: Allow sufficient clearance around the transaxle oil cooler pipes and around the hoses to prevent damage or wear which may cause fluid loss.
1. Position the upper transaxle oil cooler pipe up into the engine compartment.
2. Install the upper transaxle oil cooler pipe wire retainers to the oil cooler pipe.
3. Push the upper transaxle oil cooler pipe into the transaxle quick connect fitting, until a "click" is heard.
4. Tug gently on the cooler pipe to ensure proper retention.
5. Slide the plastic cap over the quick connect joint.
6. Install the rear exhaust manifold pipe.
7. Lower the vehicle.
8. Position the lower transaxle oil cooler pipe into the engine compartment.
9. Push the lower transaxle oil cooler pipe into the transaxle quick connect fitting, until a "click" is heard.
10. Tug gently on the cooler pipe to ensure proper retention.
11. Slide the plastic cap over the quick connect joint.
Notice: Refer to Fastener Notice in Service Precautions.
Important: Ensure the lower transaxle oil cooler pipe is positioned horizontally while tightening.
12. Connect the lower transaxle oil cooler pipe fitting to the radiator.
^ Tighten the transaxle oil cooler pipe fitting to 25 Nm (18 ft. lbs.).
Important: Ensure the upper transaxle oil cooler pipe is positioned vertically while tightening.
13. Connect the upper transaxle oil cooler pipe fitting to the radiator.
^ Tighten the transaxle oil cooler pipe fitting to 25 Nm (18 ft. lbs.).
14. Install the air cleaner assembly.
15. Install the upper filler panel.
Notice: Do NOT overfill the transaxle. The overfilling of the transaxle causes foaming, loss of fluid, shift complaints, and possible damage to the transaxle.
16. Adjust the fluid level.
17. Inspect for fluid leaks.