Oil Pan: Service and Repair
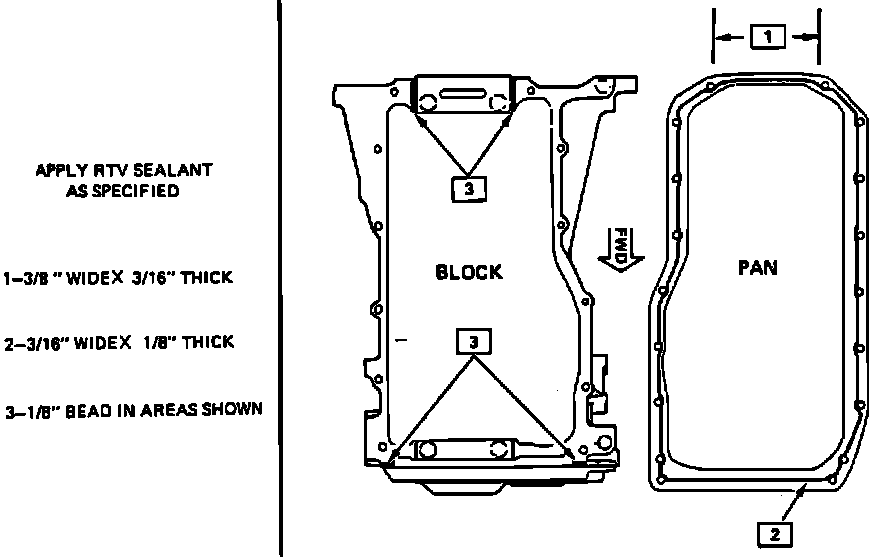
Fig. 12 Oil Pan Sealer Application:
1. Disconnect battery ground cable, then remove coolant reservoir bottle.
2. Remove engine torque strut, then air cleaner assembly.
3. Remove air inlet, then serpentine drive belt.
4. Remove A/C compressor from brackets and set aside, then engine oil level indicator.
5. Support engine using support fixture No. J-28467-A, then raise and support vehicle.
6. Drain engine oil, then remove starter and support bracket. Position starter aside.
7. Remove flywheel covers, then turn front wheels to full right position.
8. Remove engine wiring harness retainer screws under both sides of oil pan.
9. Remove right side engine splash shield, then front engine mount bracket bolts/nuts.
10. Remove transaxle mount nuts.
11. Using support fixture installed in step 5, raise engine approximately two inches, then remove front engine mount and bracket.
12. Loosen frame bolts, then remove oil pan attaching bolts.
13. Remove oil pan.
14. Reverse procedure to install, noting the following:
a. Apply RTV sealant as shown in Fig. 12.
b. Torque all bolts/nuts to specifications.