Reverse Synchronizer
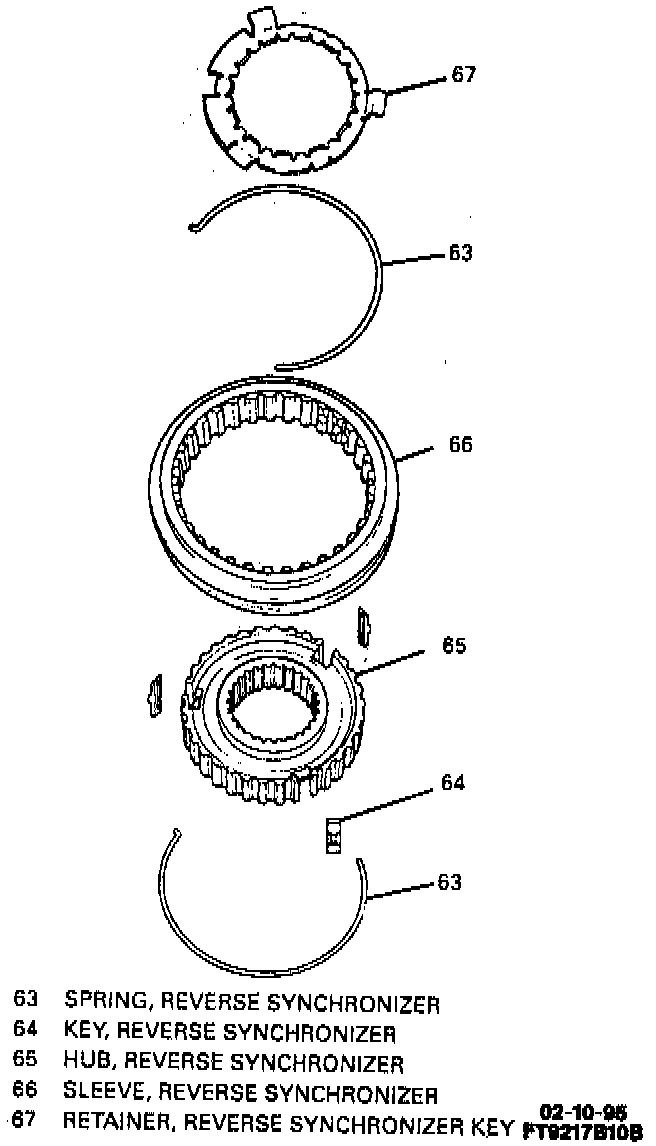
DISASSEMBLE
1. Synchronizer spring (63) using a small-bladed screwdriver.
2. Synchronizer sleeve (66) from hub (65) by pressing against inner hub (65).
3. Turn hub (65) over.
- Keys (64) will slide out from hub (65).
4. Synchronizer key retainer (67) using a small-bladed screwdriver through key slots of hub (65) and discard retainer (67).
5. Synchronizer spring (63) using a small-bladed screwdriver.
Clean
- Synchronizer components with solvent and dry with compressed air.
Inspect
Synchronizer components.
- Teeth for wear, nicked, burred or broken teeth. Replace hub and sleeve if excessive wear exists.
- Keys for wear or distortion. Replace if these conditions exist.
- Springs for distortion. Replace if these conditions exist.
- Retainer for distortion. Replace if these conditions exist.
NOTICE: If scuffed, nicked, burred or scoring conditions cannot be reconditioned by hand with a soft stone or crocus cloth, replace the component.
ASSEMBLE
1. Synchronizer sleeve (66) to hub (65).
- Align key openings in hub (65) With cuts in synchronizer sleeve (66).
2. Keys (64) with slots facing hub (65).
3. Synchronizer spring (63) using a small-bladed screwdriver.
- Locate spring tang to one of the key slots.
4. Turn synchronizer assembly (62) over.
5. Synchronizer spring (63) using a small-bladed screwdriver.
- Locate spring tang on same key but wind in opposite direction.
6. New synchronizer key retainer (67).
- Locate key retainer tangs over synchronizer keys (64).