ABS Motor Pack Replacement
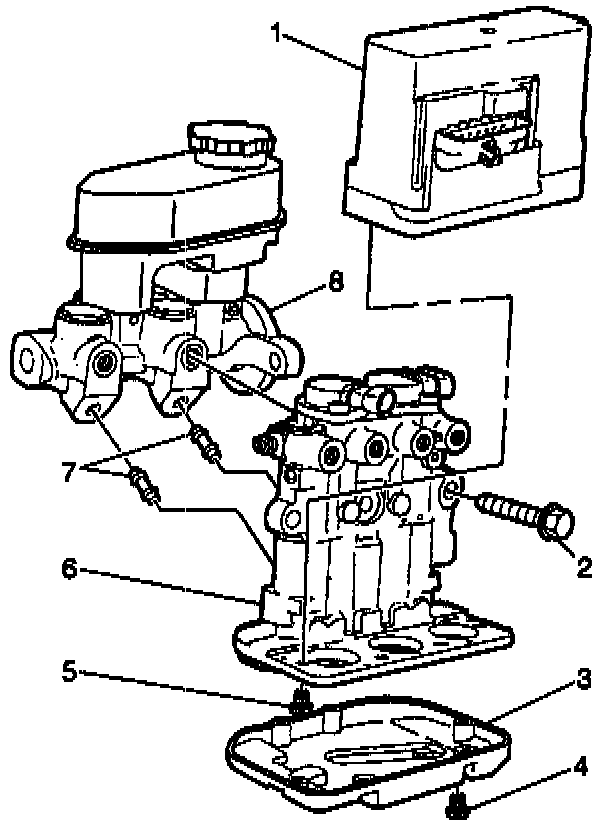
REMOVAL PROCEDURE
1. Remove the gear cover (3).
Important:
^ Use care when handling the motor pack to avoid damaging the motor pack connector. Make sure brake fluid does not accidentally intrude into the motor pack. Brake fluid in the motor pack may cause a premature failure of the motor pack.
^ Use care when handling the motor packs. Replace the motor packs if the motor packs are dropped or damages during handling.
2. Remove the Torx head screws (5) that attach the motor pack (1).
3. Remove the motor pack assembly (1).
Important: If the disassembly of the modulator/master cylinder assembly was caused by an ABS or ETS hydraulic functional test that did not pass, the Automated ABS brake motor pack Diagnosis Test should be performed. Refer to Scan Tool diagnostics in Antilock Brake System. The Automated ABS brake motor pack Diagnosis Test isolates the motor pack or brake modulator.
No repair of the motor pack is authorized. Replace as an assembly.
INSTALLATION PROCEDURE
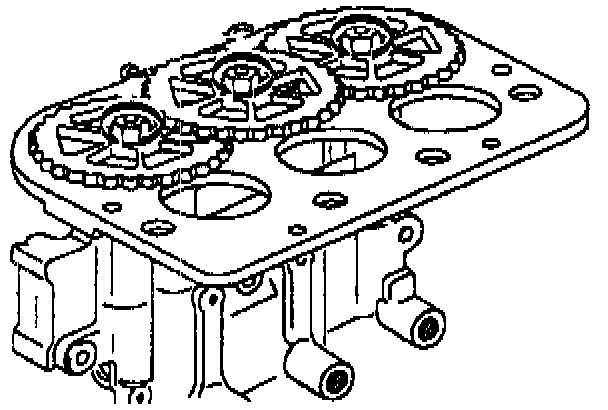
1. With the modulator positioned upside down, rotate each ABS brake modulator gear counterclockwise until movement stops.
The above procedure will cause the following conditions:
^ The pistons on the ABS brake modulator will be positioned very close to the top of the modulator bore.
^ The brake bleeding procedure becomes simplified.
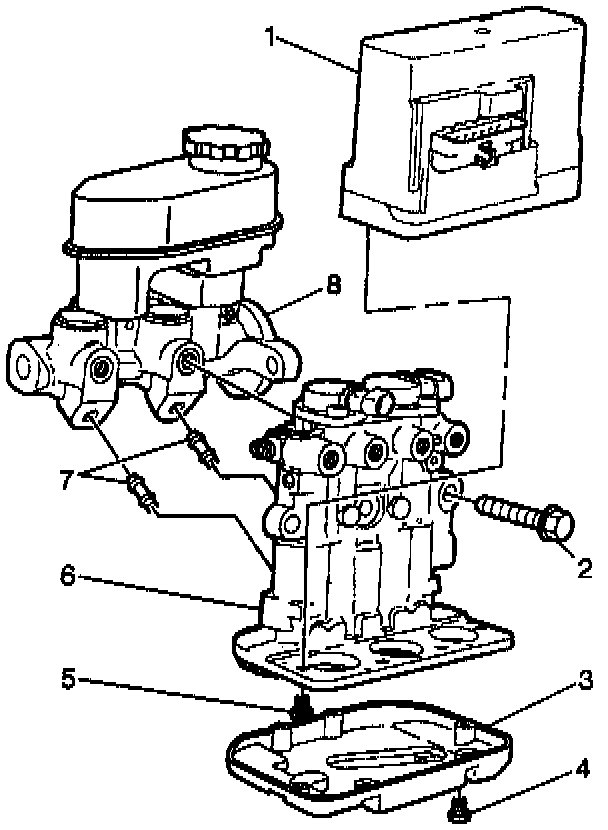
IMPORTANT: Use care when handling the motor packs. Replace the motor packs if the motor packs are dropped or damaged during handling.
Align each of the three motor pack pinions with the modulator gears.
2. Install the motor pack (1) to the modulator assembly (6).
3. Install Torx head screws (4).
^ Tighten the Torx head screws to 4.5 Nm (40 inch lbs.).
NOTICE: Always use the correct fastener in the proper location. When you replace a fastener, use ONLY the exact part number for that application. The manufacturer will call out those fasteners that require a replacement after removal. The manufacturer will also call out the fasteners that require thread lockers or thread sealant. UNLESS OTHERWISE SPECIFIED, do not use supplemental coatings (paints, greases, or other corrosion inhibitors) on threaded fasteners or fastener joint interfaces. Generally, such coatings adversely affect the fastener torque and joint clamping force, and may damage the fastener. When you install fasteners, use the correct tightening sequence and specifications. Following these instructions can help you avoid damage to parts and systems.
4. Install the gear cover (3) onto the modulator/brake master cylinder assembly.
5. Perform Motor Rehome Procedure.
6. Perform the Diagnostic System Check