Pressure Plate: Service and Repair
REMOVAL PROCEDURE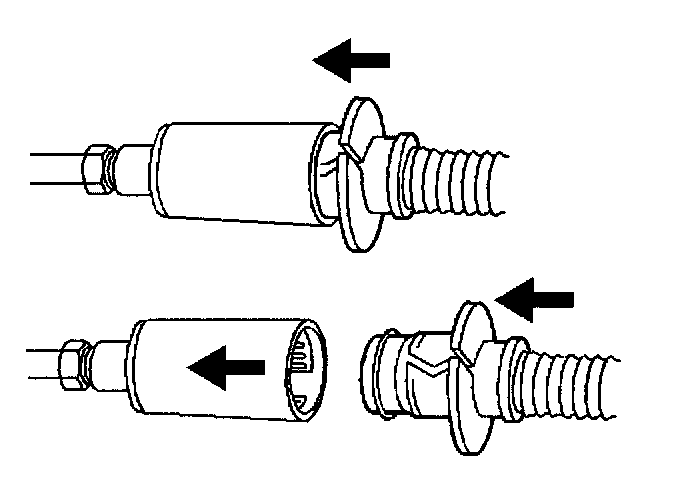
1. Disconnect the negative battery cable.
CAUTION: Refer to Battery Disconnect Caution in Service Precautions.
2. Disconnect the clutch actuator cylinder line.
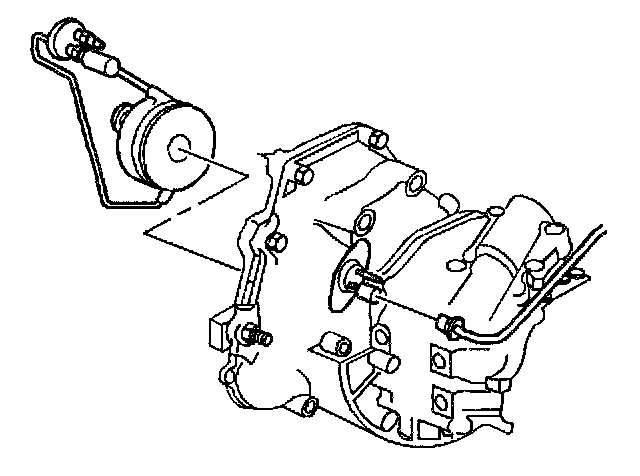
3. Remove the clutch master cylinder assembly from the clutch actuator cylinder.
4. Remove the transmission. Refer to Transmission Replacement in Manual Transmission.
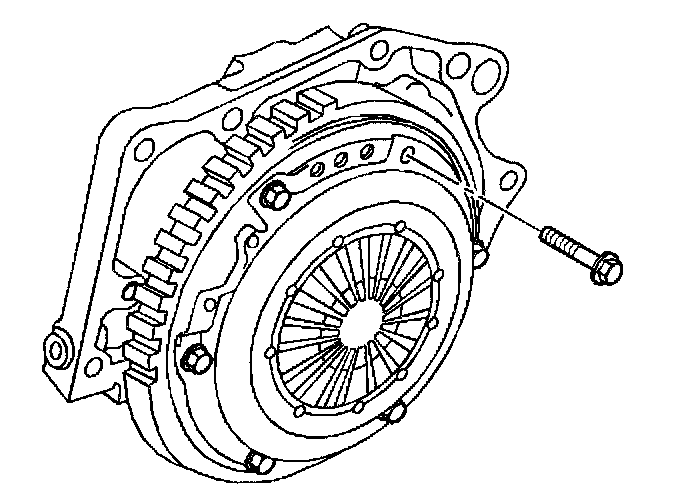
5. Remove the clutch cover bolts one turn at a time, until spring pressure is relieved.
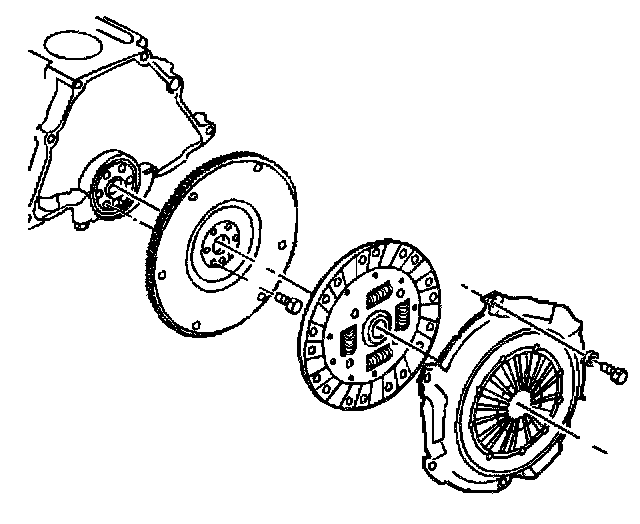
6. Remove the clutch cover and the clutch disc.
INSTALLATION PROCEDURE
^ Tools Required
- J 29074 Clutch Alignment Arbor
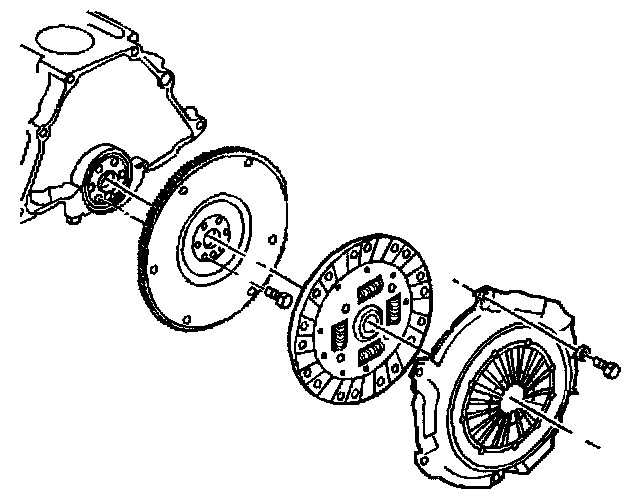
1. Align the Heavy Side of the flywheel assembly (stamped with an X), with the clutch cover Light Side (marked with paint).
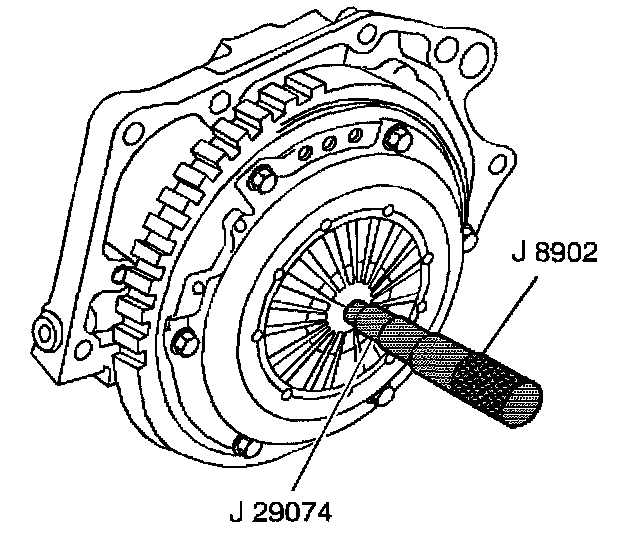
2. Install the J 29074 in order to support the clutch cover to the flywheel assembly.
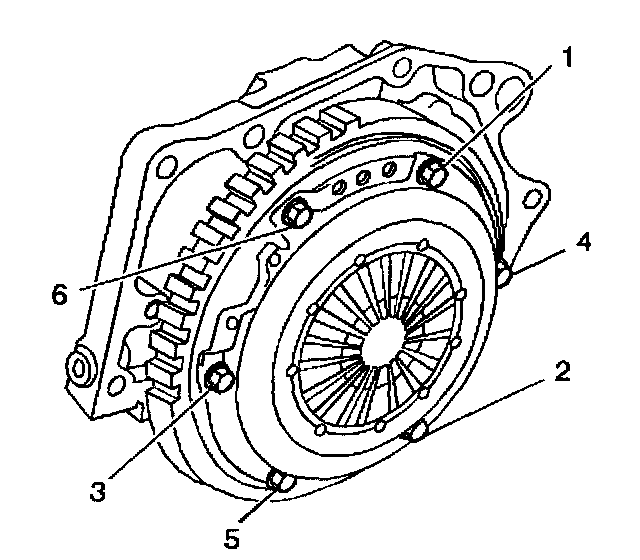
3. Install the clutch cover to flywheel bolts.
3.1. Follow the tightening sequence. Tighten the bolts to 16 Nm (12 ft. lbs.).
3.2. Tighten the bolts to specifications. Refer to Fastener Tightening Specifications.
NOTICE: Refer to Fastener Notice in Service Precautions.
4. Lubricate the inside diameter of the bearing with GM P/N 12345777, or equivalent.
5. Install the transmission. Refer to Transmission Replacement in Manual Transmission.
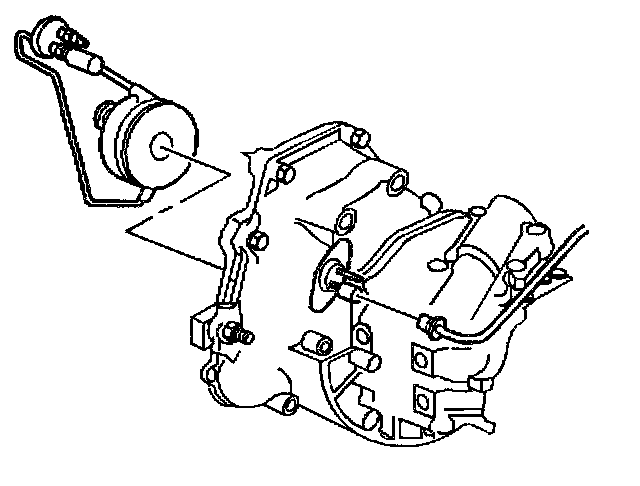
6. Install the clutch master cylinder assembly to the clutch actuator cylinder.
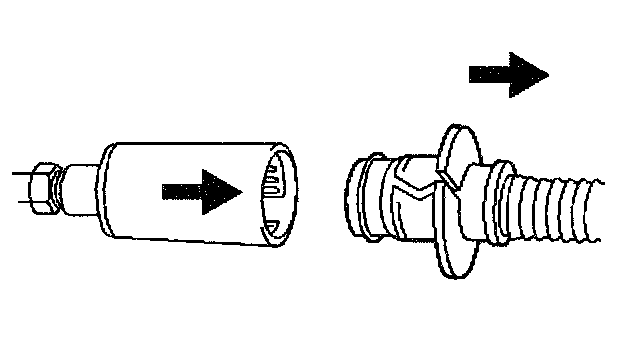
7. Connect the clutch actuator cylinder line.
8. Bleed the hydraulic system. Refer to Hydraulic Clutch Bleeding.
9. Connect the negative battery cable.