Wiring Upgrades For 2000 Models With M/T and Export Vehicles
Important:^ In order to complete the wiring upgrades listed in the section, you will need to order P/N 88952428, Wire kit, Strg Wheel Theft Dtrnt.
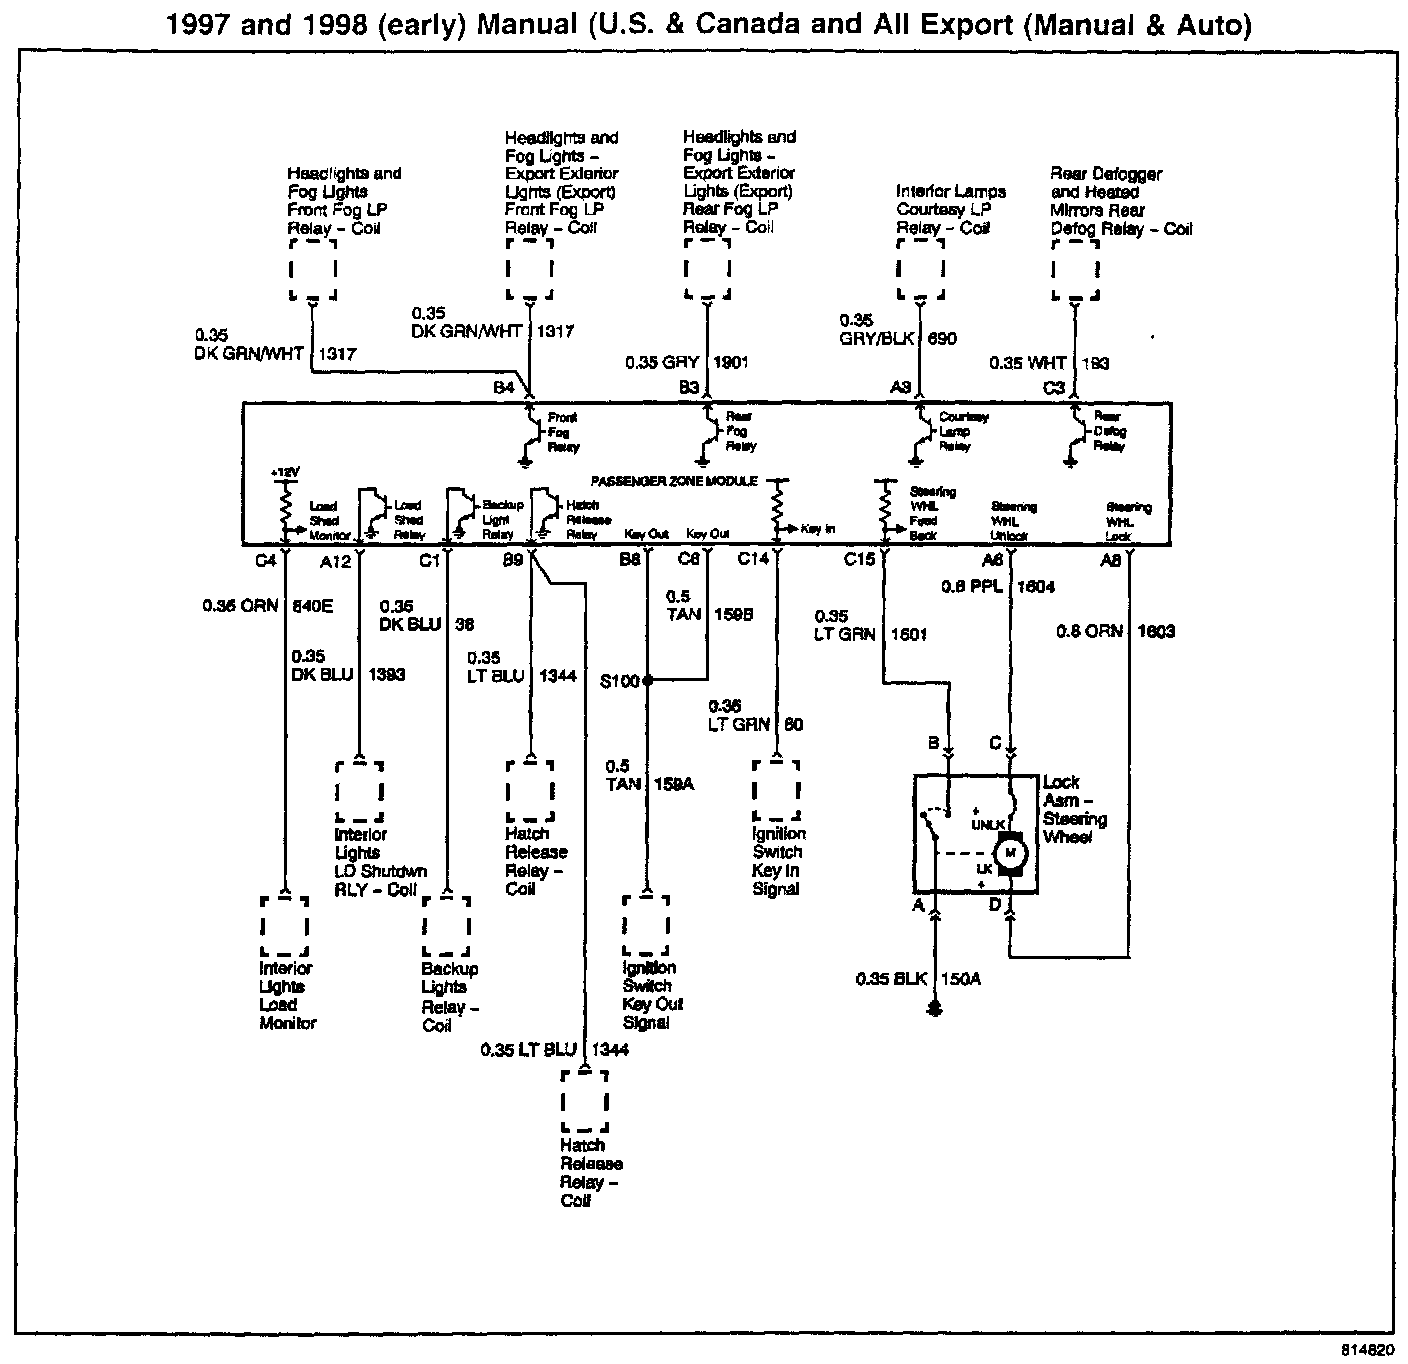
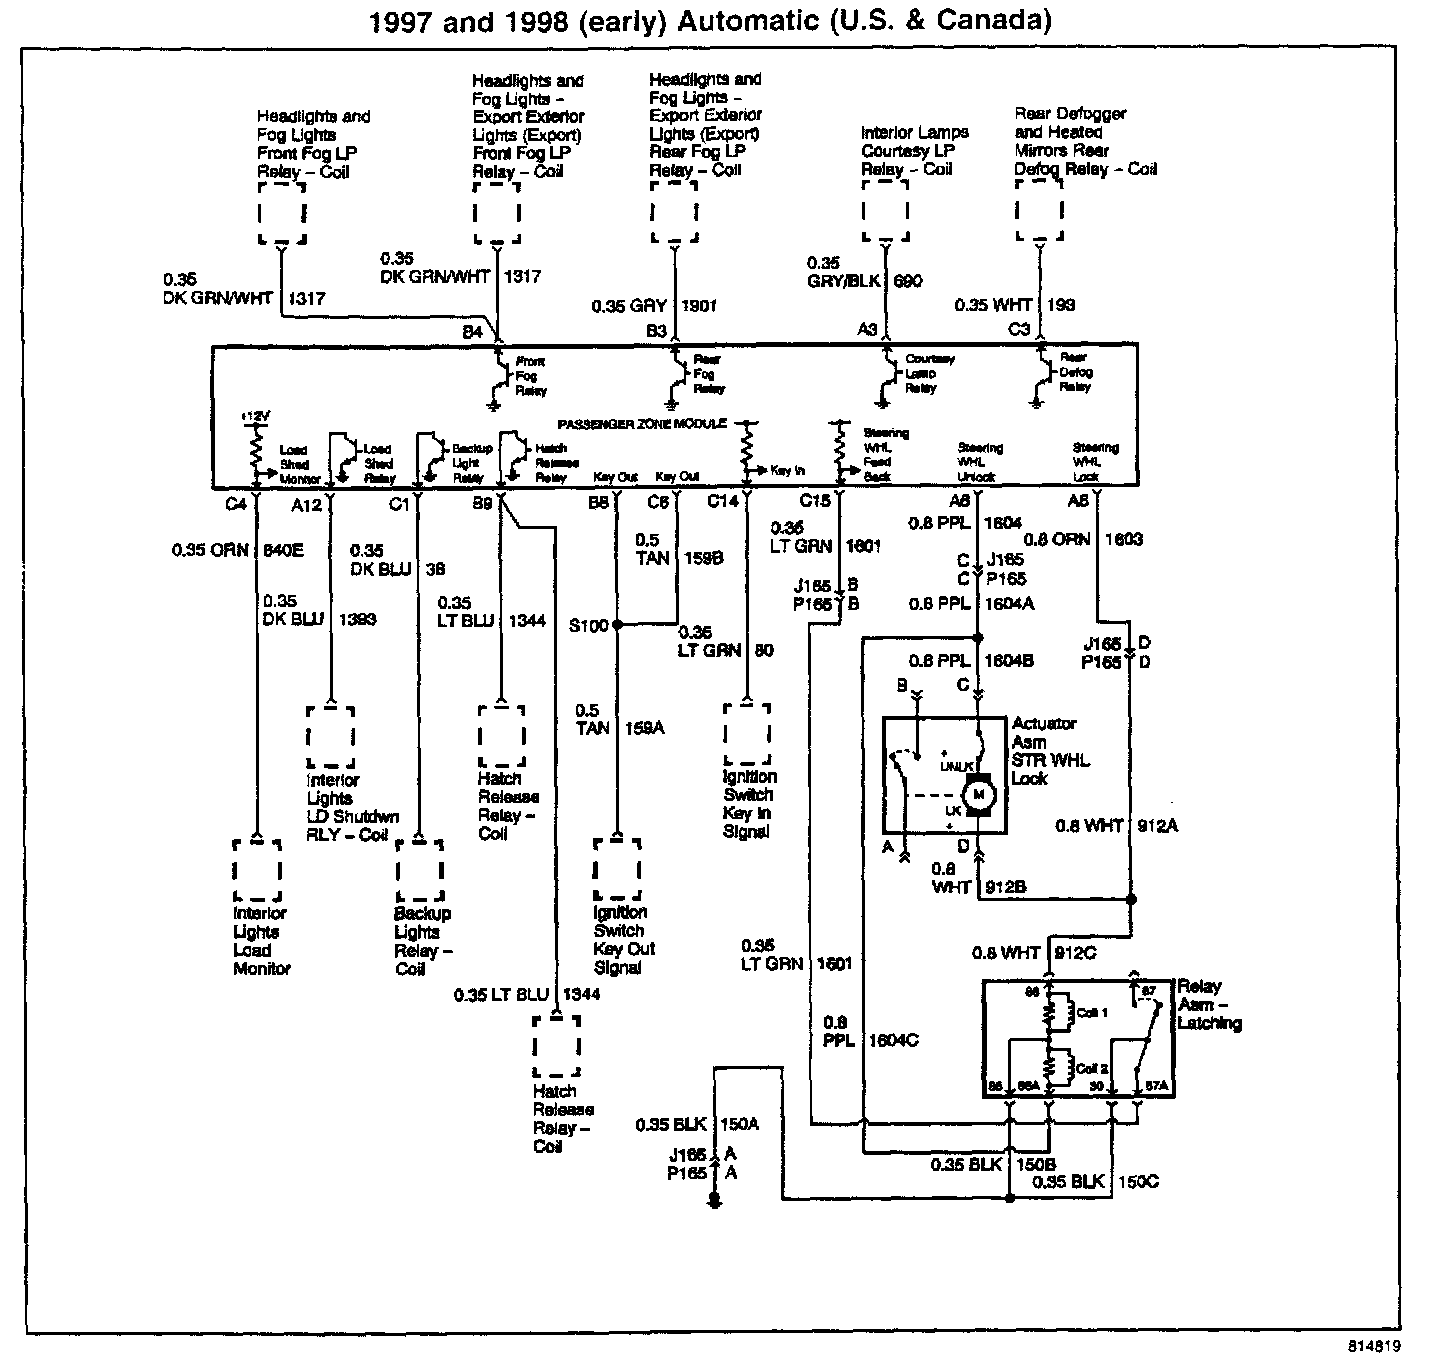
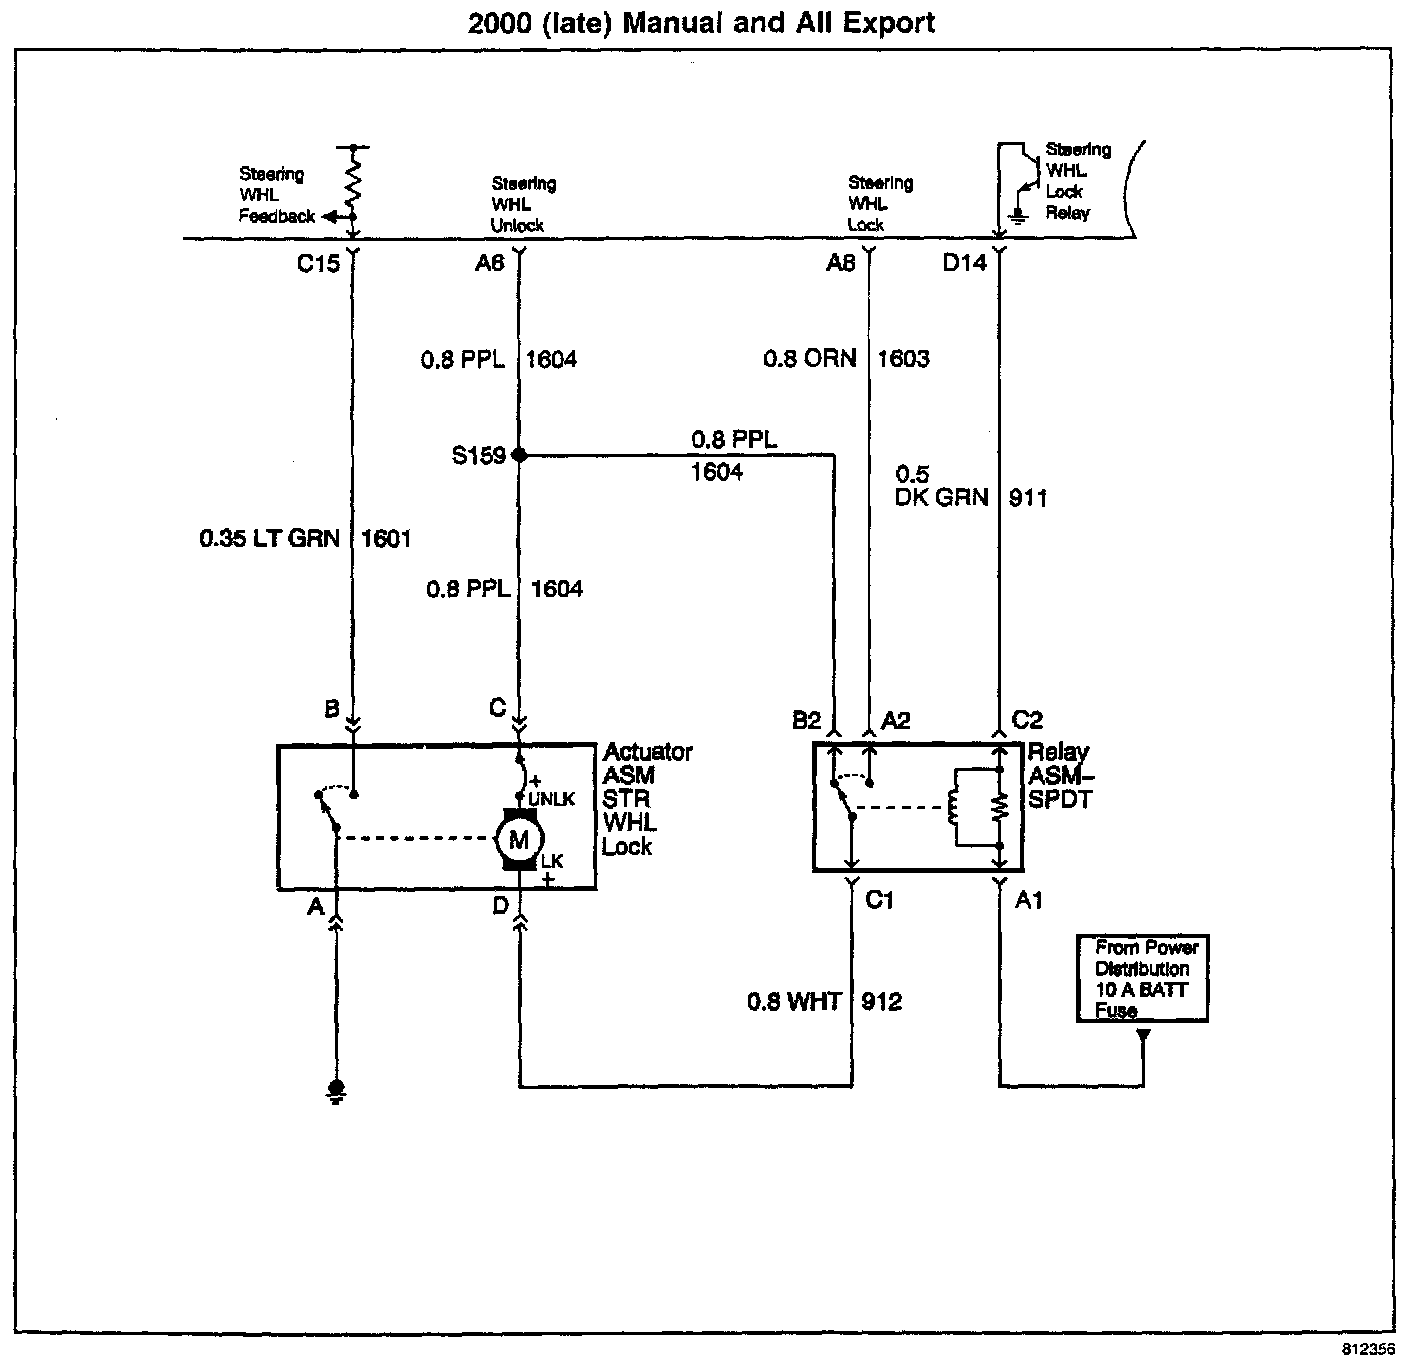
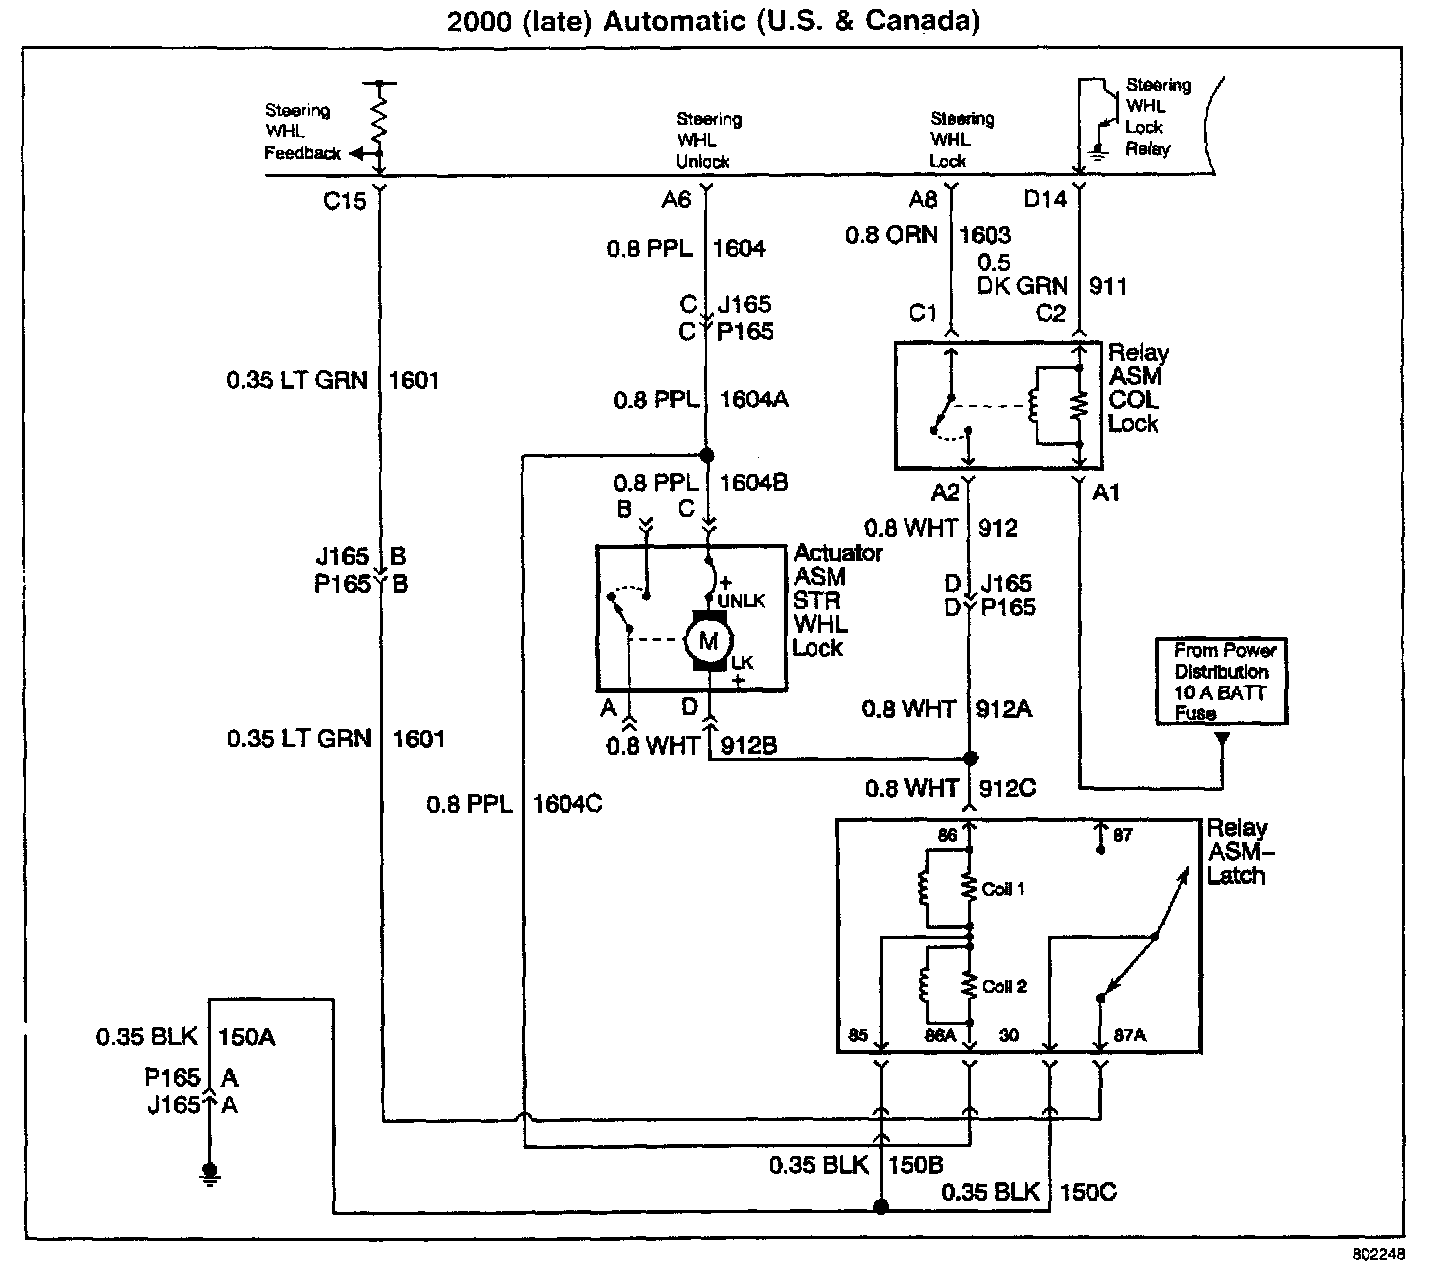
^ You may use the schematics shown to aid in verifying the installation of the new relay and jumper wire.
1. Remove the passenger side kick panel to access the electrical panel.
2. Release the retainer holding the BCM.
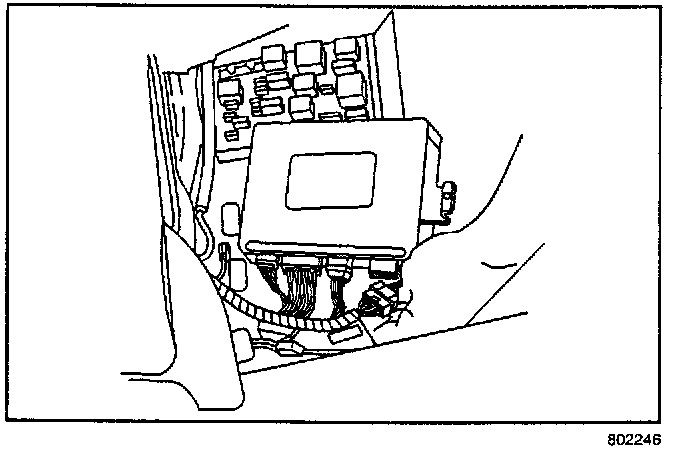
3. Disconnect the green 16-way connector from the BCM. The proper connector is illustrated. (BCM rotated 90 degrees)
4. Remove the purple wire and terminal from cavity A6 of the BCM connector.
5. Install the heat shrink tubing over the wire and connect the removed terminal to the jumper wire.
6. Apply the heat shrink tubing to the splice point and heat.
7. Install the jumper wire terminal into cavity A6 of the BCM connector.
8. Remove the Connector Position Assurance (CPA) clip from the back of the ECL relay connector.
9. Remove the ECL relay harness from the backside of the relay assembly.
10. Remove the relay.
11. Remove the orange wire from position C1 on the ECL relay connector.
12. Remove the white wire from position A2 on the ECL relay connector.
13. Swap the two terminal positions and re-insert, orange wire to A2 and white wire to C1.
14. Add the new purple wire from the jumper to terminal position B2.
15. Install the new single pole, double throw relay.
16. Install the Green 16-way connector to the BCM.
17. Secure the BCM to the electrical panel.
18. Tape the new purple wire neatly to another group of wires along it's path.
19. Install the electrical center kick panel cover.
20. Return to Step 25 under ECL Upgrade 1997, 1998 and 2000 Models with Manual Transmission or Export Vehicles.