Compressor Clutch Coil Replacement
REMOVAL PROCEDURETOOLS REQUIRED
^ J 33023-A Puller Pilot
^ J 8433 Compressor Pulley Puller
^ J 8433-3 Forcing Screw
^ J 33025 Clutch Coil Puller Legs
^ J 33024 Clutch Coil Installer
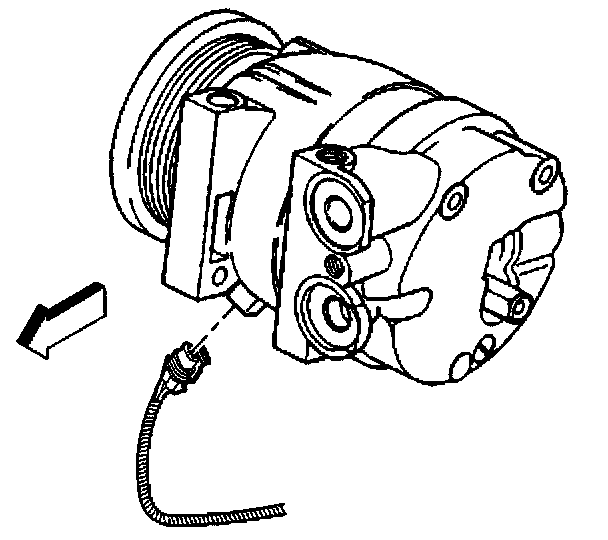
1. Remove the drive belt.
2. Raise the vehicle. Refer to Lifting and Jacking the Vehicle in General Information.
3. Remove the right side wheelhouse splash shield.
4. Disconnect the electrical connector from the compressor.
5. Remove the compressor clutch plate and hub assembly.
6. Remove the compressor rotor and bearing assembly.
7. Mark the clutch coil terminal location on the compressor front head.
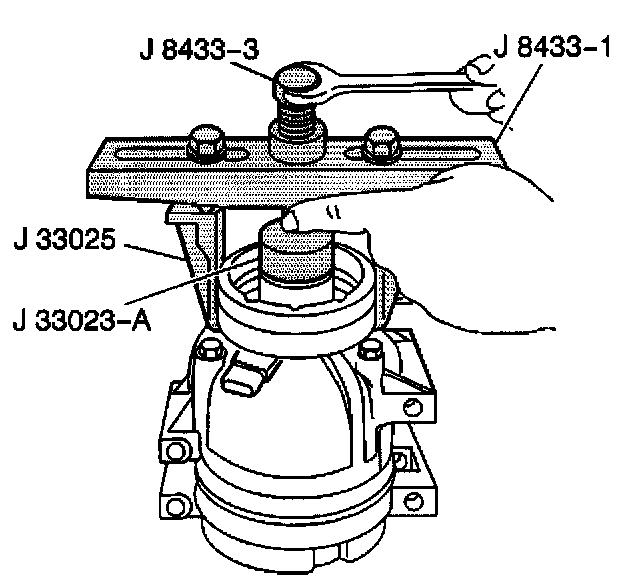
8. Install the following tools onto the A/C clutch coil:
^ J 8433-1
^ J 8433-3
^ J 33025
^ J 33023-A
9. Tighten the center forcing screw of the puller bar until the A/C clutch coil comes off of the compressor.
10. Remove the following item:
^ J 8433-1
^ J 8433-3
^ J 33025
^ J 33023-A
1 1. Remove the A/C clutch coil.
INSTALLATION PROCEDURE
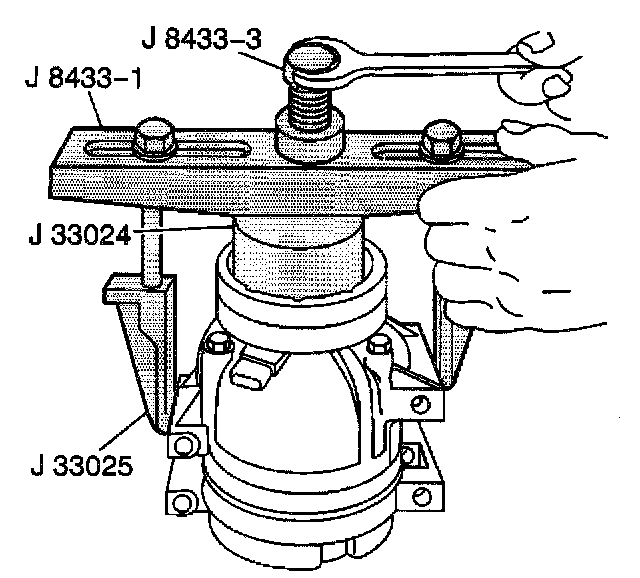
1. Place the clutch coil assembly on the front head with the coil terminal at the positioned at the mark made during disassembly.
2. Place the J 33024 over the internal opening of the clutch coil housing and align installer with the compressor front head.
3. Install the following tools onto the A/C clutch coil:
^ J 8433-1
^ J 8433-3
^ J 33024
4. Tighten the center screw of the puller bar until the screw pushes the A/C clutch coil all of the way down into position.
5. Remove the following tools from the compressor:
^ J 8433-1
^ J 8433-3
^ J 33024
6. Install the compressor clutch rotor and bearing assembly.
7. Install the A/C compressor pulley.
8. Install the electrical connector to the compressor.
9. Install the right side wheelhouse splash shield.
10. Lower the vehicle.
1 1. Install the drive belt.