Manual Bleeding Procedure
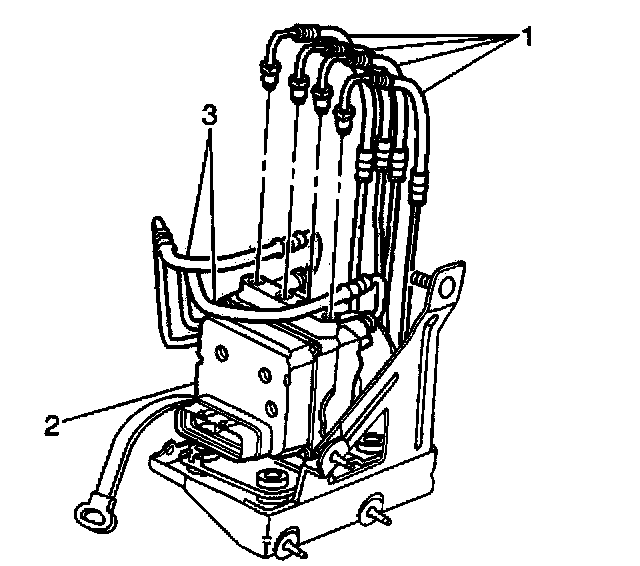
Notice: Avoid spilling brake fluid on any of the vehicle's painted surfaces, wiring, cables, or electric connectors. Brake fluid will damage the paint and the electrical connections. If any fluid is spilled on the vehicle, flush the area to lessen the damage.
Important: This procedure may require the help of an assistant to apply the brake pedal while the bleeder valves are opened and closed.
Important: Ensure that the master cylinder brake fluid level does not drop to the bottom of the master cylinder reservoir. You will be instructed to Inspect and fill the master cylinder reservoir at times during this procedure. However, the actual frequency of master cylinder reservoir filling REQUIRED will depend on the amount of fluid that is released. If the brake fluid level drops to the bottom of the master cylinder reservoir, start the bleed procedure again at Step 1.
1. Inspect and fill the master cylinder reservoir to the proper level as necessary. Refer to Master Cylinder Reservoir Filling.
Important: Use a shop cloth in order to catch escaping brake fluid.
2. Slowly open the ABS modulator brake pipe fitting (1) starting from the first pipe on the left side in order to allow the brake fluid to flow.
3. Press and hold the brake pedal approximately 75 percent of a full stroke.
Notice: Refer to Fastener Notice in Service Precautions.
4. Close the ABS modulator brake pipe fitting when air bubbles are no longer detected in the brake fluid.
^ Tighten the ABS modulator brake pipe fitting to 24 Nm (18 ft. lbs.).
5. Repeat Steps 2 and 3 for the remaining ABS modulator brake pipe fittings.
6. Inspect and fill the master cylinder reservoir to the proper level as necessary.
7. Raise and suitably support the vehicle. Refer to Vehicle Lifting.
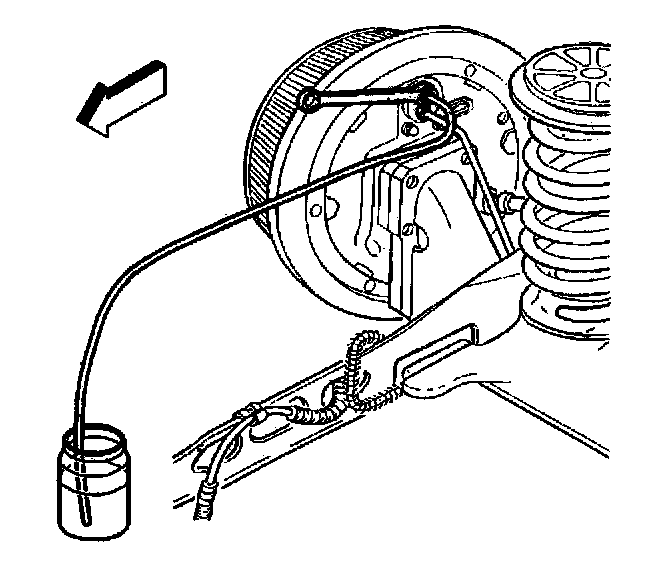
8. Install the clear plastic bleeder hose to the RIGHT REAR bleeder valve.
^ For vehicles with rear drum brakes, install the clear plastic bleeder hose to the wheel cylinder bleeder valve.
^ For vehicles with rear disc brakes, install the clear plastic bleeder hose to the brake caliper bleeder valve.
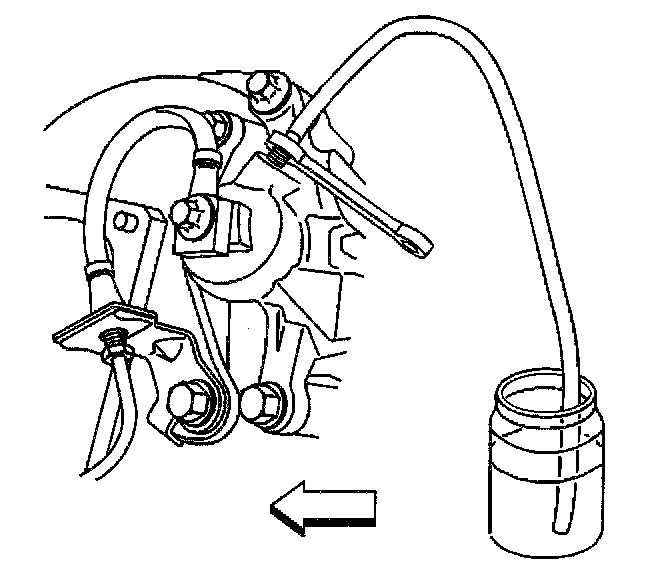
9. Submerge the opposite end of the clear plastic bleeder hose in a clean container partially filled with clean brake fluid.
10. Open the bleeder valve.
11. Press and hold the brake pedal approximately 75 percent of a full stroke.
12. Close the bleeder valve.
13. Release the brake pedal.
14. Repeat Steps 10 through 13 until air bubbles are no longer detected in the brake fluid.
^ For vehicles with rear drum brakes, tighten the wheel cylinder bleeder valve to 7 Nm (62 inch lbs.).
^ For vehicles with rear disc brakes, tighten the wheel cylinder bleeder valve to 11 Nm (97 inch lbs.).
15. Remove the clear plastic bleeder hose from the bleeder valve.
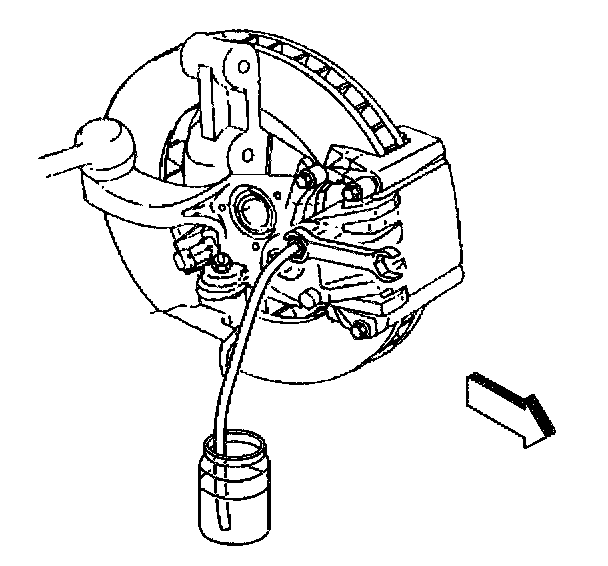
16. Install the clear plastic bleeder hose to the LEFT FRONT brake caliper bleeder valve.
17. Submerge the opposite end of the clear plastic bleeder hose in a clean container partially filled with clean brake fluid.
18. Open the bleeder valve.
19. Press and hold the brake pedal approximately 75 percent of a full stroke.
20. Close the bleeder valve.
21. Release the brake pedal.
22. Repeat Steps 18 through 21 until air bubbles are no longer detected in the brake fluid.
^ Tighten the brake caliper bleeder valve to 13 Nm (115 inch lbs.).
23. Remove the clear plastic bleeder hose from the bleeder valve.
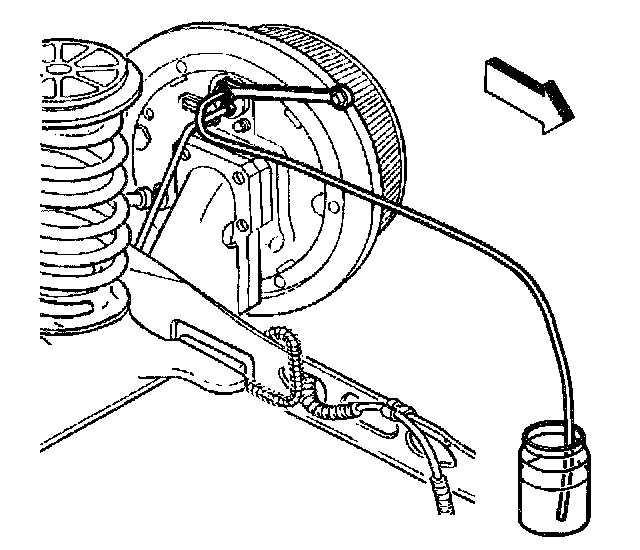
24. Install the clear plastic bleeder hose to the LEFT REAR bleeder valve.
^ For vehicles with rear drum brakes, install the clear plastic bleeder hose to the wheel cylinder bleeder valve.
^ For vehicles with rear disc brakes, install the clear plastic bleeder hose to the brake caliper bleeder valve.
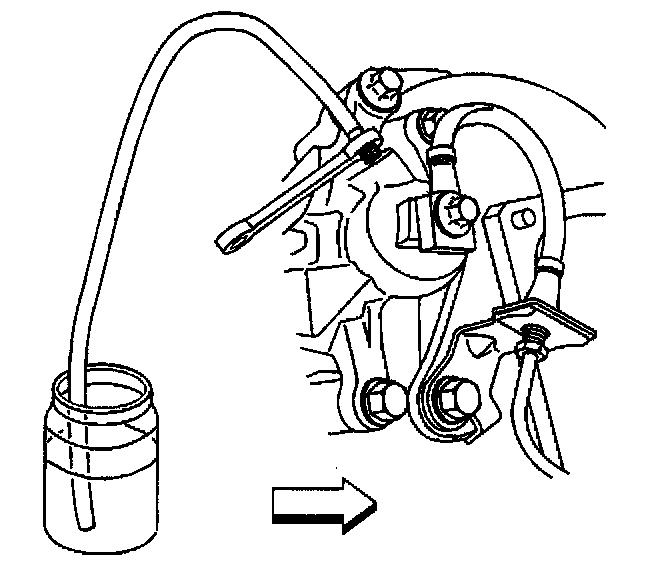
25. Submerge the opposite end of the clear plastic bleeder hose in a clean container partially filled with clean brake fluid.
26. Open the bleeder valve.
27. Press and hold the brake pedal approximately 75 percent of a full stroke.
28. Close the bleeder valve.
29. Release the brake pedal.
30. Repeat Steps 26 through 29 until air bubbles are no longer detected in the brake fluid.
^ Tighten
For vehicles with rear drum brakes, tighten the wheel cylinder bleeder valve to 7 Nm (62 inch lbs.).
^ For vehicles with rear disc brakes, tighten the wheel cylinder bleeder valve to 11 Nm (97 inch lbs.).
31. Remove the clear plastic bleeder hose from the bleeder valve.
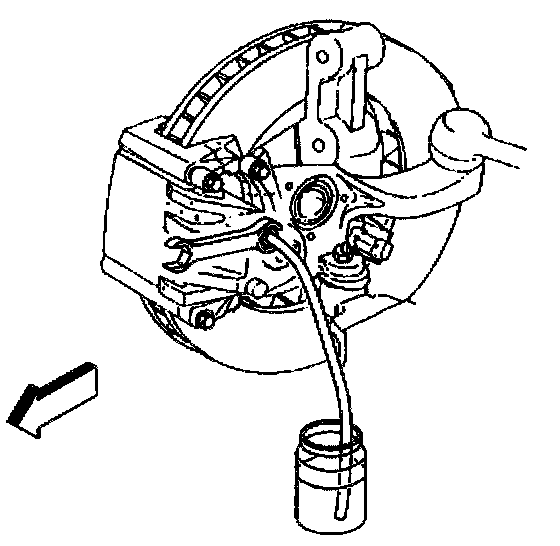
32. Install the clear plastic bleeder hose to the RIGHT FRONT brake caliper bleeder valve.
33. Submerge the opposite end of the clear plastic bleeder hose in a clean container partially filled with clean brake fluid.
34. Open the bleeder valve.
35. Press and hold the brake pedal approximately 75 percent of a full stroke.
36. Close the bleeder valve.
37. Release the brake pedal.
38. Repeat Steps 34 through 37 until air bubbles are no longer detected in the brake fluid
^ Tighten the brake caliper bleeder valve to 13 Nm (115 inch lbs.).
39. Remove the clear plastic bleeder hose from the bleeder valve.
40. Lower the vehicle.
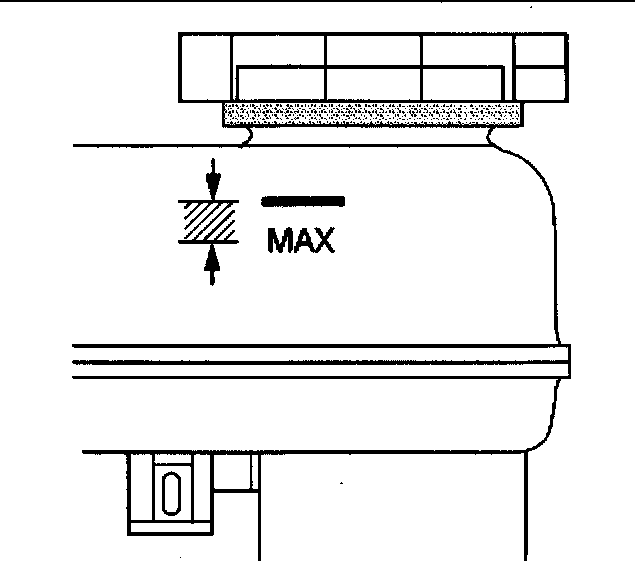
41. Remove the brake fluid reservoir cover.
42. Inspect the brake fluid level in the reservoir. Refer to Master Cylinder Reservoir Filling.
43. Install the brake fluid reservoir cover.
44. Turn the ignition switch to the RUN position, then turn off the engine. Apply the brake pedal with moderate force and hold the pedal. Note the pedal travel and feel.
45. If the pedal feels firm and constant and pedal travel is not excessive, start the engine. With the engine running, recheck the pedal travel.
46. If the pedal feel is still firm and constant and pedal travel is not excessive, perform a vehicle road test. Make several normal (non-ABS) stops from a moderate speed in order to ensure proper brake system function.
47. If pedal feel is soft or has excessive travel either initially or after engine start, refer to Automated Bleed Procedure.
48. Repeat the manual bleeding procedure, starting at Step 1.
Caution: Do not move the vehicle until a firm brake pedal is obtained. Failure to obtain a firm pedal before moving vehicle may result in personal injury.
49. Perform a vehicle road test. Make several normal (non-ABS) stops from a moderate speed in order to ensure proper brake system function.