Pressure Bleeding Procedure
^ Tools Required- J 29532 Diaphragm Type Brake Bleeder
- J 35589 Brake Bleeder Adapter
Notice: Pressure bleeding equipment must be of the diaphragm type. It must have a rubber diaphragm between the air supply and the brake fluid to prevent air, moisture, and other contaminants from entering the hydraulic system.
Notice: Avoid spilling brake fluid on any of the vehicle's painted surfaces, wiring, cables, or electric connectors. Brake fluid will damage the paint and the electrical connections. If any fluid is spilled on the vehicle, flush the area to lessen the damage.
1. Inspect and fill the master cylinder reservoir to the proper level as necessary. Refer to Master Cylinder Reservoir Filling.
2. Assemble the components as shown.
3. Install the J 35589 to the master cylinder reservoir.
4. Connect the J 29532 to the J 35589.
5. Adjust the J 29532 to 35 - 70 kPa (5 - 10 psi).
6. Wait approximately 30 seconds, then inspect the entire hydraulic brake system in order to ensure that there are no existing brake fluid leaks. Repair any brake fluid leaks.
7. Adjust the J 29532 to 205 - 240 kPa (30 - 35 psi).
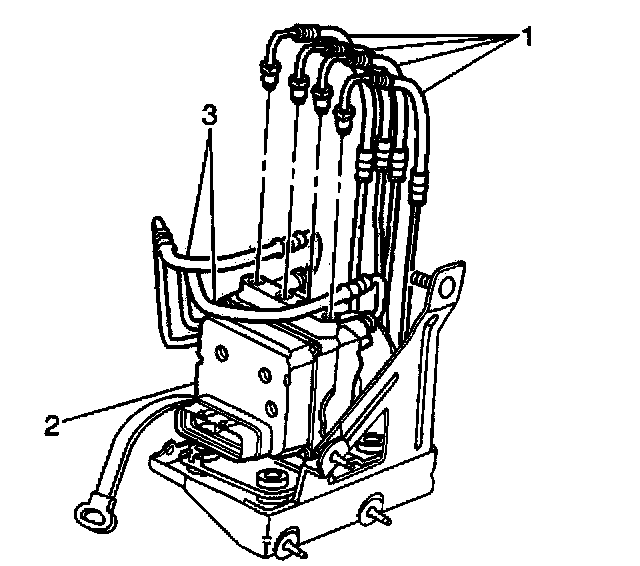
Important: Use a shop cloth in order to catch escaping brake fluid.
8. Slowly open the ABS modulator brake pipe fitting (1) starting from the first pipe on the left side in order to allow the brake fluid to flow.
Notice: Refer to Fastener Notice in Service Precautions.
9. Close the ABS modulator brake pipe fitting when air bubbles are no longer detected in the brake fluid.
^ Tighten the ABS modulator brake pipe fitting to 24 Nm (18 ft. lbs.).
10. Repeat Steps 8 and 9 for the remaining ABS modulator brake pipe fittings.
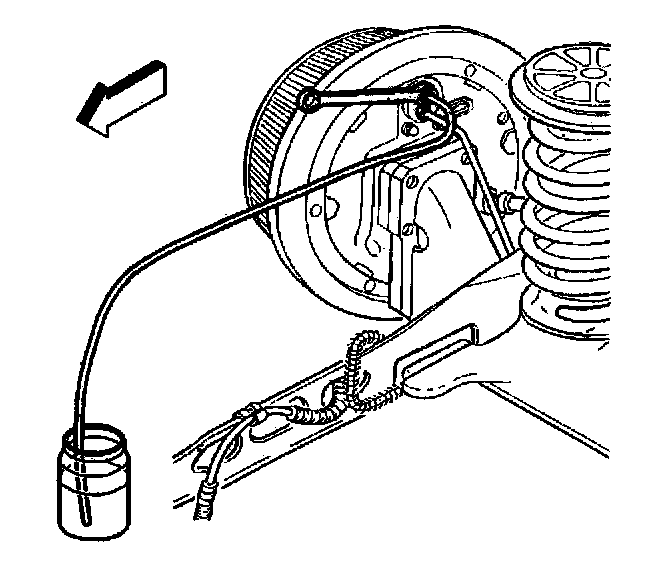
11. Raise and suitably support the vehicle. Refer to Vehicle Lifting.
12. Install the clear plastic bleeder hose to the RIGHT REAR bleeder valve:
^ For vehicles with rear drum brakes, install the clear plastic bleeder hose to the wheel cylinder bleeder valve.
^ For vehicles with rear disc brakes, install the clear plastic bleeder hose to the brake caliper bleeder valve.
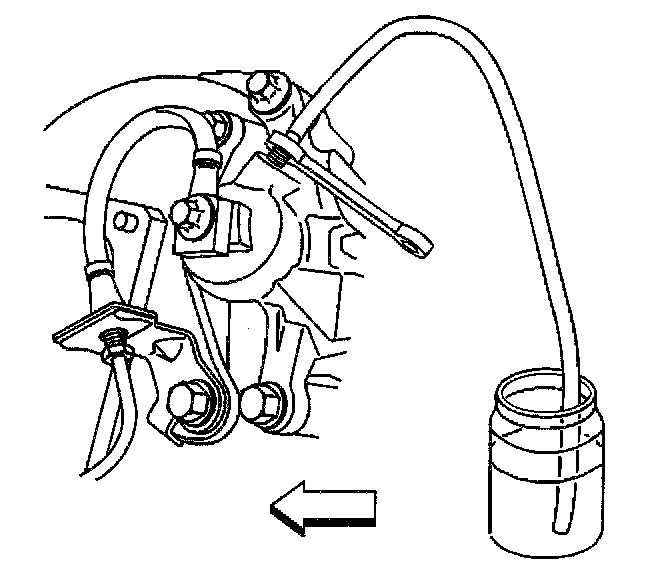
13. Submerge the opposite end of the clear plastic bleeder hose in a clean container partially filled with clean brake fluid.
14. Slowly open the bleeder valve in order to allow the brake fluid to flow.
15. Close the bleeder valve when air bubbles are no longer detected in the brake fluid.
^ For vehicles with rear drum brakes, tighten the wheel cylinder bleeder valve to 7 Nm (62 inch lbs.).
^ For vehicles with rear disc brakes, tighten the wheel cylinder bleeder valve to 11 Nm (97 inch lbs.).
16. Remove the clear plastic bleeder hose from the bleeder valve.
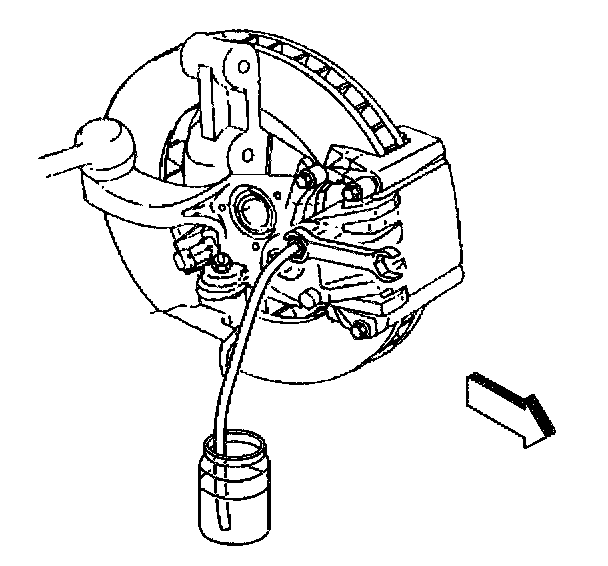
17. Install the clear plastic bleeder hose to the LEFT FRONT brake caliper bleeder valve.
18. Submerge the opposite end of the clear plastic bleeder hose in a clean container partially filled with clean brake fluid.
19. Slowly open the bleeder valve in order to allow the brake fluid to flow.
20. Close the bleeder valve when air bubbles are no longer detected in the brake fluid.
^ Tighten the brake caliper bleeder valve to 13 Nm (115 inch lbs.).
21. Remove the clear plastic bleeder hose from the bleeder valve.
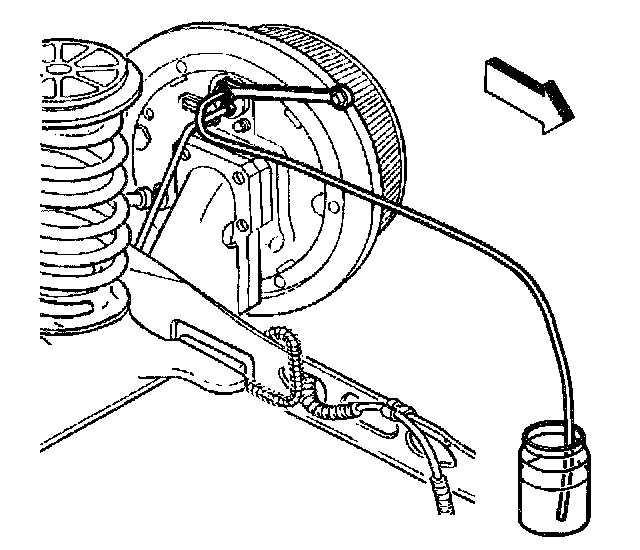
22. Install the clear plastic bleeder hose to the LEFT REAR bleeder valve.
^ For vehicles with rear drum brakes, install the clear plastic bleeder hose to the wheel cylinder bleeder valve.
^ For vehicles with rear disc brakes, install the clear plastic bleeder hose to the brake caliper bleeder valve.
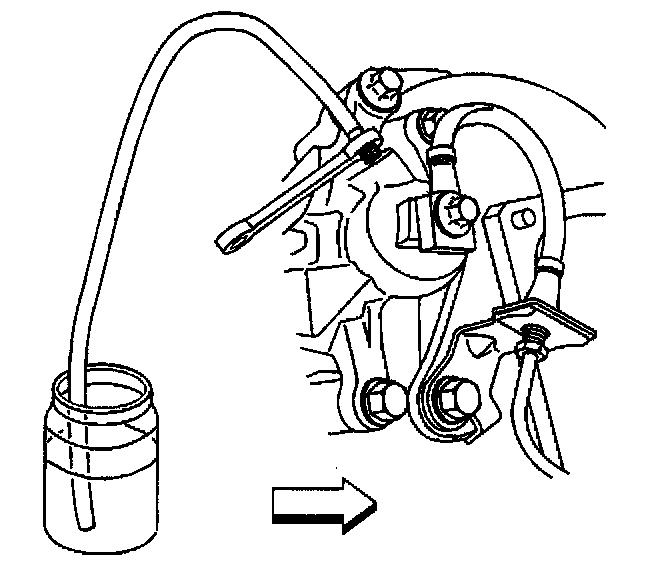
23. Submerge the opposite end of the clear plastic bleeder hose in a clean container partially filled with clean brake fluid.
24. Slowly open the bleeder valve in order to allow the brake fluid to flow.
25. Close the bleeder valve when air bubbles are no longer detected in the brake fluid.
^ For vehicles with rear drum brakes, tighten the wheel cylinder bleeder valve to 7 Nm (62 inch lbs.).
^ For vehicles with rear disc brakes, tighten the wheel cylinder bleeder valve to 11 Nm (97 inch lbs.).
26. Remove the clear plastic bleeder hose from the bleeder valve.
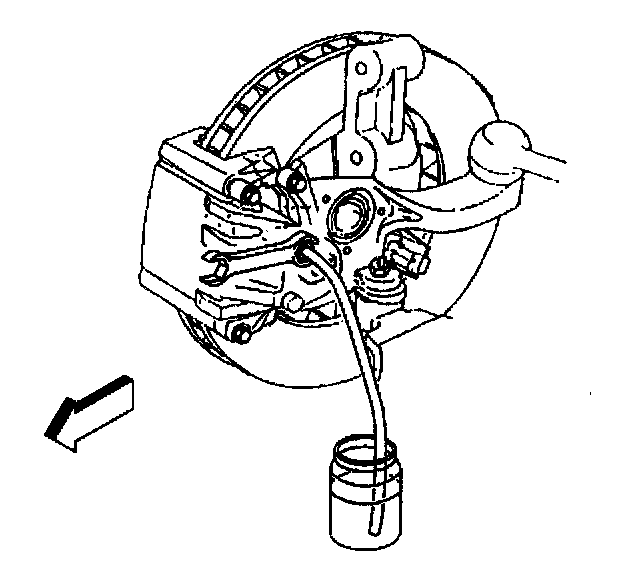
27. Install the clear plastic bleeder hose to the RIGHT FRONT brake caliper bleeder valve.
28. Submerge the opposite end of the clear plastic bleeder hose in a clean container partially filled with clean brake fluid.
29. Slowly open the bleeder valve in order to allow the brake fluid to flow.
30. Close the bleeder valve when air bubbles are no longer detected in the brake fluid.
^ Tighten the brake caliper bleeder valve to 13 Nm (115 inch lbs.).
31. Remove the clear plastic bleeder hose from the bleeder valve.
32. Lower the vehicle.
33. Remove the J 35589 from the master cylinder reservoir.
34. Inspect and fill the master cylinder reservoir to the proper level as necessary. Refer to Master Cylinder Reservoir Filling.
35. Install the master cylinder reservoir cap.
36. Start the engine and allow the engine to run for at least 10 seconds.
37. Turn the ignition OFF.
38. Inspect the brake pedal feel and the brake pedal travel. Refer to Brake Pedal Travel.
^ If the brake pedal feels firm and constant and the brake pedal travel does not exceed specifications, proceed to Step 39.
^ If the pedal feels soft or the brake pedal travel exceeds specifications, DO NOT DRIVE THE VEHICLE. Go to Step 40.
39. Start the engine and inspect the brake pedal feel.
^ If the brake pedal still feels firm, go to Step 42.
^ If the brake pedal feels soft, DO NOT DRIVE THE VEHICLE. proceed to Step 40.
40. Use the scan tool in order to perform the automated bleed procedure. Refer to Automated Bleed Procedure.
41. Ensure that the unacceptable brake pedal feel/travel is not caused by misadjusted brake linings or other mechanical failures, then repeat the Brake System Pressure Bleeding procedure. Proceed to Step 1.
Caution: Do not move the vehicle until a firm brake pedal is obtained. Failure to obtain a firm pedal before moving vehicle may result in personal injury.
42. Road test the vehicle. Make several normal (non-ABS) stops from a moderate speed in order to ensure proper brake system function. Allow adequate brake system cooling time between stops.