Upper Control Arm Bushings Replacement
- Tools Required- J 21474-5 Control Arm Bushing Receiver
- J 21474-18 Upper Control Arm Nut
- J 21474-19 Upper (control Arm Screw
- J 39872 Half Moon Spacer
- J 39930 Upper Control Arm Bushing Receiver/Installer
Disassembly Procedure
Service the upper control arm bushing separately from the upper control arm.
1. Remove the upper control arm. Refer to Upper Control Arm Replacement.
2. Remove the bolts/screws and the nuts.
3. Separate the front upper control arm from the upper control arm support.
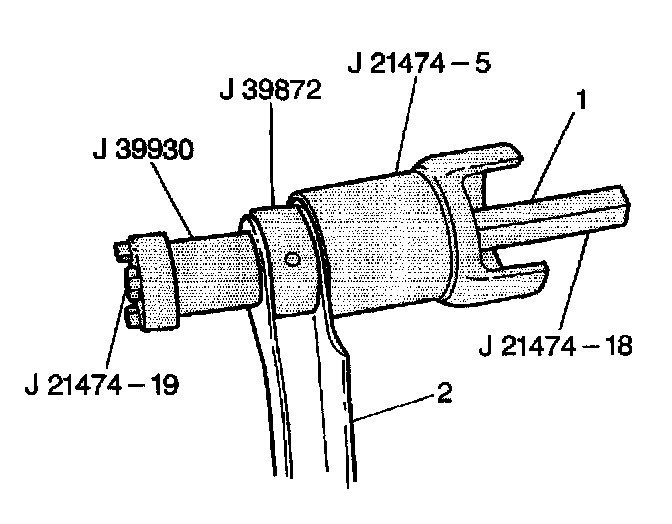
4. Remove the upper control arm bushing from the upper control arm (2):
4.1. Thread J 21474-19 through J 39930 (the 3 tangs on J 39930 should be against the screw head).
4.2. Thread J21474-19through the inside of the upper control arm bushing (you may need to wiggle J21474-19 until the tool slides through the bushing).
4.3. Run the smaller end of J 21474-5 onto J 21474-19, then place the thrust washer (1) on J 21474-19 with the seams facing toward J 21474-5.
4.4. Install J 39872 around the outside of the bushing in order to avoid metal distortion during removal.
4.5. Align J 39930 and J 21474-5 properly, then install J 21474-18 on J 21474-19.
4.6. Tighten J 21474-19 and J 21474-18 until the bushing is pushed all the way out (making a popping noise).
Assembly Procedure
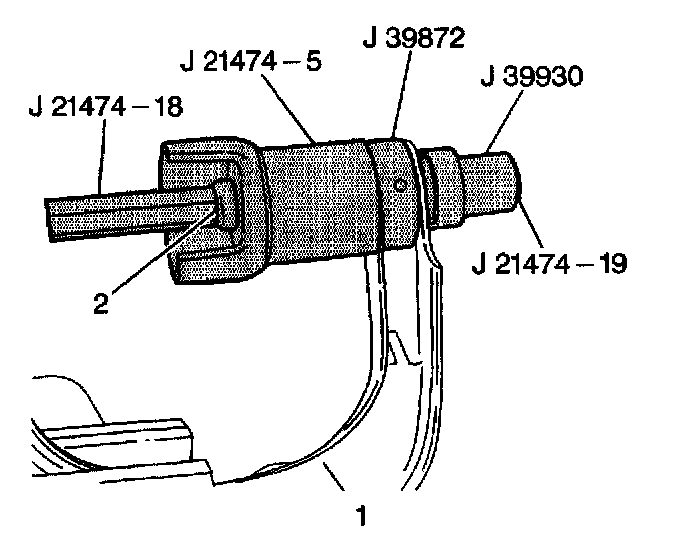
1. Install the upper control arm bushings:
1.1. Secure the control arm tightly in a vise, then thread J 21474-19 through J 39930(the three tangs on J 39930 should face away from the screw head).
1.2. Install a new upper control arm bushing onto J 21474-19 with the three indentations facing toward the three tangs on J 39930.
1.3. Install the threaded end of J 21474-19 into the upper control arm from the outer side of the control arm.
1.4. Install J 21474-5 onto J 21474-19from the inside of the control arm.
1.5. Install the thrust washer (2) onto J 21474-19 with the seam facing toward the control arm bushing.
1.6. Install J 39872 around the outside of the bushing in order to avoid metal distortion during removal.
1.7. Install J 21474-18 onto J 21474-19. Fit the three tang prongs on J 39930 into the indentations of the bushing.
1.8. Tighten until the bushing is flush with the control arm.
2. Install the front upper control arm to the front upper control arm support.
Notice: Refer to Fastener Notice in Service Precautions.
3. Install the bolts/screws and nuts.
- Tighten the nuts to 98 Nm (72 ft. lbs.).
4. Install the upper control arm. Refer to upper Control Arm Replacement.