Front Bushing
Lower Control Arm Bushings Replacement (Front Bushing)- Tools Required
- J 21474-3 Screw Assembly
- J 21474-4 1/2 Inch Nut
- J 21474-5 Control Arm Bushing Receiver
- J 21474-6 Inst.-Rem. Carrier Bsh
- J 39875 Half Moon Spacer
- J 39876 Lower Control Arm Bushing Receiver
Disassembly Procedure
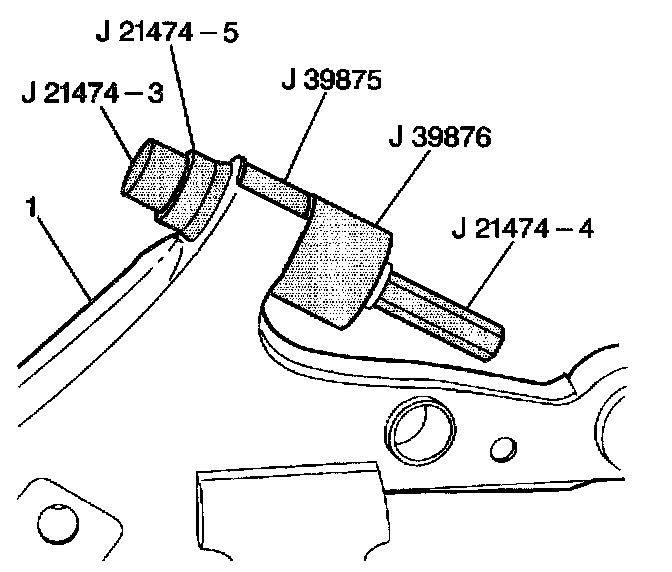
1. Remove the lower control arm.
2. Remove the lower control arm front bushing from the lower control arm (1):
2.1. Place J21474-3 through the large end of J 21474-6.
2.2. Thread J21474-3 through the front bushing and push J21474-3 through the open end of J 39876.
2.3. Place the thrust washer onto J21474-3 with the seam facing toward the front bushing.
2.4. Install J 39875 around the outside of the bushing in order to avoid metal distortion during removal.
2.5. Align all tools properly with the front bushing with and the control arm (1), then install J21474-4 and tighten until the bushing is pushed all the way out. The bushing makes a popping noise upon removal.
Assembly Procedure
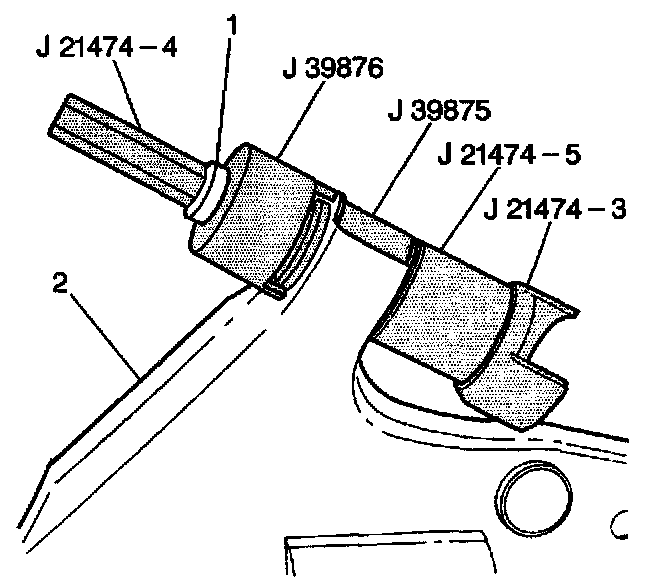
1. Install the lower control arm front bushing:
1.1. Thread J 21474-3 through J 21474-5.
1.2. Install J 21474-3 through the new front bushing and into the lower control arm (2).
1.3. Thread J 21474-3 and accessories into the front lower control arm.
1.4. Install J39876 onto J21474-3 with the open end of J 39876 facing toward the control arm
1.5. Install J 39875 around the outside of the bushing in order to avoid metal distortion during installation.
1.6. Place the thrust washer (1) onto the threaded end of J21474-3 with the seam facing toward the control arm.
1.7. Align all tools properly with the front bushing and the control arm, then install J 21474-4 onto J 21474-3.
1.8. Tighten J21474-4 and J21474-3 until the bushing becomes flush with the control arm.
2. Install the lower control arm.