Compressor Hose Assembly
COMPRESSOR HOSE ASSEMBLY REPLACEMENTTOOLS REQUIRED
J 39400-A Halogen Leak Detector
REMOVAL PROCEDURE
1. Recover the refrigerant from the A/C system.
2. Remove the battery heat shield.
3. Remove the compressor drive belt.
4. Remove the RH exhaust manifold heat shield.
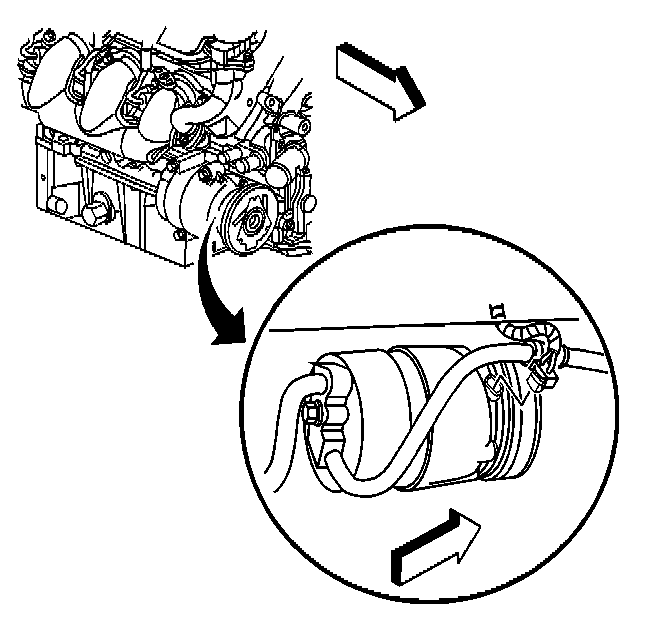
5. Disconnect the compressor clutch electrical connector.
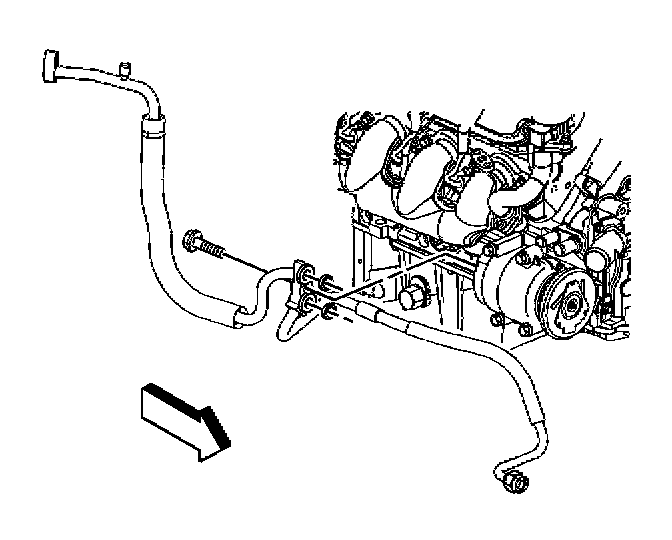
6. Remove the compressor hose assembly retaining bolt.
7. Disconnect the compressor hose assembly from the compressor.
IMPORTANT: Cap or tape the compressor hose assembly and the compressor immediately to prevent system contamination.
8. Remove and discard sealing washers.
9. Cap or tape the compressor hose assembly and the compressor.
10. Raise and support the vehicle. Refer to Vehicle Lifting.
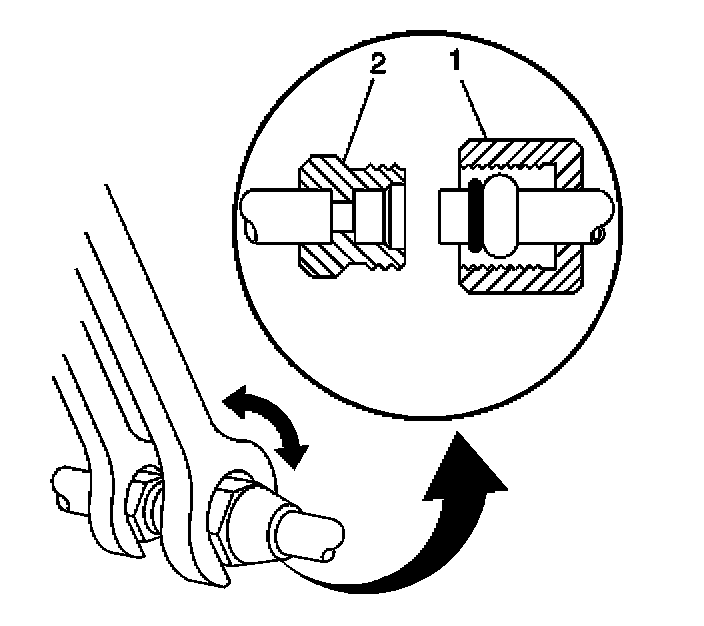
11. Using a back-up wrench on the condenser fitting (2), loosen the compressor hose fitting (1) from the condenser.
IMPORTANT: Prior to removal, take note of the compressor hose routing and orientation between the compressor and condenser.
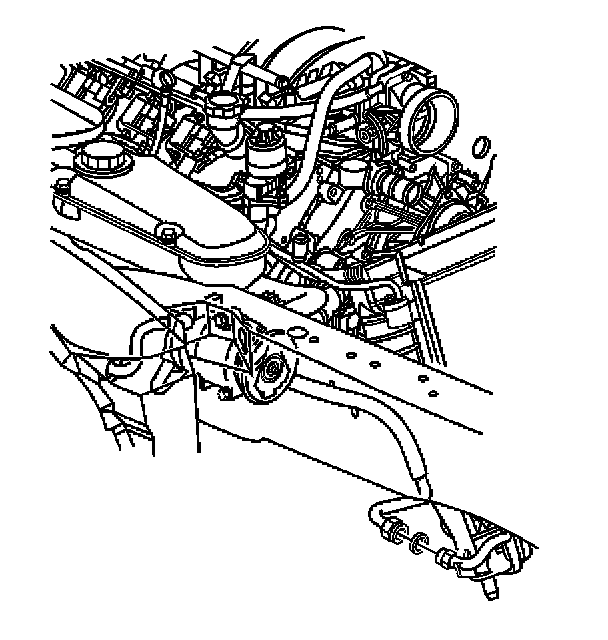
12. Disconnect the compressor hose assembly from the condenser.
13. Discard the O-ring seal.
14. Cap or tape the compressor hose and the condenser.
15. Lower the vehicle.
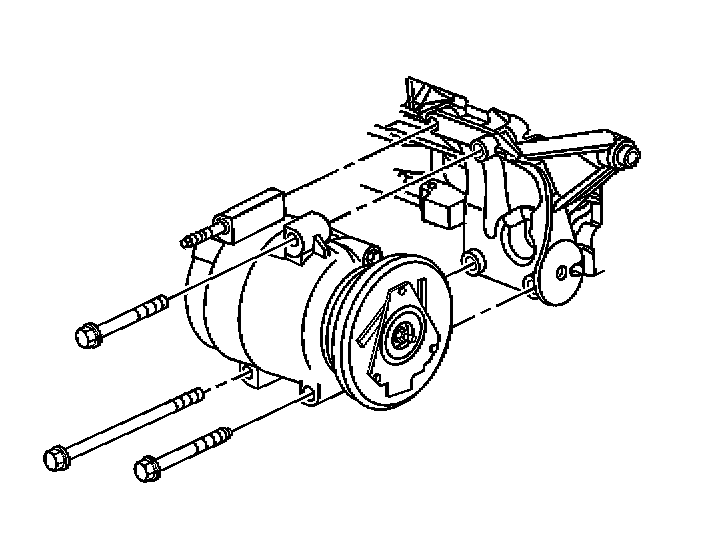
16. Remove the lower compressor mounting bolts.
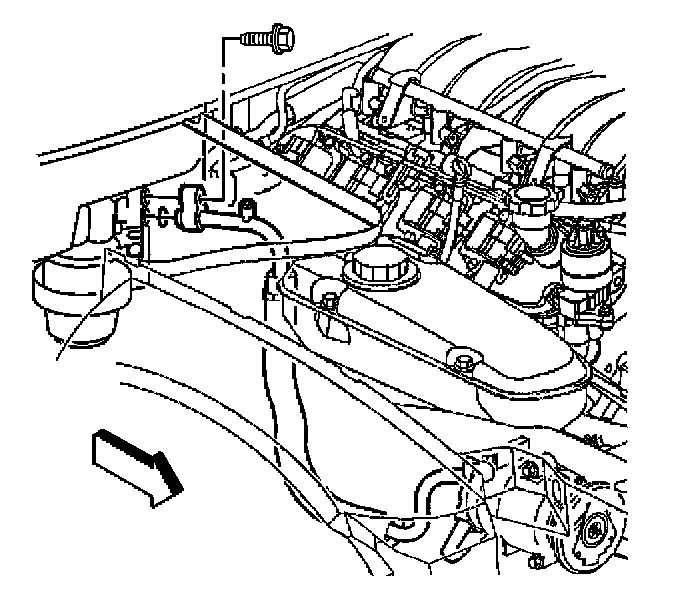
17. Remove the compressor hose assembly to accumulator retaining bolt.
18. Disconnect the compressor hose assembly from the accumulator.
19. Discard the O-ring seal.
20. Cap or tape the compressor hose and the accumulator.
21. Remove the compressor upper mounting bolt.
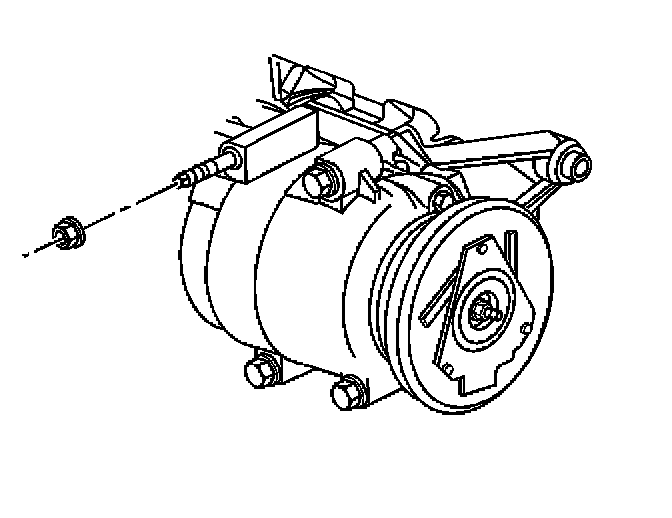
22. Remove the compressor mounting nut.
23. Fully loosen the compressor mounting stud.
24. Reposition the A/C compressor forward.
25. Remove the compressor hose assembly from the vehicle.
INSTALLATION PROCEDURE
1. Install the compressor hose assembly into position in the vehicle.
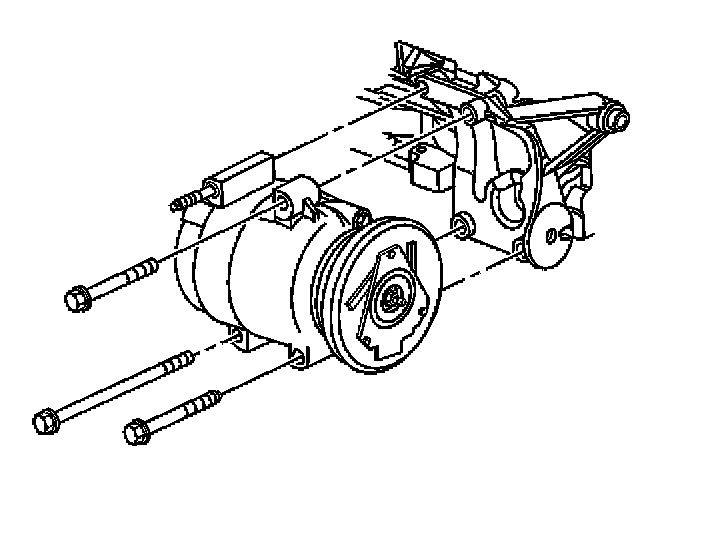
2. Install the compressor into position on the compressor mounting bracket.
3. Install the compressor mounting stud to the engine block.
4. Install the compressor upper mounting bolt.
5. Remove the cap or tape from the compressor hose assembly and the accumulator.
6. Install the new O-ring to the compressor hose assembly.
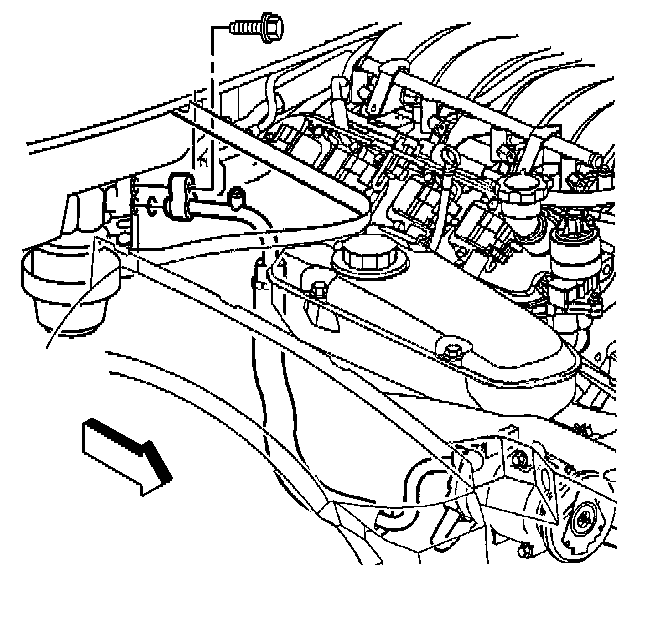
7. Connect the compressor hose to the accumulator.
8. Install the compressor hose assembly to accumulator retaining bolt.
NOTE: Refer to Fastener Notice in Service Precautions.
Tighten
Tighten the bolt to .......................20 N.m (15 lb ft).
9. Install the lower compressor mounting bolts.
10. Raise and support the vehicle.
11. Remove the cap or tape from the compressor hose assembly and the condenser.
12. Install a new O-ring to the compressor hose assembly.
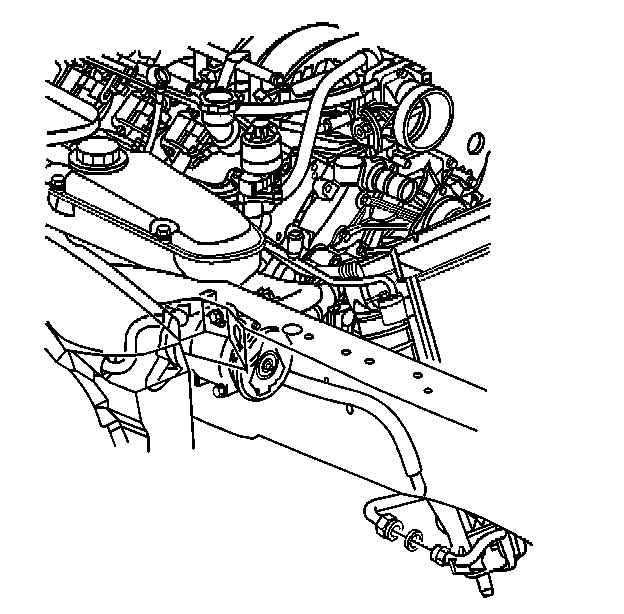
13. Connect the compressor hose assembly to the condenser.
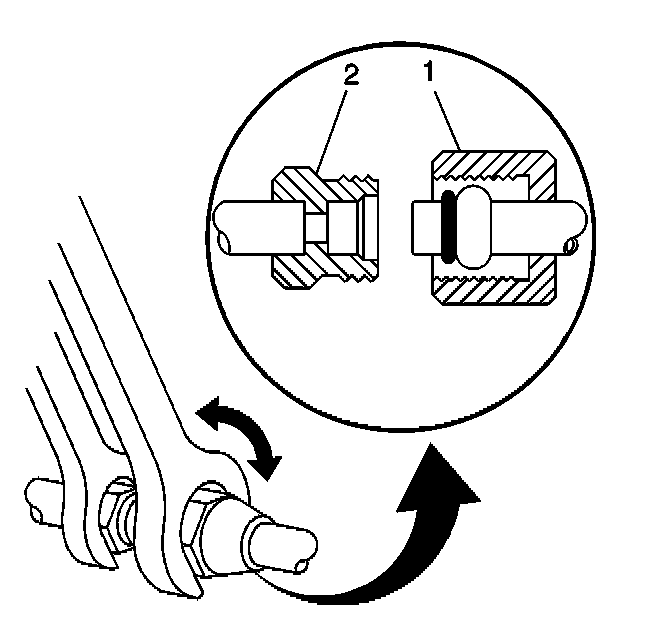
14. Using a back-up wrench on the condenser fitting (2), secure the compressor hose assembly fitting (1) to the condenser.
Tighten
Tighten the fitting to 24 N.m (17 lb ft).
15. Lower the vehicle.
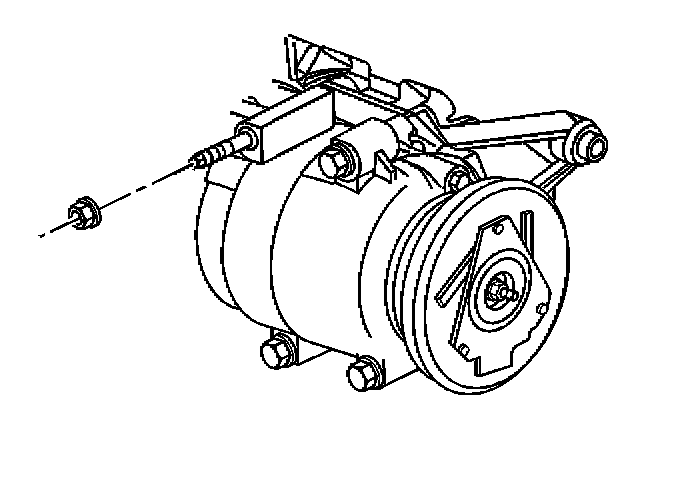
16. Tighten the compressor mounting stud.
Tighten
Tighten the stud to .............9 N.m (80 lb in).
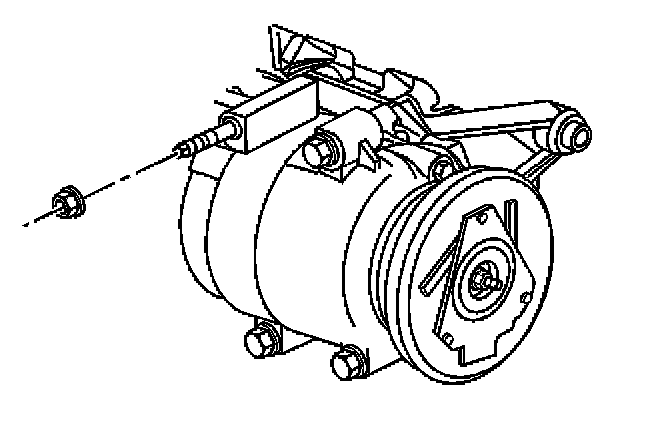
17. Install the compressor mounting nut.
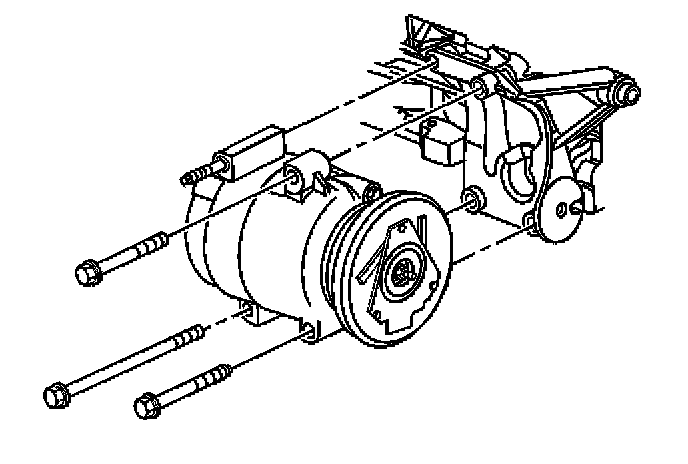
18. Tighten the compressor mounting bolts.
IMPORTANT: Tighten the compressor mounting bolts in the following sequence:
1. Front upper
2. Front lower
3. Rear lower
Tighten
Tighten the bolts to .........................40 N.m (30 lb ft).
4. Tighten the compressor mounting nut.
Tighten
Tighten the nut to ...................40 N.m (30 lb ft).
5. Remove the cap or tape from the compressor hose assembly end and the compressor.
6. Install the new seal washers to the compressor hose assembly.
7. Connect the compressor hose assembly to the compressor.
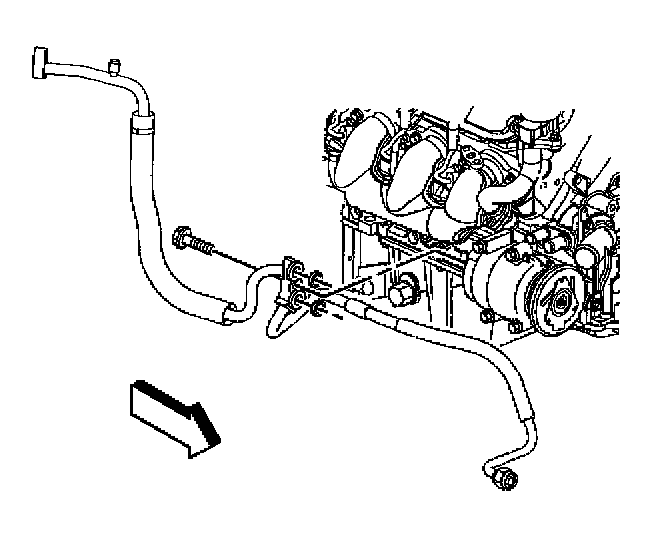
8. Install the compressor hose assembly retaining bolt.
Tighten
Tighten the bolt to .......................26 N.m (19 lb ft).
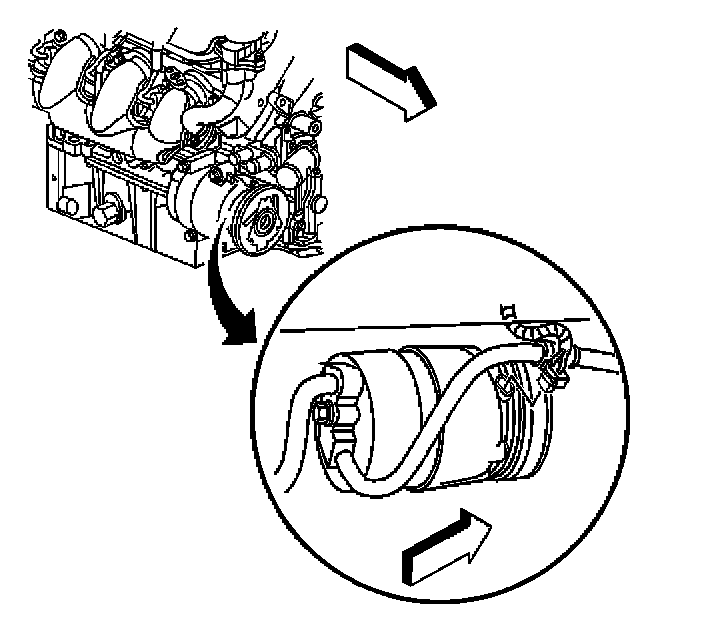
9. Connect the compressor clutch electrical connector.
10. Install the RH exhaust manifold heat shield.
11. Install the compressor drive belt.
12. Install the battery heat shield.
13. Recharge the A/C system. Refer to Refrigerant Recovery and Recharging.
14. Leak test the fittings of the component using J 39400-A.