Oil Pan Installation
Oil Pan Installation (LCV)
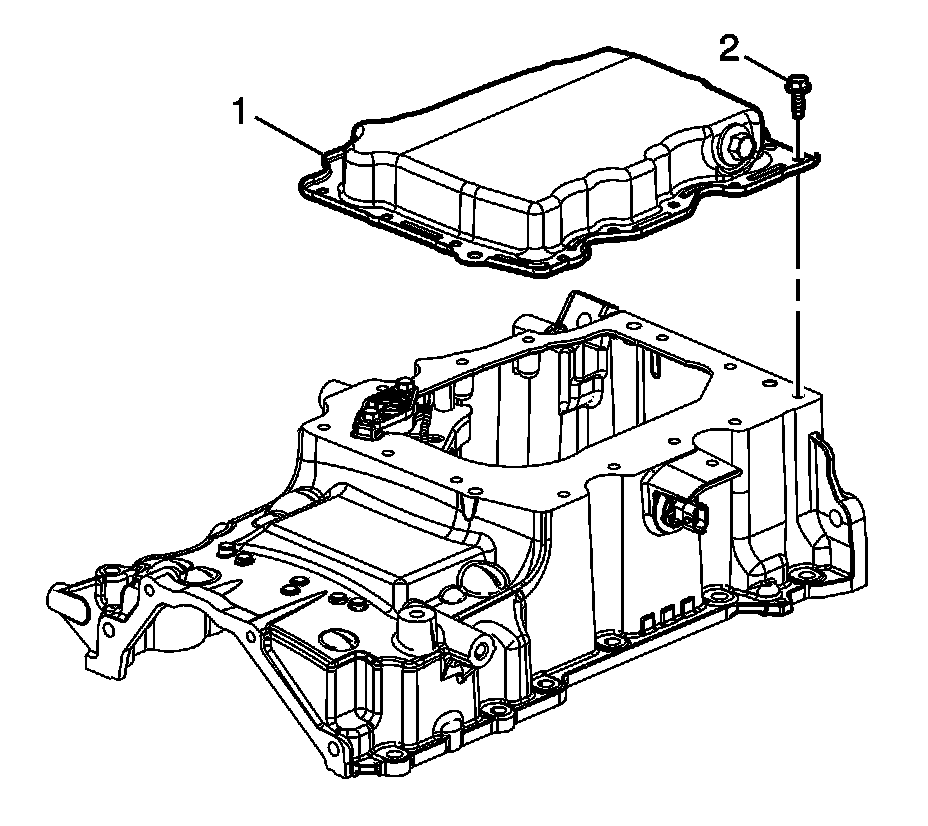
Note:
* The oil pan sealing surfaces must be free of contamination prior to applying the sealer.
* Install and align the oil pans within 20 minutes of applying the sealer.
* The oil pans must be fastened to final torque specification within 60 minutes of applying the sealer.
1. Apply a bead of RTV sealant to the perimeter of the lower oil pan.
2. Install the lower oil pan (1) to the upper oil pan.
Caution: Refer to Fastener Caution Fastener Caution.
Note: Two long bolts secure the lower oil pan and upper oil pan together to the lower crankcase.
3. Install the short lower oil pan bolts (2) and tighten to 10 Nm (89 lb in).
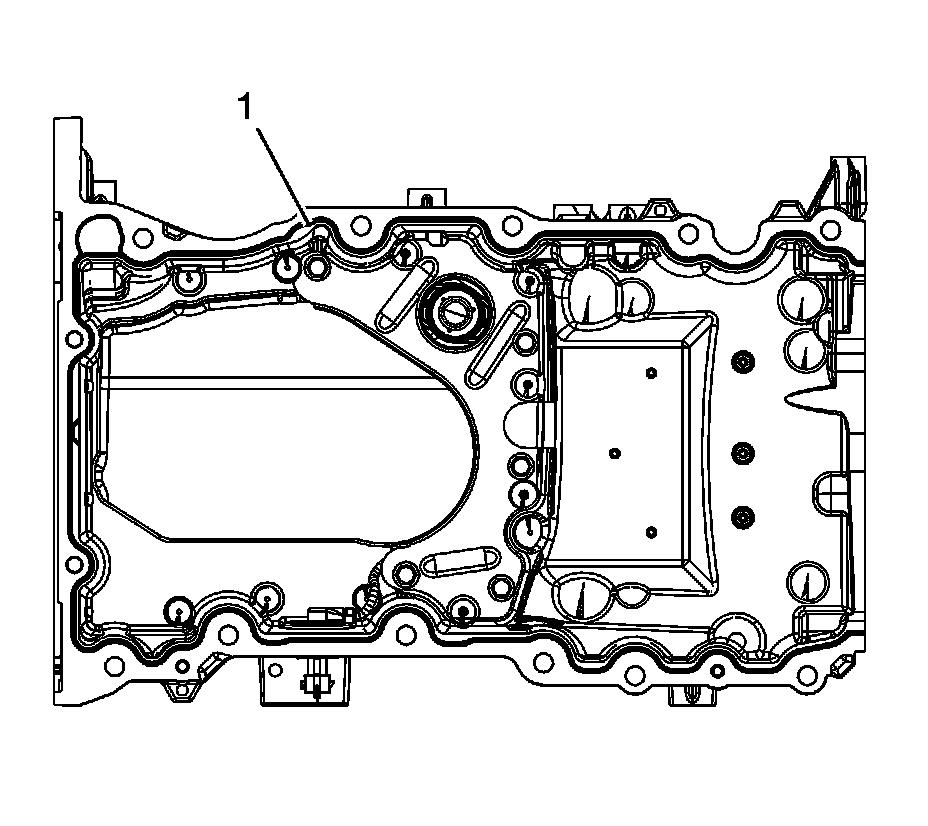
Note:
* The lower crankcase surface must be free of contamination prior to applying the sealer.
* Install and align the oil pan to block within 20 minutes of applying the sealer.
* The oil pan must be fastened to final torque specification within 60 minutes of applying the sealer.
4. Apply a 4.25 mm bead of sealer (1) on the level part of the flange around the perimeter of the oil pan. Refer to Adhesives, Fluids, Lubricants, and Sealers (LCV) [1][2]Fluid Type SpecificationsAdhesives, Fluids, Lubricants, and Sealers (LTG) [1][2]Fluid Type Specifications.
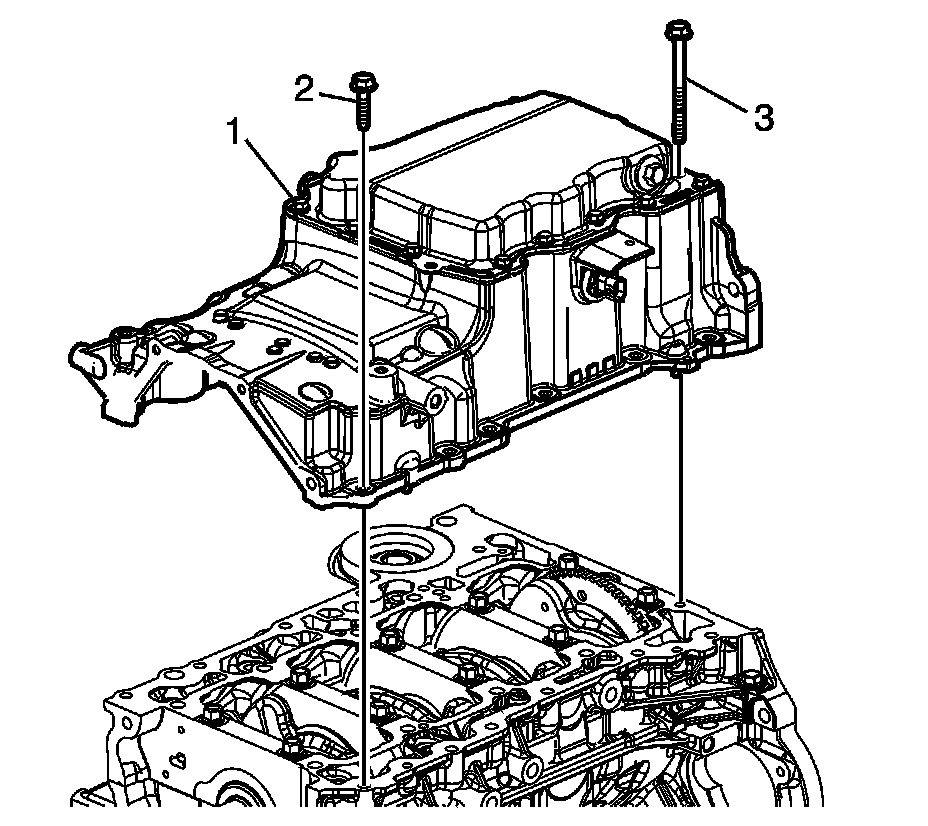
5. Install the oil pan (1).
6. Install the oil pan bolts (2, 3) finger tight.
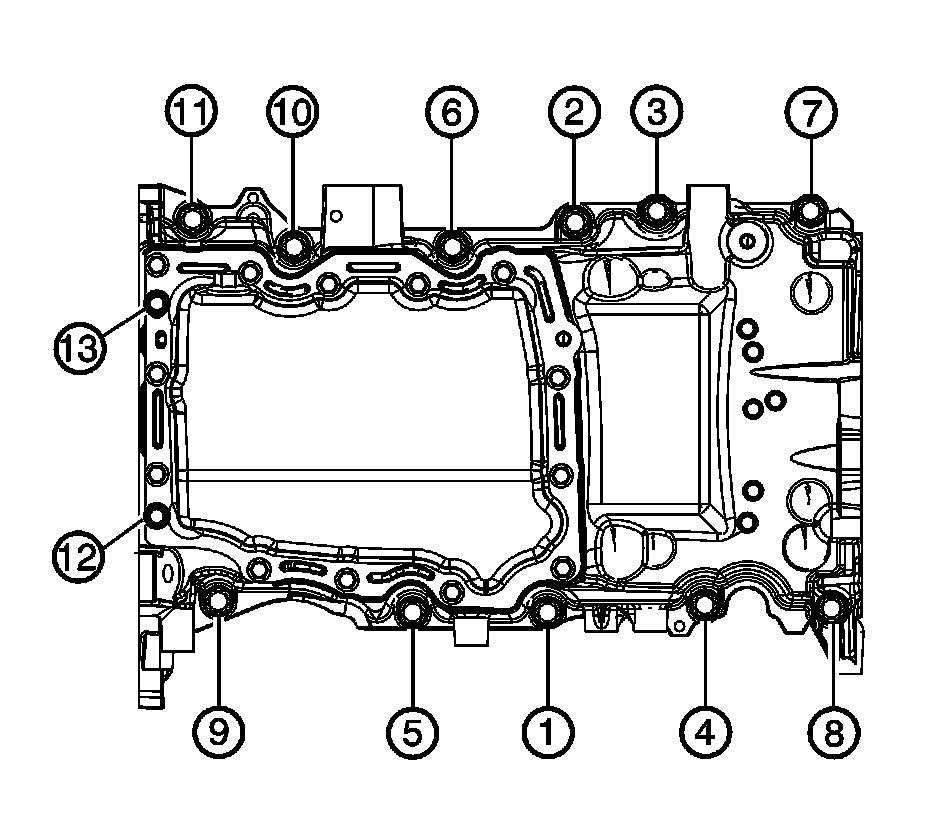
7. Tighten the oil pan bolts in sequence to final torque twice using the following procedure:
1. Tighten bolts in sequence 1-11 to 25 Nm (18 lb ft).
2. Tighten bolts in sequence 12-13 to 10 Nm (89 lb in).
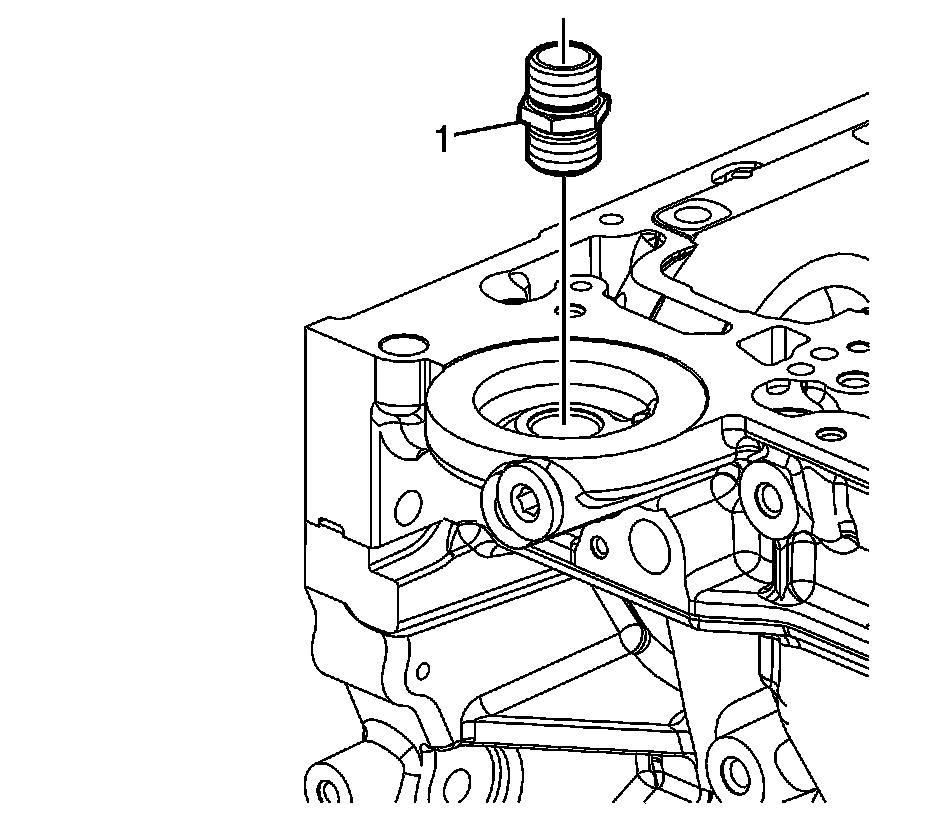
8. Insert the oil filter fitting (1). Tighten the fitting to 50 Nm (37 lb ft).
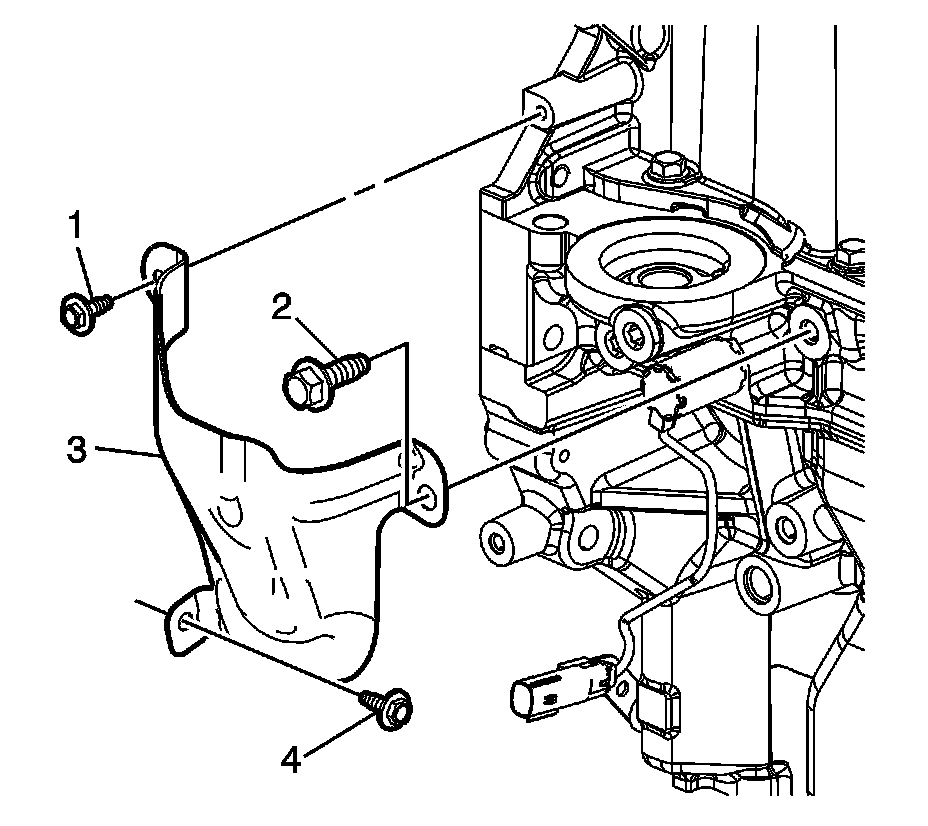
9. Install the oil pump flow control valve cover (3).
10. Install the valve cover bolts (1, 4) and tighten to 9 Nm (80 lb in).
11. Install the valve cover bolt (2) and tighten to 58 Nm (43 lb ft).