Extension Housing: Service and Repair
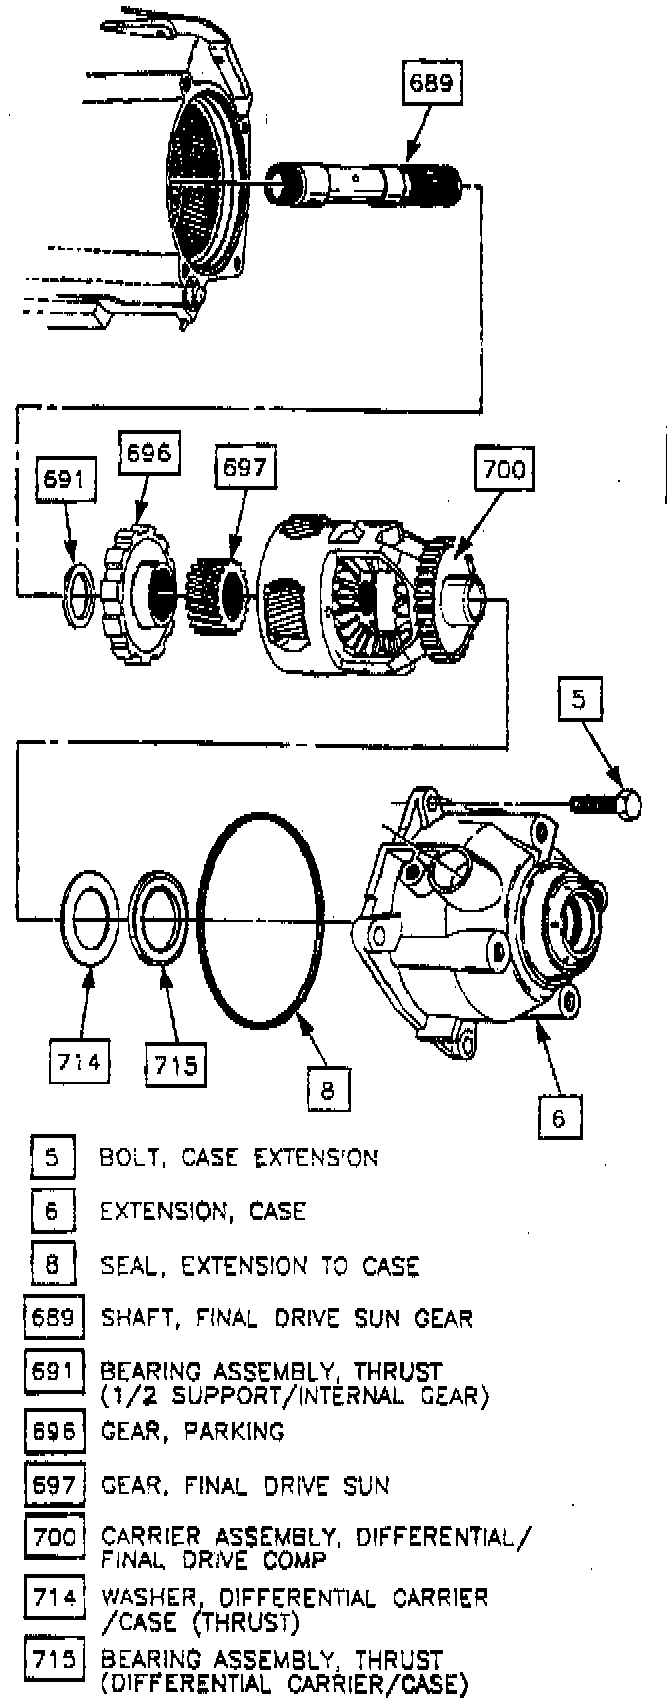
REMOVE OR DISCONNECT
1. Raise and suitably support the vehicle.
2. Right front tire and wheel.
3. Right engine splash shield.
4. Stabilizer shaft links from lower control arms.
5. Right tie rod end from steering knuckle.
6. Right lower ball joint from steering knuckle.
7. Right drive axle from transaxle.
8. Secure drive axle to steering knuckle/strut.
9. Transaxle brace.
10. Vehicle speed sensor electrical connector.
11. Extension housing bolts/screws.
12. Axle seal, vehicle speed sensor and extension housing O-rings.
INSTALL OR CONNECT
NOTICE: Always use the correct fastener in the proper location. When you replace a fastener, use ONLY the exact part number for that application. The manufacturer will call out those fasteners that require a replacement after removal. The manufacturer will also call out the fasteners that require thread lockers or thread sealant. UNLESS OTHERWISE SPECIFIED, do not use supplemental coatings (paints, greases, or other corrosion inhibitors) on threaded fasteners or fastener joint interlaces. Generally, such coatings adversely affect the fastener torque and the joint clamping force, and may damage the fastener. When you install fasteners, use the correct tightening sequence and specifications. Following these instructions can help you avoid damage to parts and systems.
1. Extension housing O-rings, vehicle speed sensor and axle seal.
2. Extension housing bolts/screws.
- Tighten bolts/screws to 36 Nm (27 ft. lbs.).
3. Vehicle speed sensor electrical connector.
4. Transaxle brace.
5. Right drive axle to transaxle.
6. Right lower ball joint to steering knuckle.
7. Right tie rod end to steering knuckle.
8. Stabilizer shaft links to lower control arms.
9. Right engine splash shield.
10. Right front tire and wheel.
11. Lower vehicle.
Adjust
- Fluid level.
Inspect
- For proper completion of repairs.
- For proper fluid level.
- For fluid leaks.