Upper Control Arm
UPPER CONTROL ARMREMOVAL
NOTE: If servicing the right upper control arm, remove the air cleaner housing to access the bolt and nut.
NOTE: To remove the upper control arm the shock absorber must remain installed.
1. Raise and support the vehicle.
2. Remove the front wheel and tire assembly.
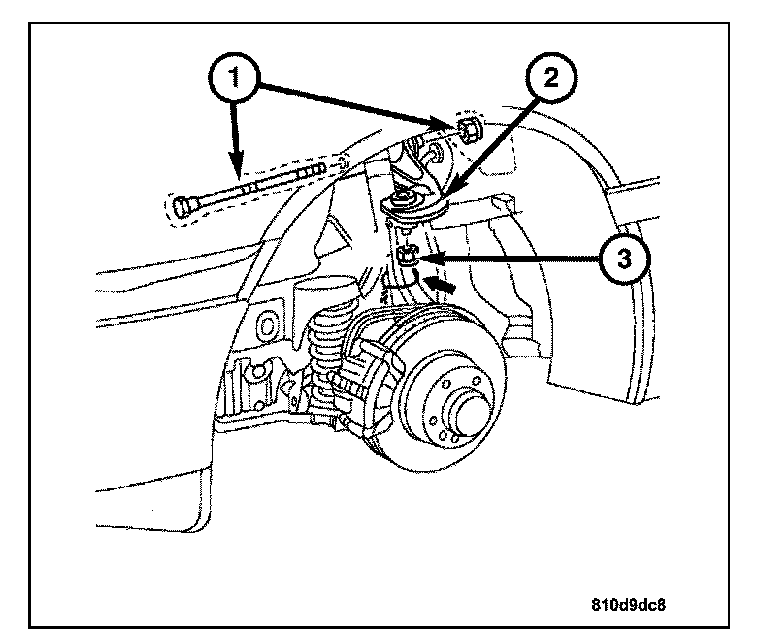
3. Wire tie the steering knuckle to the shock absorber (arrow). This is to hold the steering knuckle from falling away from the vehicle.
4. Remove the ball joint nut (3) from the upper control arm (2).
CAUTION: Do not subject the brake hose or any wheel speed sensor harness to any tension.
CAUTION: Do not use pneumatic tools to tighten the bolt on the tool.
5. Using Special Tool 9168 Ball Joint Puller, press the upper ball joint out of the steering knuckle.
6. Remove the upper control arm (2) from the body by removing the nut and bolt (1) from the inside of the engine compartment on the shock tower.
INSTALLATION
WARNING: TIGHTEN ALL NUTS AND BOLTS WITH THE VEHICLE AT NORMAL RIDE HEIGHT.
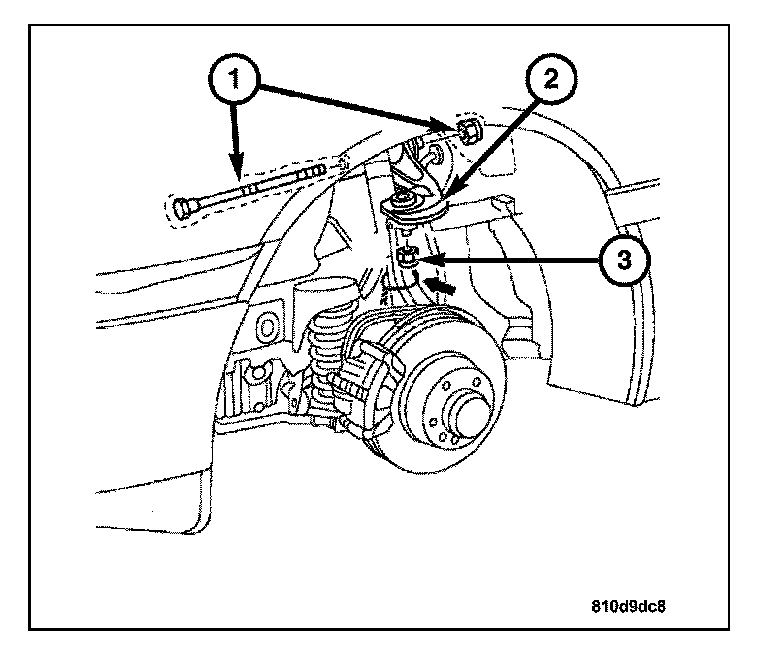
1. Install the upper control arm (2) and the bolt and nut (1) to the body. Tighten to 65 Nm (48 ft. lbs.)
NOTE: Clean the ball joint tapered bolt and mounting hole of the steering knuckle.
2. Install the upper ball joint (3) to the steering knuckle. Tighten to 45 Nm (33 ft. lbs.)
3. Remove the wire tie attaching the steering knuckle to the shock absorber.
4. Lower the vehicle and check vehicle alignment.
5. Install the wheel and tire assembly.