Lateral Stabilizer Rod: Service and Repair
LATERAL LINKREMOVAL
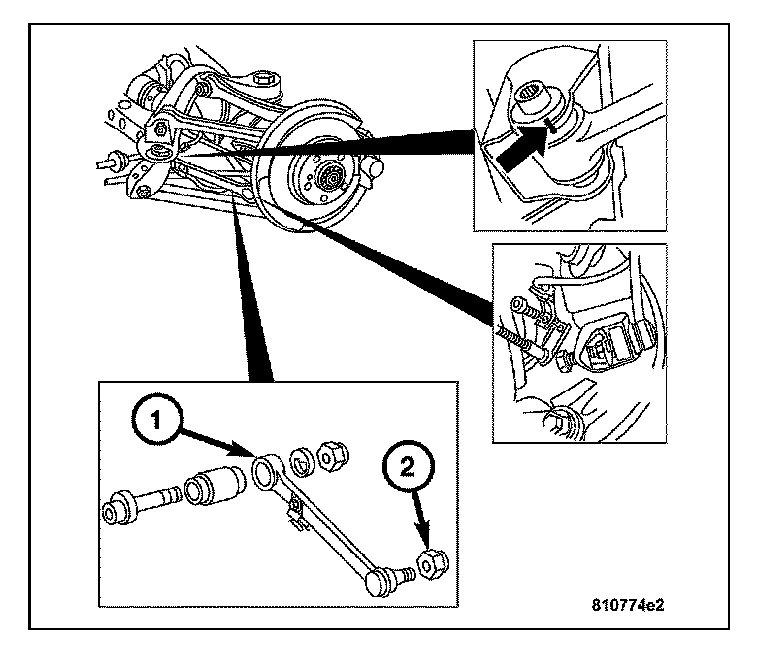
1. Raise and support the vehicle.
2. Remove the wheel and tire assembly.
3. Remove the inner lateral link bolt attaching the lateral link to the rear axle carrier.
4. Remove the lateral link ball joint nut (2).
CAUTION: Do not use pneumatic tools to tighten the bolt on the tool.
5. Using Special Tool 9168 Ball Joint Puller, remove the outer lateral link ball joint attaching the lateral link to the wheel carrier.
NOTE: Lightly tap the lateral link with a plastic headed hammer to loosen the rubber mounts from the mounting flanges.
6. Remove the lateral link (1).
INSTALLATION
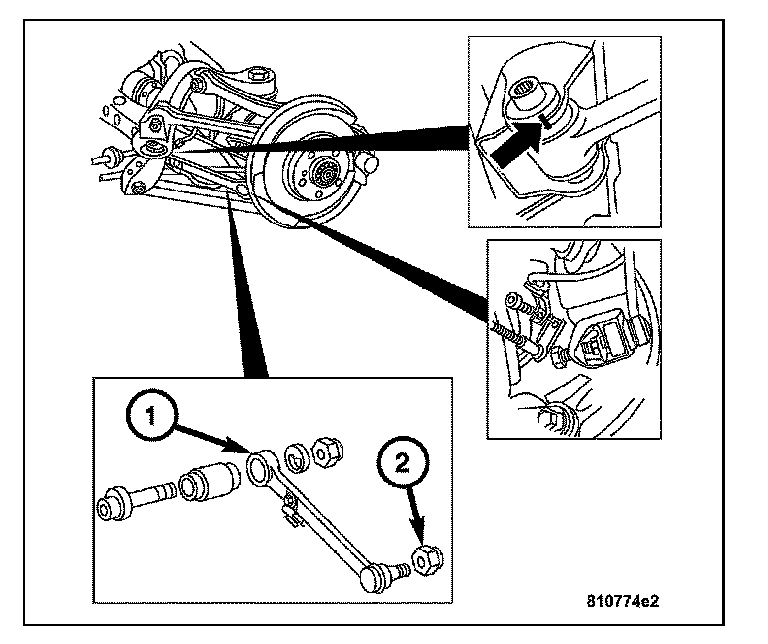
1. Install the lateral link onto the vehicle.
CAUTION: The rear axle shaft must be horizontal when tightening the lateral link nuts.
2. Install the outer lateral link ball joint attaching the lateral link to the wheel carrier.
CAUTION: The rear axle shaft must be horizontal when tightening the lateral link nuts.
3. Install the inner lateral link bolt attaching the lateral link to the rear axle carrier.
CAUTION: Vehicle must be at normal ride height before tightening components to specified torque.
4. Tighten the outer lateral link ball joint attaching the lateral link to the wheel carrier to 30 Nm (22 ft. lbs.).
5. Tighten the inner lateral link bolt attaching the lateral link to the rear axle carrier to 70 Nm (52 ft. lbs.).