Installation
NOTE: When new brake shoes are installed they must be burnished (seated) to the rotor. This must be done to ensure the proper performance of the replacement brake shoe. Follow the procedure at the end of this installation procedure to correctly burnish the new brake shoes.GENERAL INFORMATION
Before new brake shoes can be installed in the caliper, the caliper pistons must be pushed back into the bores of the caliper. Push the pistons back into the bores of the caliper using the following procedure. This procedure must be used to prevent damaging the caliper, pistons, dust boots or braking disc.
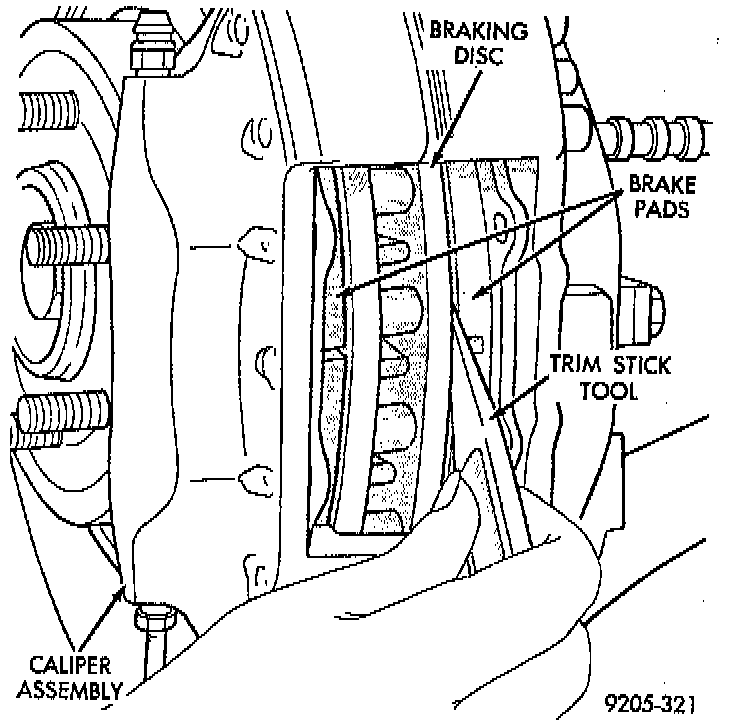
CAUTION: When pushing the pistons back into the bores of the caliper, use only a trim stick as shown above or other suitable soft tool. Never use a screw driver or other metal pry bar due to potential damage to the braking surface of the rotor surface.
1. Install the previously removed brake shoes back into the caliper. Place a trim stick at the center groove of the inboard brake shoe and the outer edge of the rotor. Using the trim stick, apply pressure against the inboard brake shoe assembly until both pistons are completely bottomed in the bores of the inboard caliper half. Move the trim stick between the outboard brake shoe and the rotor and repeat above the procedure.
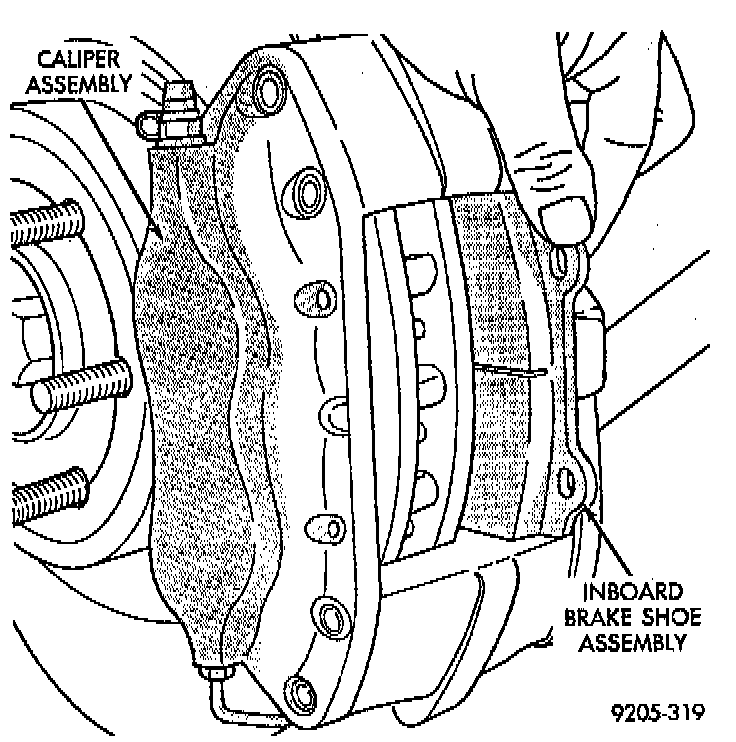
2. Install the new inboard and outboard brake shoes into the disc brake caliper.
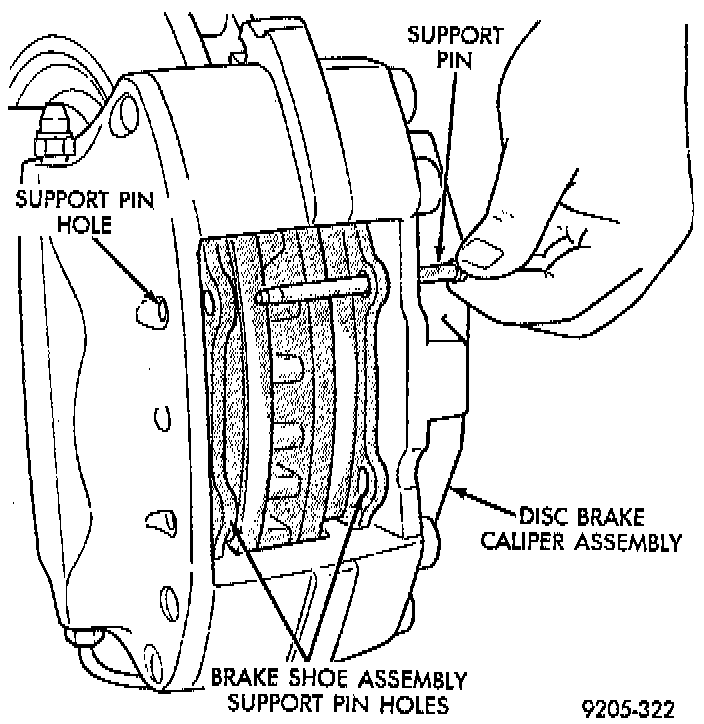
3. Install the upper brake shoe support pin into the caliper and both brake shoe upper support pin holes. Ensure that the small end of the support pin is in the hole in the outboard caliper half.
Spring Clip:
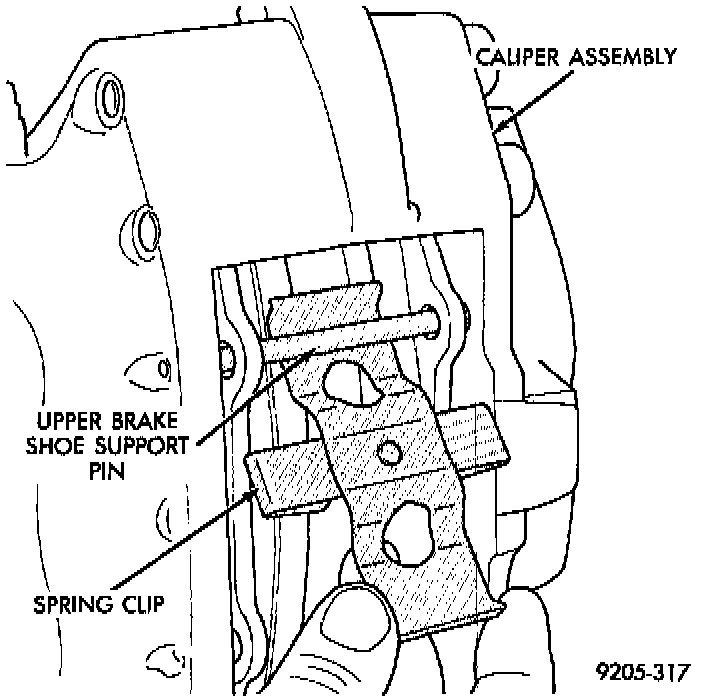
4. Install the brake shoe spring clip under the upper brake shoe assembly support pin.
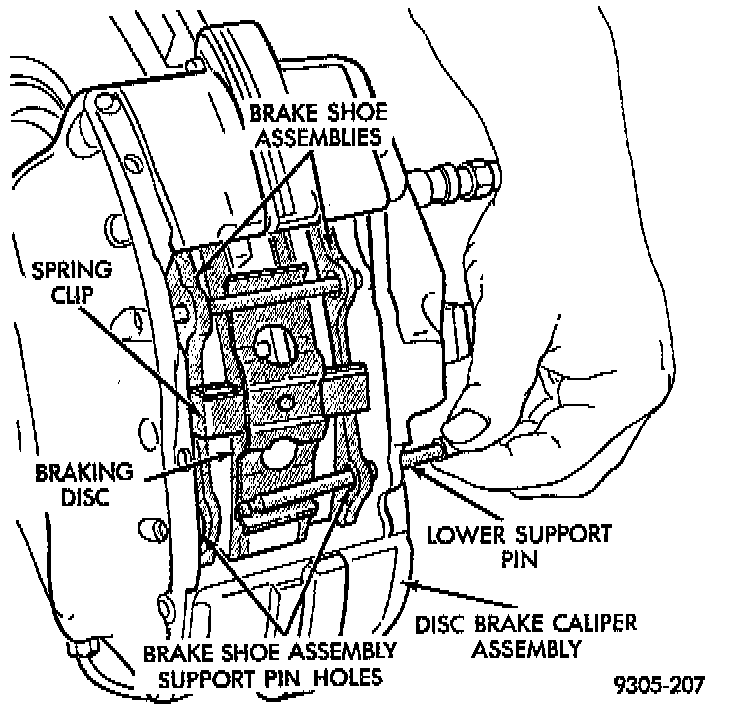
5. Press down on the lower end of the spring clip until it touches the braking disc. Then install the lower brake shoe assembly support pin into the caliper assembly and both brake shoe assembly lower support pin holes. Be sure the spring clip is against lower support pin and the small end of the support pin is in hole in outboard caliper half.
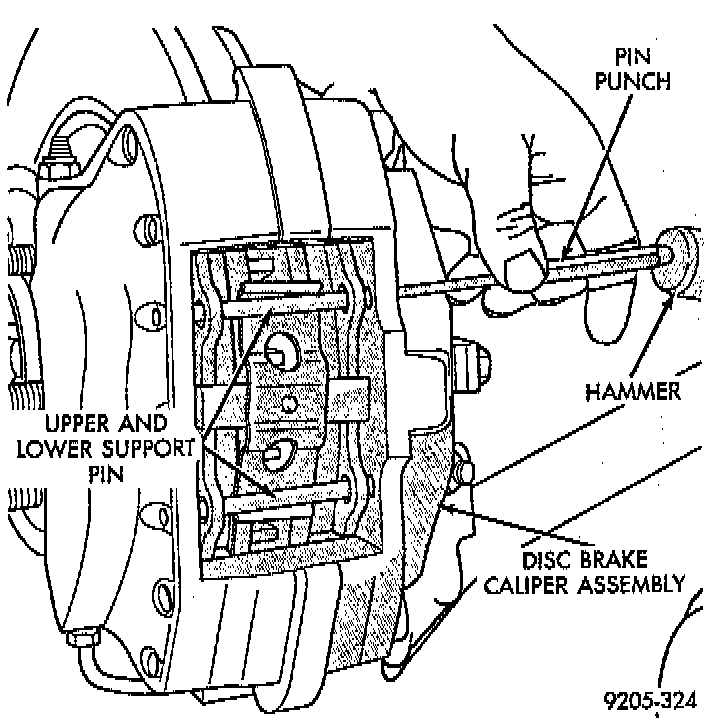
6. Using a pin punch and a hammer, drive the upper and lower support pins for the brake shoes into the caliper from the inboard side. Support pins must be installed into the caliper until the support pin retaining rings are locked into caliper assembly.
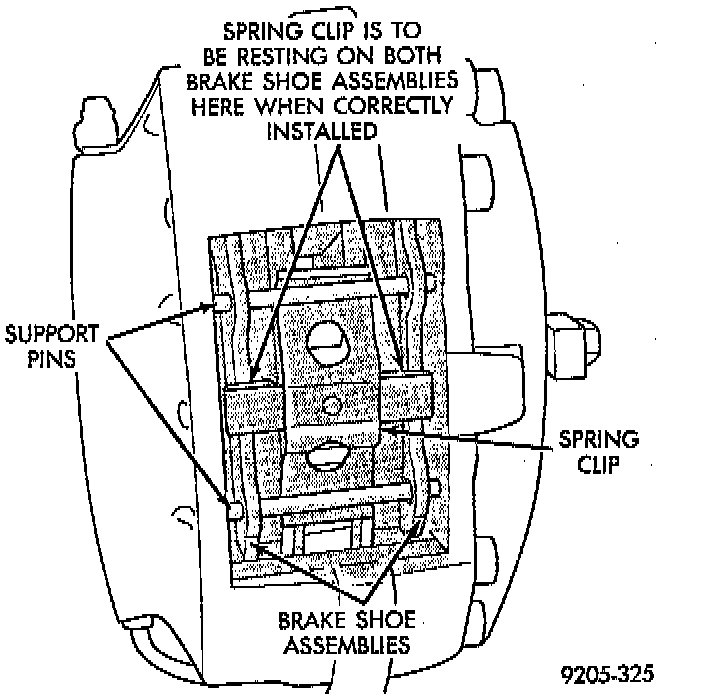
7. After the support pins are fully installed into the caliper assembly. Inspect assembled caliper to be sure the spring clip is centered in the opening of the caliper and is resting against both brake shoe assemblies.
8. Install the wheel and tire assembly. Tighten the wheel mounting stud nuts in proper sequence until all nuts are torqued to half specification. Then repeat the tightening sequence to the full specified torque of 108 - 136 Nm (80 - 100 ft. lbs.).
9. Remove jackstands or lower hoist. Before moving vehicle, pump the brake pedal several times to insure the vehicle has a firm brake pedal to adequately stop vehicle.
10. Road test the vehicle and make several stops using the procedure described below to wear off any foreign material on the brakes and to seat the brake shoe linings.