Receiver Dryer: Service and Repair
Fig 35 Filter Drier Mounting:
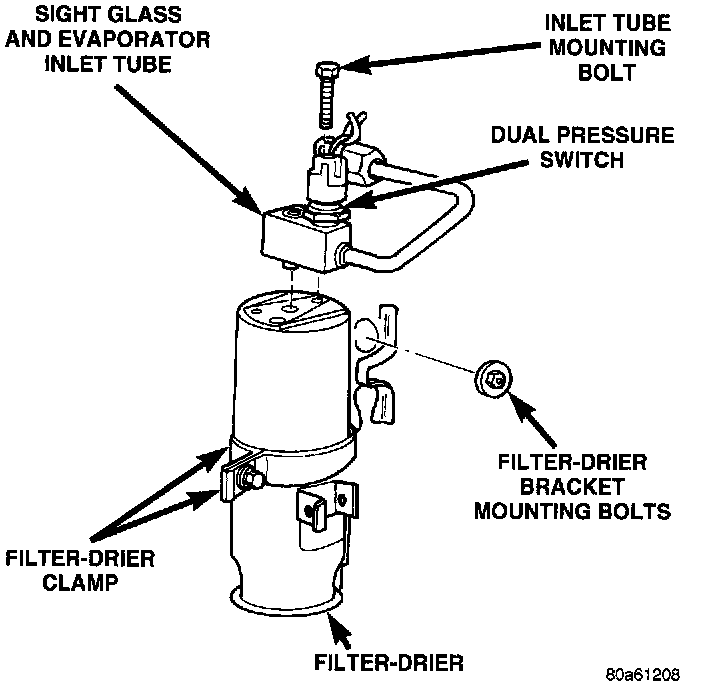
FILTER-DRIER ASSEMBLY
WARNING: The refrigeration system must be completely empty before proceeding with this operation.
CAUTION: The filter-drier used in a 134a refrigerant System will not interchange with a filter-drier from a R-12 refrigerant system
NOTE: Special effort must be used to keep all R-134a system components moisture-free. Moisture in the oil is very difficult to remove and will cause a reliability problem with the compressor.
REMOVAL
1. Open the vehicle hood.
2. Remove the two high pressure refrigerant lines from the top of the filter-drier assembly.
- Then carefully separate lines from filter-drier. Discard the old O-rings.
3. Remove two mounting nuts at the toe box for the filter-drier.
4. Remove the clamp bolt at the filter-drier and remove filter-drier from clamp.
5. Cover the open ends of the refrigerant lines to minimize refrigerant system contamination.
INSTALLATION
1. Replace O-rings on both refrigerant line go to the filter-drier.
2. Reverse the above procedures.
- Tighten Filter-Drier Attaching Nuts to 5 to 6 Nm (40 to 50 in. lbs.) torque.
3. Evacuate and Charge A/C system.