Hub and Bearing Carrier Removal
HUB AND BEARING CARRIER REMOVAL - JEEP MODELS1. Raise the vehicle.
2. Remove the wheel-tire assembly
3. Remove the disc brake caliper but do not disconnect the brake hose. Secure the caliper to the chassis with wire or string.
CAUTION: Do not allow the brake hose to support caliper weight. Be sure to secure the caliper to the chassis.
FIGURE 2 - FRONT WHEEL BEARING ASSEMBLY:
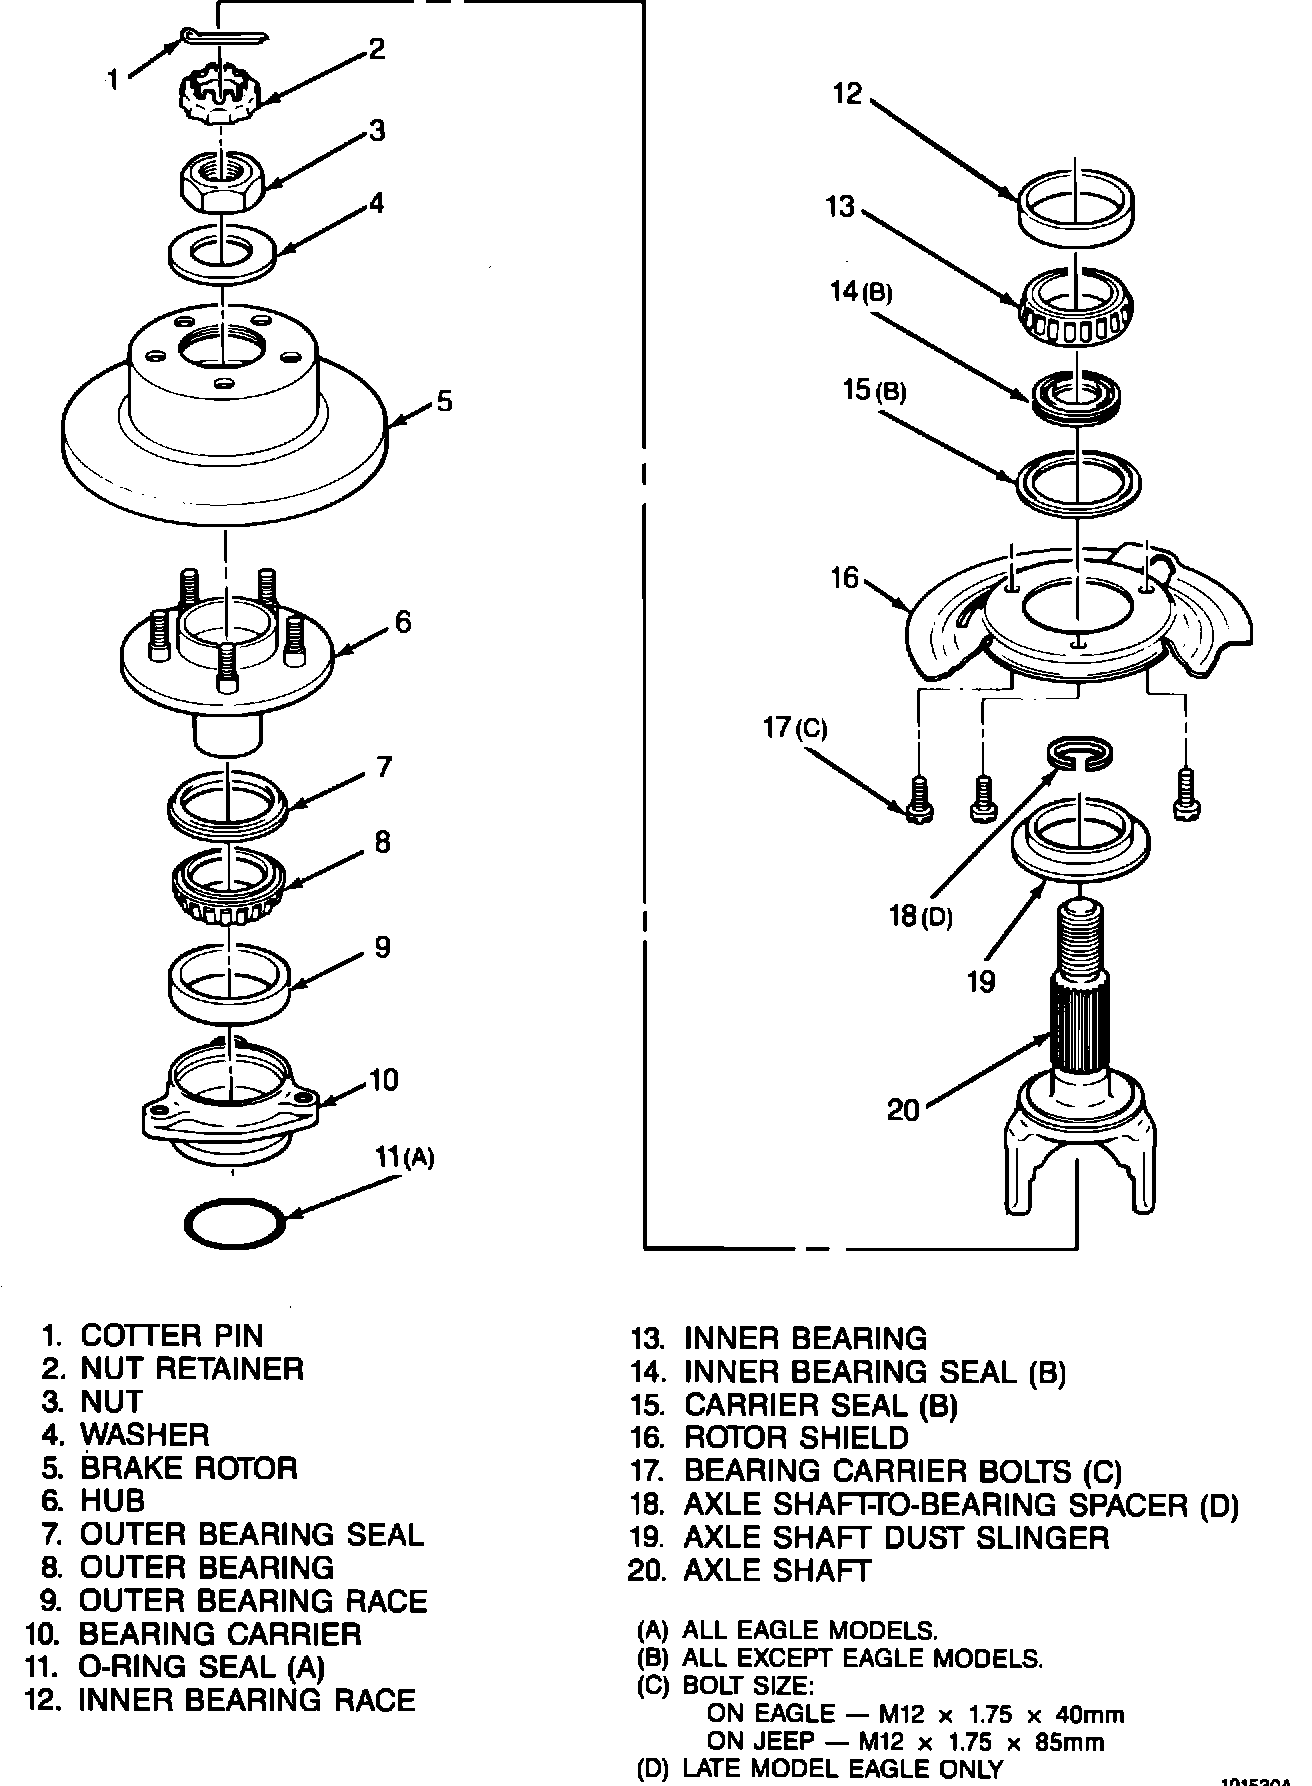
4. Remove the brake rotor (5) (Fig. 2).
5. Remove the cotter pin (1), nut retainer (2), axle nut (3), and washer (4) (Fig. 2).
6. Remove the three carrier bolts (17) (Fig. 2).
7. Remove the hub (6), bearing carrier (10) and rotor shield (16) (Fig. 2).
HUB AND BEARING CARRIER REMOVAL - EAGLE MODELS
1. Raise the vehicle.
2. Remove the wheel and tire assembly.
3. Remove the disc brake caliper but do not disconnect the brake hose. Secure the caliper to the chassis with wire or string.
CAUTION: Do not allow the brake hose to support caliper weight. Be sure to secure the caliper to the chassis.
FIGURE 2 - FRONT WHEEL BEARING ASSEMBLY:
4. Remove the disc brake rotor (5) (Fig. 2).
5. Remove the cotter pin (1), nut retainer (2), axle nut (3), and washer (4) (Fig. 2).
6. Disconnect the steering arm from the steering knuckle.
7. Remove the caliper anchor plate from the steering knuckle.
8. Remove the three carrier bolts (17) (Fig 2).
9. Remove the hub (6), bearing carrier (10) and rotor shield (16) (Fig. 2).
BEARING REMOVAL
CAUTION: The bearing remover tools are designed for use with an arbor or hydraulic press and Kent-Moore bearing remover J-22912-01. They must not be used with any type of impact tool such as a machinist hammer or slide hammer.
FIGURE 3:
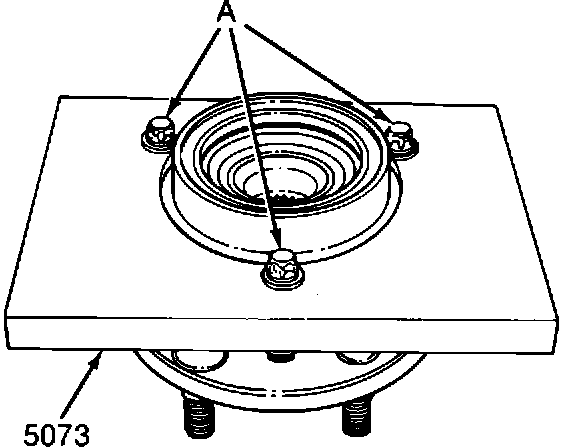
1. Attach press plate 5073 to the rear of the hub and carrier assembly as shown in (Fig. 3). Secure the press plate with the M12 x 1.75 x 40 mm bolts (A).
2. Position the assembled hub, carrier and press plate in an arbor or hydraulic press.
FIGURE 4:
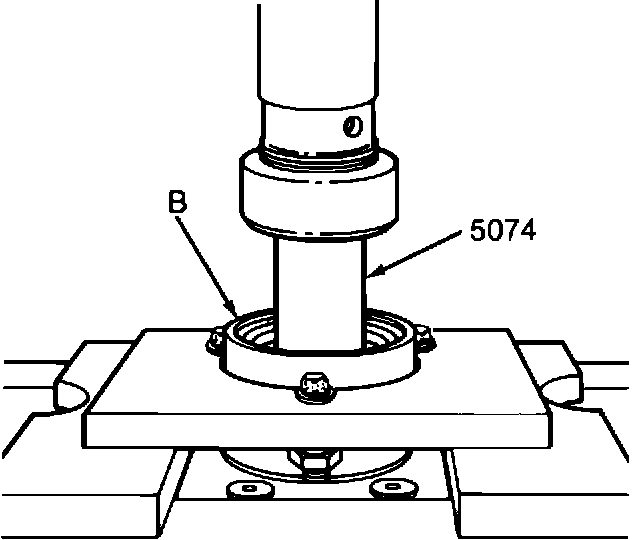
3. Press the hub out of the carrier (B) with press pin 5074 (Fig. 4).
FIGURE 5:
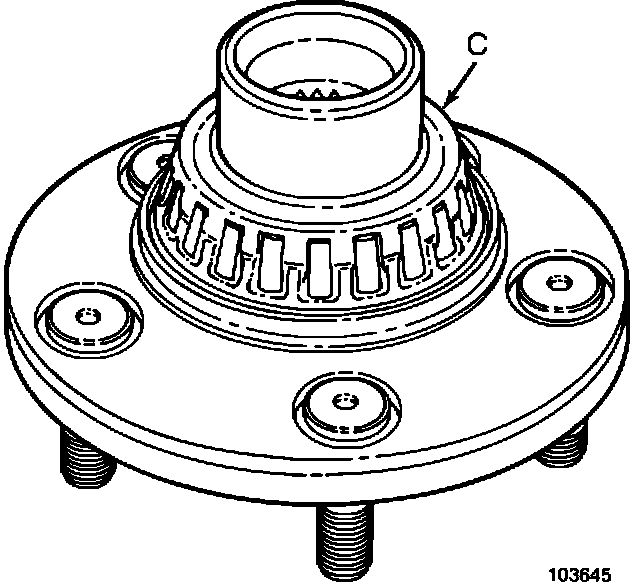
4. Cut and remove the plastic bearing cage (C) (Fig. 5) from the hub inner bearing. Use diagonal pliers or tin snips to cut the bearing cage. Discard the bearing rollers after removing the cage.
FIGURE 6:
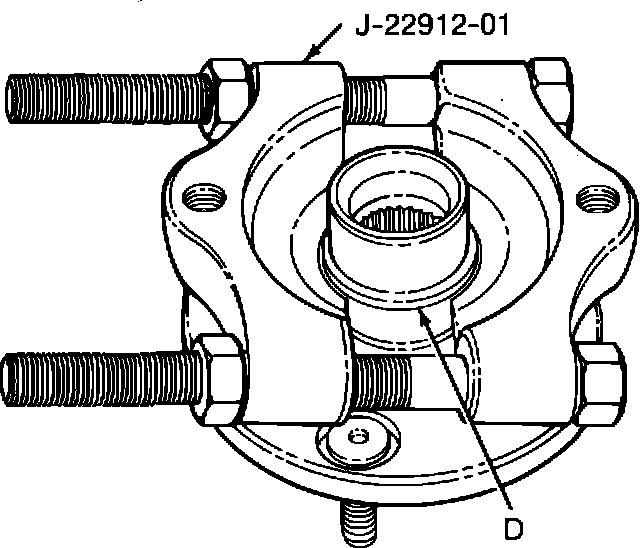
5. Remove the remaining part of the inner bearing from the hub as follows:
^ Install remover tool J-22912-01 on the inner bearing (D) (Fig. 6).
^ Position the remover tool and hub in an arbor or hydraulic press.
FIGURE 7:
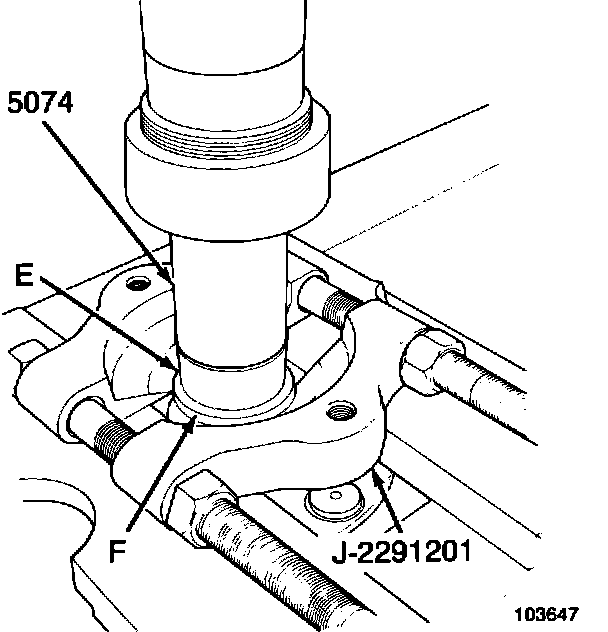
^ Press the hub (E) out of the inner bearing (F) with press pin 5074 (Fig. 7).
FIGURE 2 - FRONT WHEEL BEARING ASSEMBLY:
6. On Eagle models, remove the O-ring seal (11) from the hub (Fig. 2). Discard the seal, it is not reusable.
7. On Jeep models, remove the carrier seal (15) (Fig. 2). Discard the seal, it is not reusable.
8. On Eagle models, remove the inner bearing (12) (Fig. 2).
FIGURE 8:
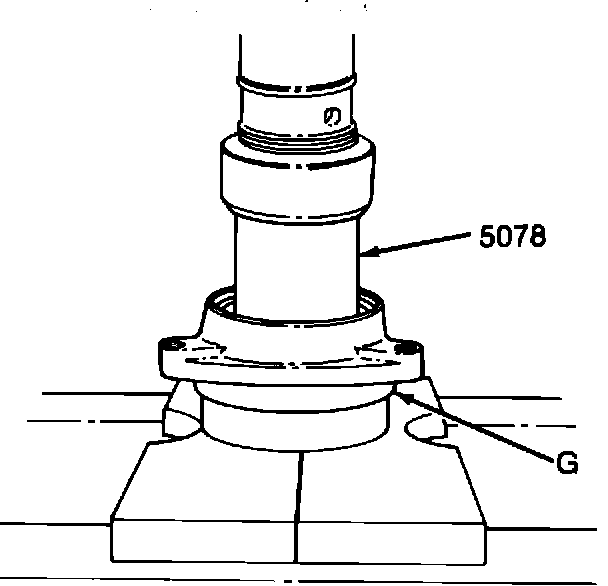
9. On Jeep models, press the inner bearing seal (G), from the hub using the inner race and bearing installer 5078 (Fig. 8).
NOTE: Be sure the word "Jeep" on tool 5078 is facing downward toward the hub.
FIGURE 9:
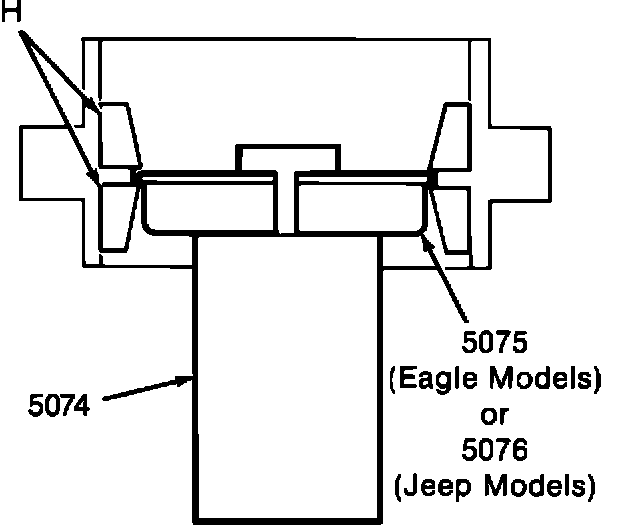
10. On Eagle models, position bearing race remover tool 5075 between inner and outer bearing races (H) (Fig. 9).
11. On Jeep models, position bearing race remover tool 5076 between inner and outer bearing races (H) (Fig. 9).
12. Position press pin 5074 (Fig. 9) on bearing race remover tool.
FIGURE 10:
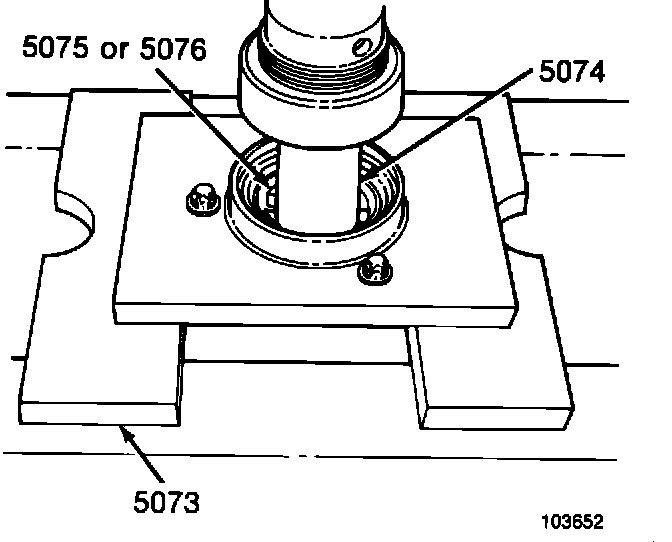
13. Place on press and press out inner bearing race, rotate and press out outer bearing race (Fig. 10).
CAUTION: Never use anything other than prescribed tools to remove bearing races as damage to the internal machined shoulder of the bearing carrier could result.