Part 2
Engine Continued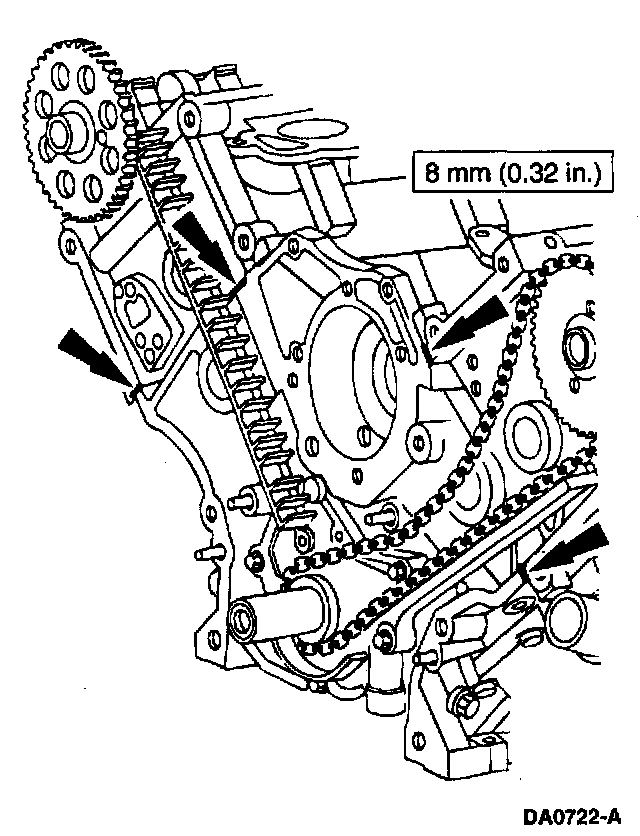
50. NOTE: If the front cover is not secured within four minutes, the sealant must be removed and the sealing area cleaned. To clean the sealing area, follow the directions provided on the packaging of the silicone gasket remover and the metal surface prep. Failure to follow this procedure can cause future oil leakage.
Apply a bead of silicone gasket and sealant along the cylinder head-to-cylinder block sealing surfaces, at the locations shown.
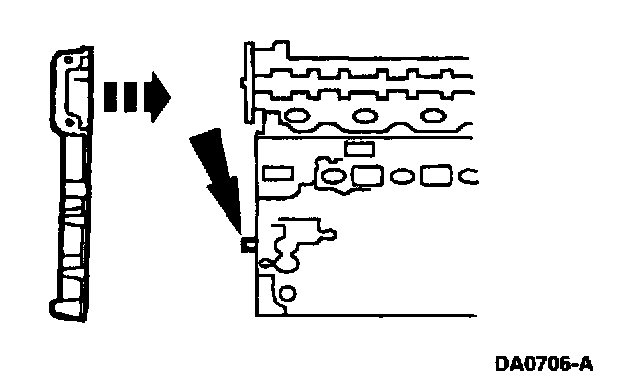
51. install a new engine front cover gasket on the engine front cover. Position the engine front cover. Install the fasteners finger-tight.
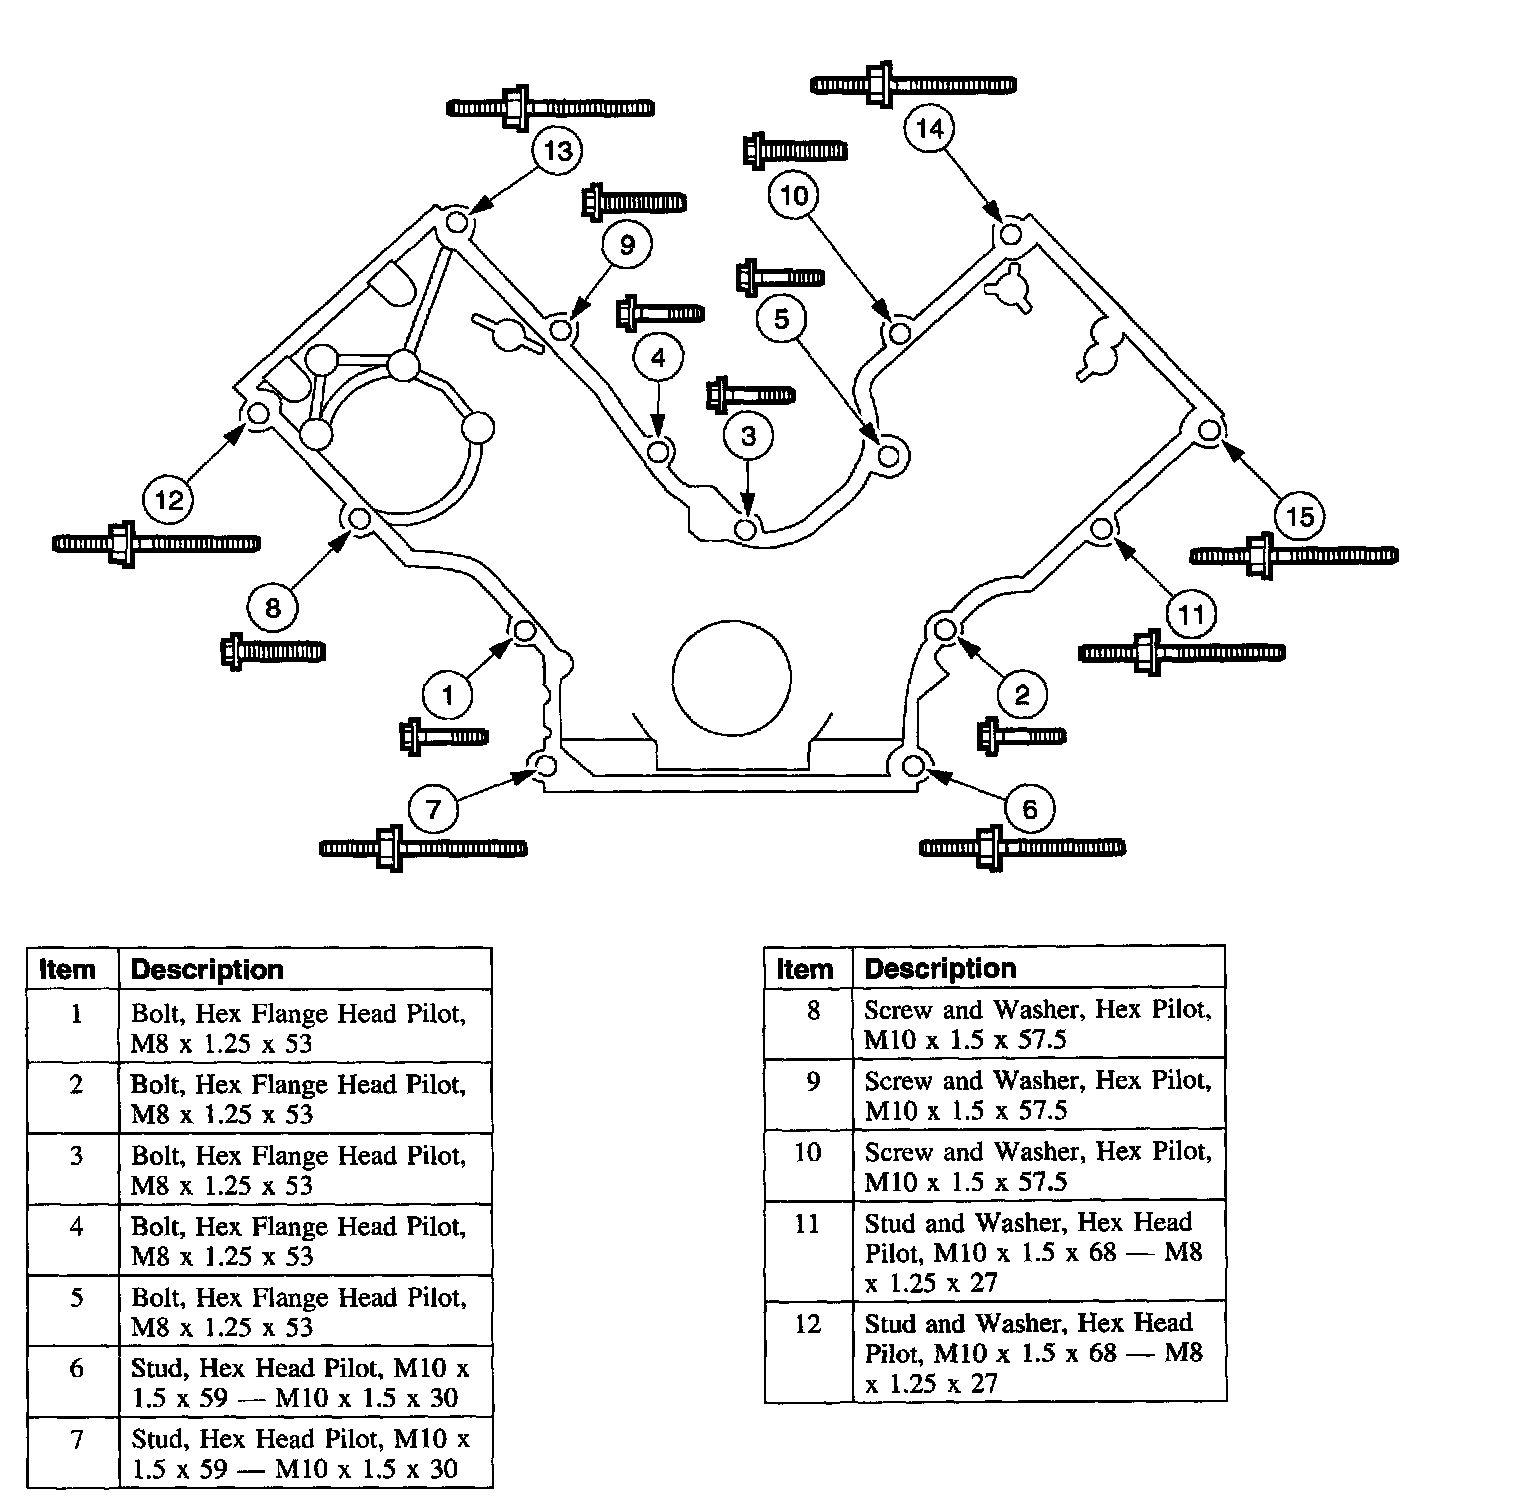
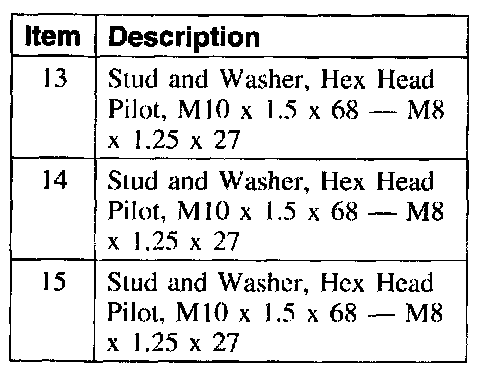
52. Tighten the engine front cover fasteners in sequence in three stages.
Stage 1: Tighten fasteners 1 through 5 to 25 Nm (18 ft. lbs.).
Stage 2: Tighten fasteners 6 and 7 to 48 Nm (35 ft. lbs.).
Stage 3: Tighten fasteners 8 through 15 to 48 Nm (35 ft. lbs.).
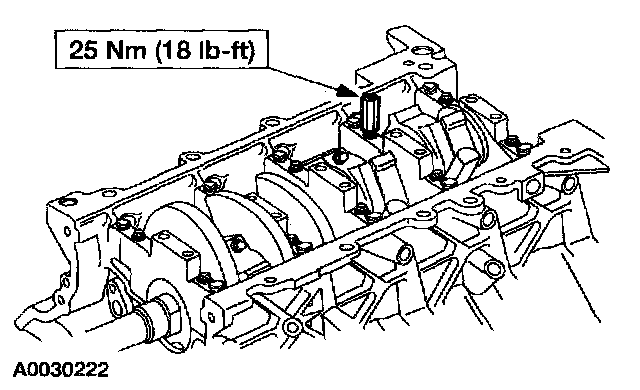
53. Install the oil pump screen and pickup tube spacer.
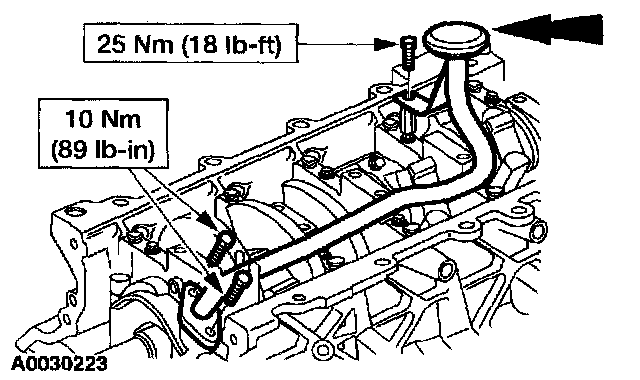
54. CAUTION: Make sure the O-ring is in place and not damaged. A missing or damaged O-ring can cause foam in the lubrication system, low oil pressure and severe engine damage.
NOTE: Clean and inspect the malting surfaces and install a new O-ring. Lubricate with the O-ring with clean engine oil.
Position the oil pump screen and pickup tube and install the bolts.
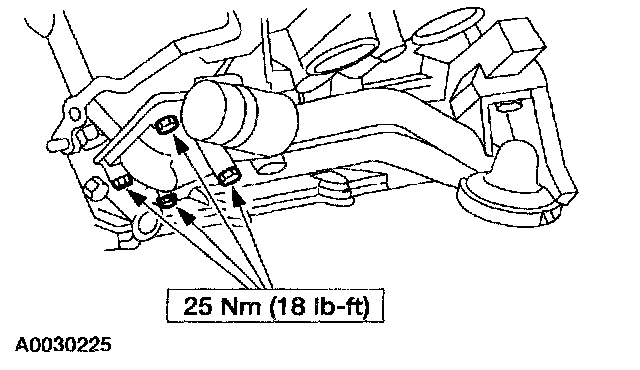
55. NOTE: Clean and inspect the mating surfaces, and install new gaskets.
Position the oil filter adapter and install the four bolts.

56. Install the rear nut.

57. Position the engine mounts to the cylinder block and install the six bolts.
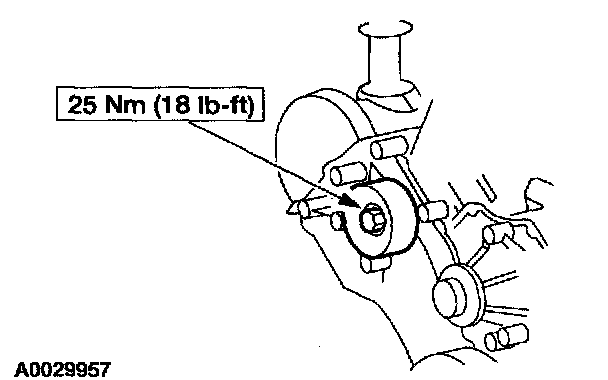
58. Position the belt idler pulley and install the bolt.

59. CAUTION: Do not rotate the coolant pump housing once the coolant pump has been positioned in the cylinder block. Damage to the O-ring seal will occur.
Install the coolant pump.
1 Lubricate the new O-ring seal using engine coolant and install the O-ring seal onto the coolant pump.
2 Position the coolant pump into the engine block.
3 Install the bolts.
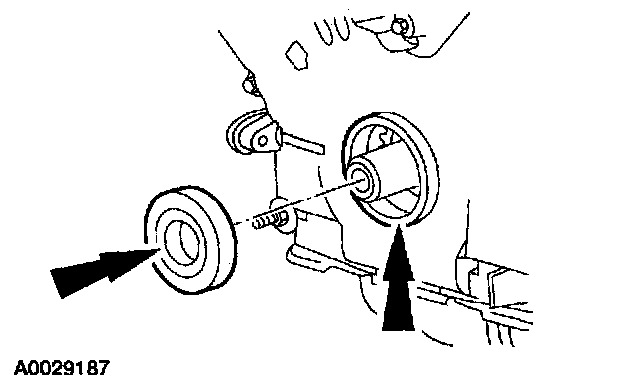
60. Lubricate the engine front cover and the front seal inner lip with clean engine oil.
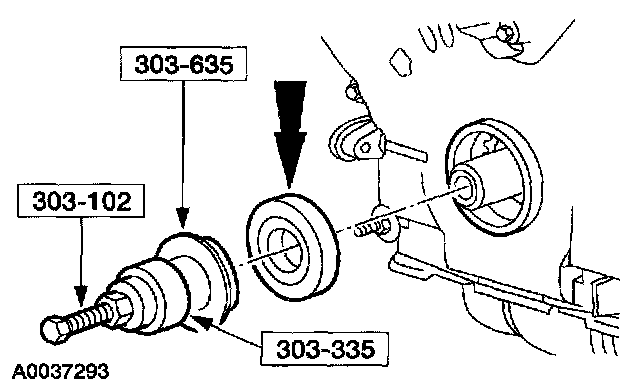
61. Use the special tools to install the crankshaft front seal into the engine front cover.
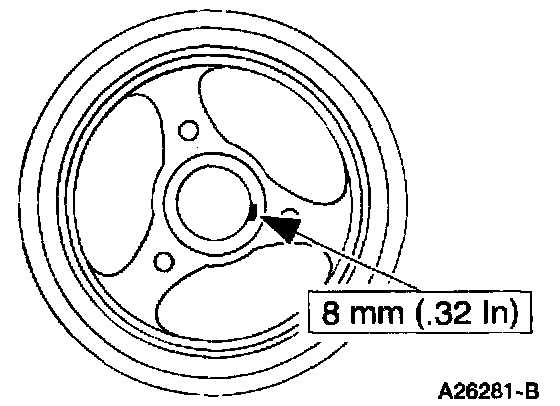
62. NOTE: If not secured within four minutes, the sealant must be removed and the sealing area cleaned. To clean the sealing area, follow the directions provided on the packaging of the silicone gasket remover and the metal surface prep. Failure to follow this procedure can cause future oil leakage.
Apply silicone gasket and sealant to the Woodruff key slot on the crankshaft pulley.
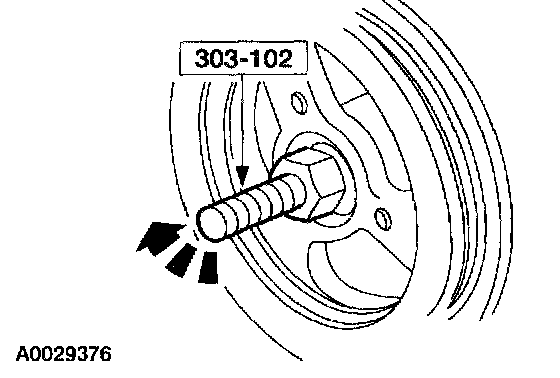
63. Use the special tool to install the crankshaft pulley.
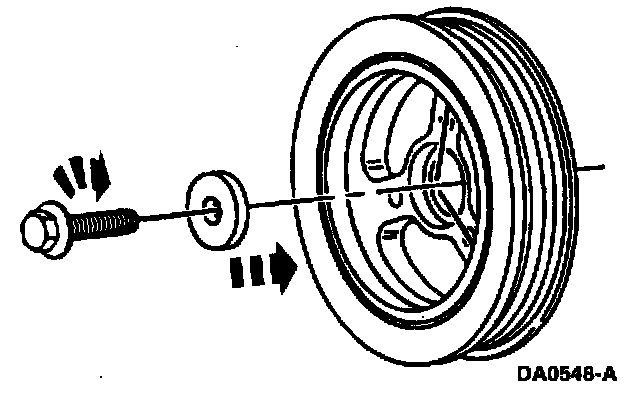
64. Install a new crankshaft pulley bolt and tighten the bolt in four stages.
^ Stage 1: Tighten to 90 Nm (66 ft. lbs.).
^ Stage 2: Loosen 360 degrees.
^ Stage 3: Tighten to 50 Nm (37 ft. lbs.).
^ Stage 4: Tighten an additional 90 degrees.
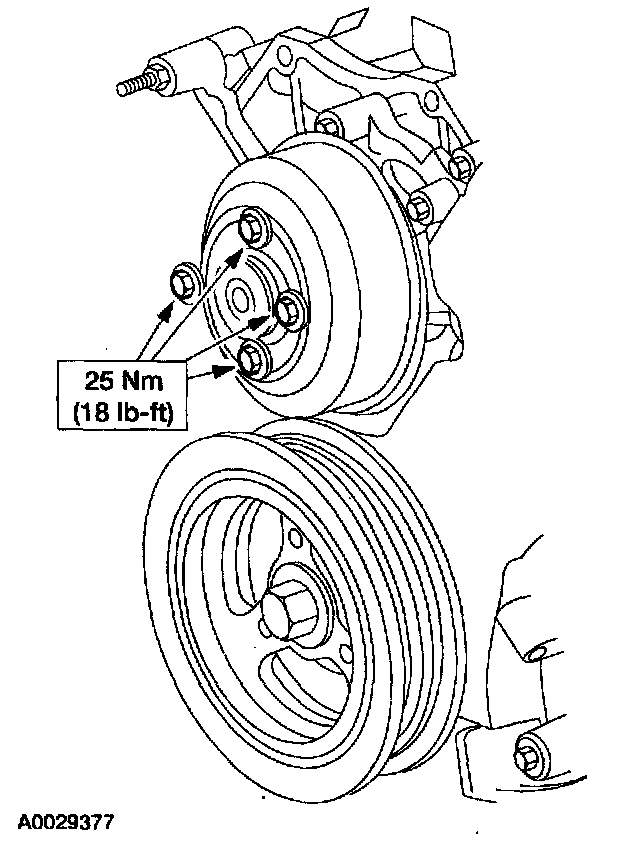
65. Position the coolant pump pulley on the coolant pump and install the bolts.
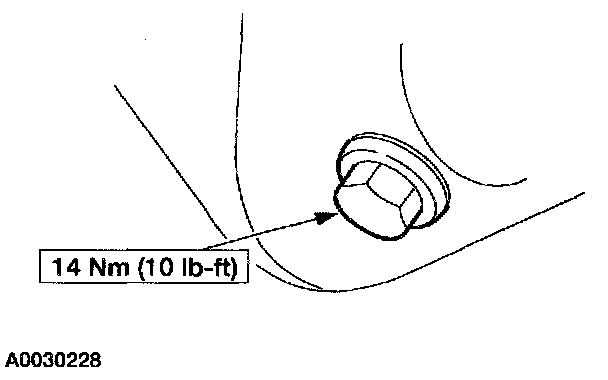
66. Install the oil drain plug.
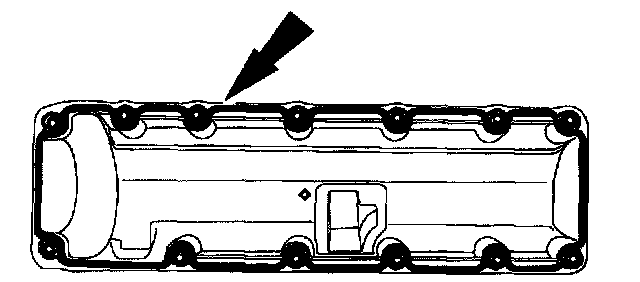
67. If a new gasket is being installed, apply instant adhesive completely around the gasket groove in the valve cover. Install the new LH valve cover gasket.
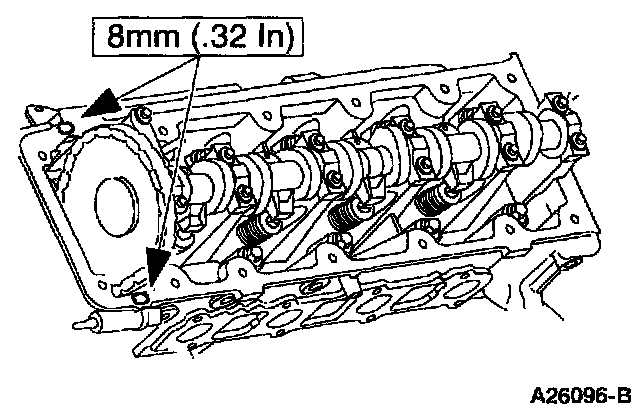
68. NOTE: If not secured within four minutes, sealant must be removed and the sealing area cleaned. To clean the sealing area, follow the directions provided on the packaging of the silicone gasket remover and the metal surface prep. Failure to follow this procedure can cause future oil leakage.
Apply silicone gasket and sealant in two places where the engine front cover meets the cylinder head.
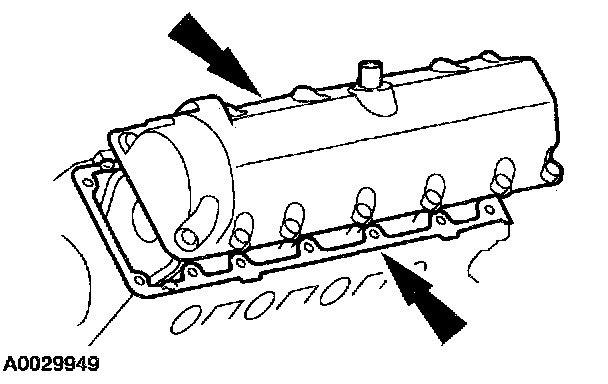
69. Position the LH valve cover and the valve cover gasket on the cylinder head and install the bolts loosely.
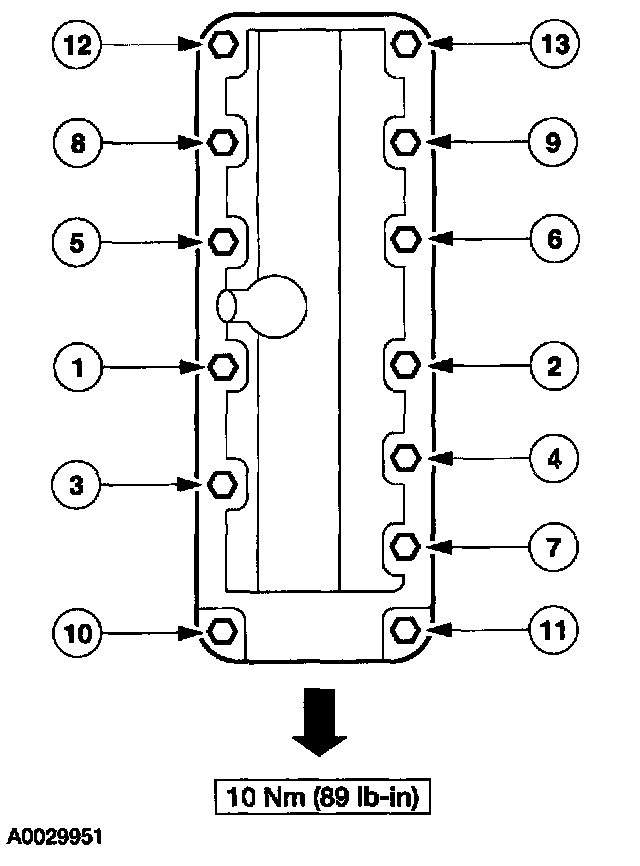
70. Tighten the bolts in the sequence shown.
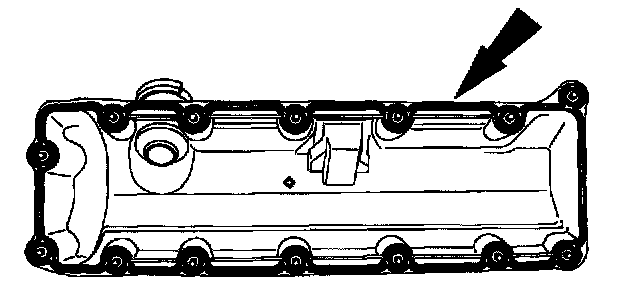
71. If a new gasket is being installed, apply instant adhesive completely around the gasket groove in the valve cover. Install the new RH valve cover gasket.
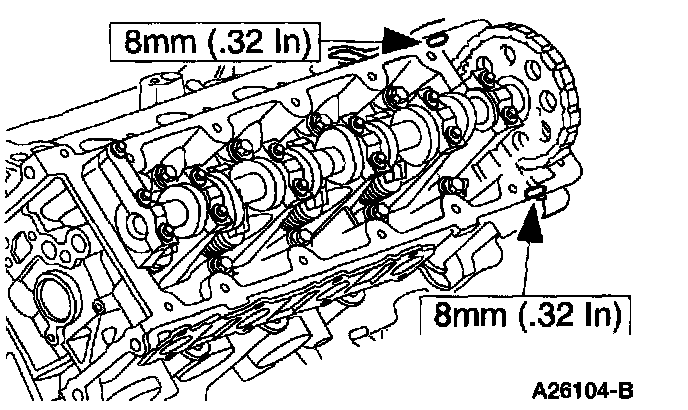
72. NOTE: If not secured within four minutes, the sealant must be removed and the sealing area cleaned. To clean the sealing area, follow the directions provided on the packaging of the silicone gasket remover and the metal surface prep. Failure to follow this procedure can cause future oil leakage.
Apply silicone gasket and sealant in two places where the engine front cover meets the cylinder head.
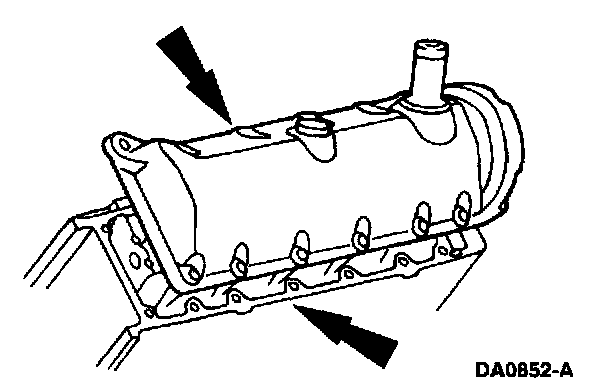
73. Position the RH valve cover on the cylinder head and install the bolts loosely.
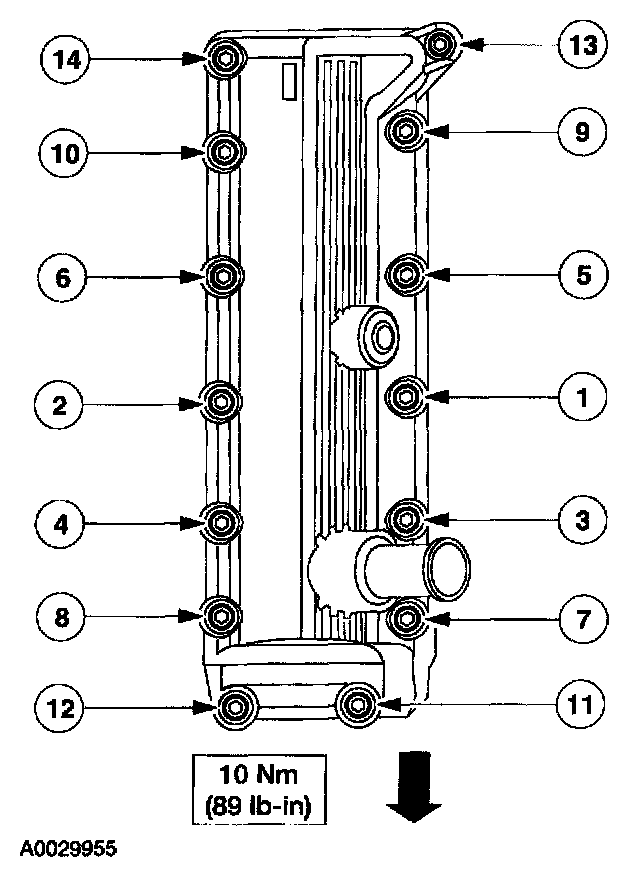
74. Tighten the bolts in the sequence shown.
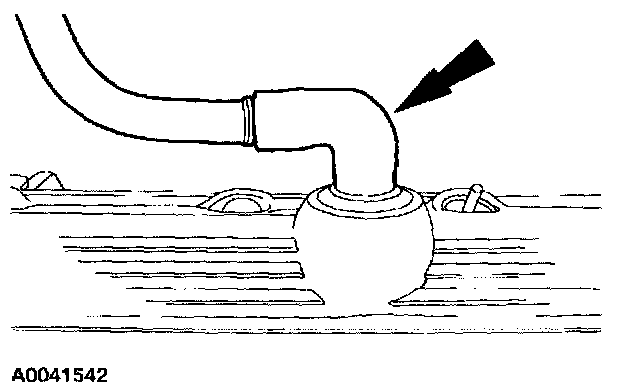
75. Install the crankcase ventilation tube on the LH valve cover.
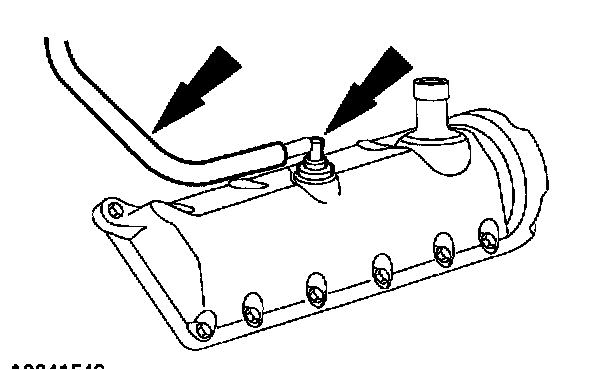
76. Install the Positive Crankcase Ventilation (PCV) valve and hose in the RH valve cover.

77. NOTE: RH shown, LH similar.
Install the radio frequency interference capacitors.
78. Install the engine control sensor wiring harness.
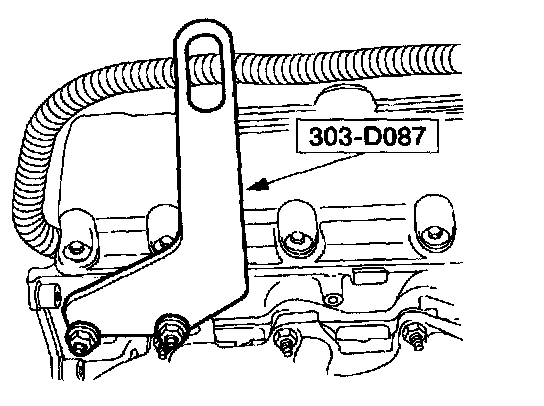
79. Install the special tool.
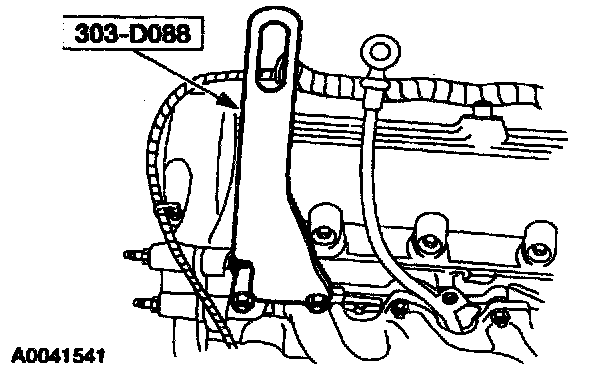
80. Install the special tool.
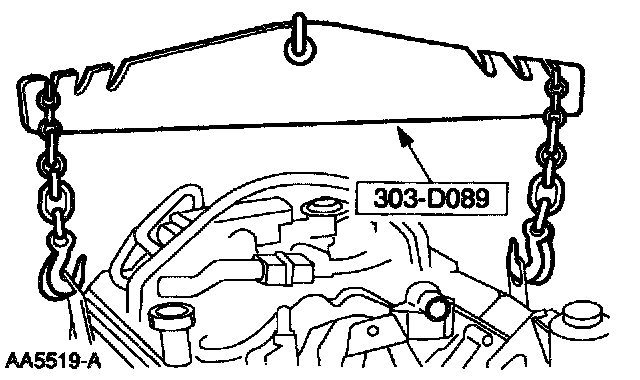
81. Install the special tool and remove the engine from the work stand.
82. CAUTION: Do not use metal scrapers, wire brushes, power abrasive discs or other abrasive means to clean the aluminum retainer plate. These tools cause scratches and gouges, which make leak paths. Use a plastic scraping tool to remove all traces of old sealant.
Inspect the rear seal retainer plate. Clean the mating surface for the rear seal retainer plate with silicone gasket remover and metal surface prep. Follow the directions on the packaging.
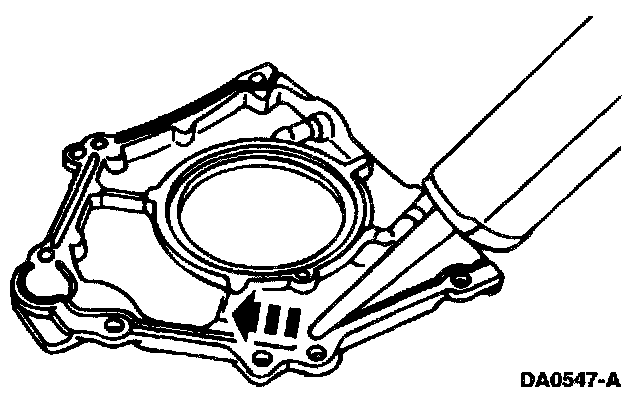
83. NOTE: If not secured within four minutes, the sealant must be removed and the sealing area cleaned. To clean the sealing area, follow the directions provided on the packaging of the silicone gasket remover and the metal surface prep. Failure to follow this procedure can cause future oil leakage.
Apply a 4 mm (0.16 inch) bead of silicone gasket and sealant around the rear oil seal retainer sealing surface.
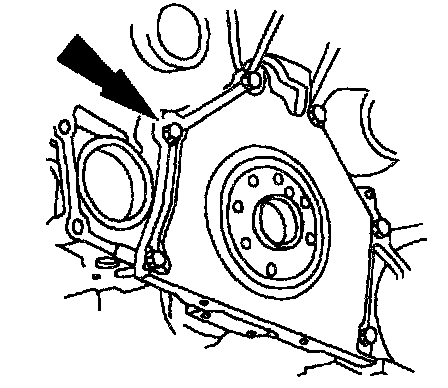
84. Install the rear oil seal retainer plate and loosely install the six bolts.
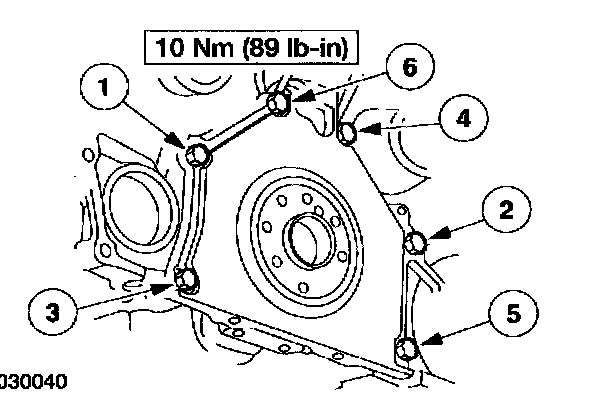
85. Tighten the bolts in the sequence shown.
86. CAUTION: Do not use metal scrapers, wire brushes, power abrasive discs or other abrasive means to clean the sealing surfaces. These tools cause scratches and gouges, which make leak paths. Use a plastic scraping tool to remove all traces of old sealant.
Inspect the oil pan. Clean the mating surface for the oil pan with silicone gasket remover and metal surface prep. Follow the directions on the packaging.
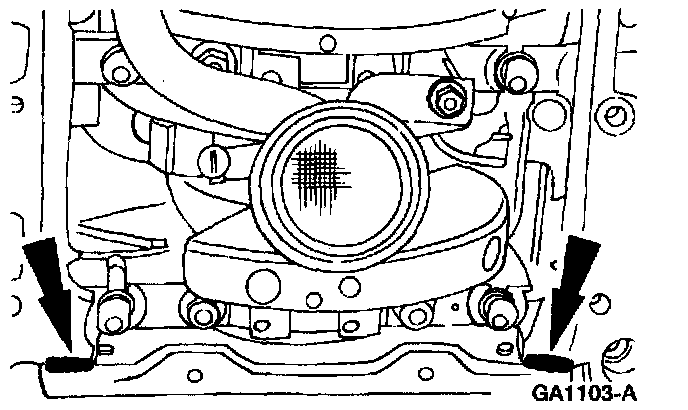
87. NOTE: If the oil pan is not secured within four minutes, the sealant must be removed and the sealing areas cleaned. To clean the sealing area, follow the directions provided on the packaging of the silicone gasket remover and the metal surface prep. Failure to follow this procedure can cause future oil leakage.
Apply silicone gasket and sealant at the rear oil seal retainer-to-cylinder block sealing surface.
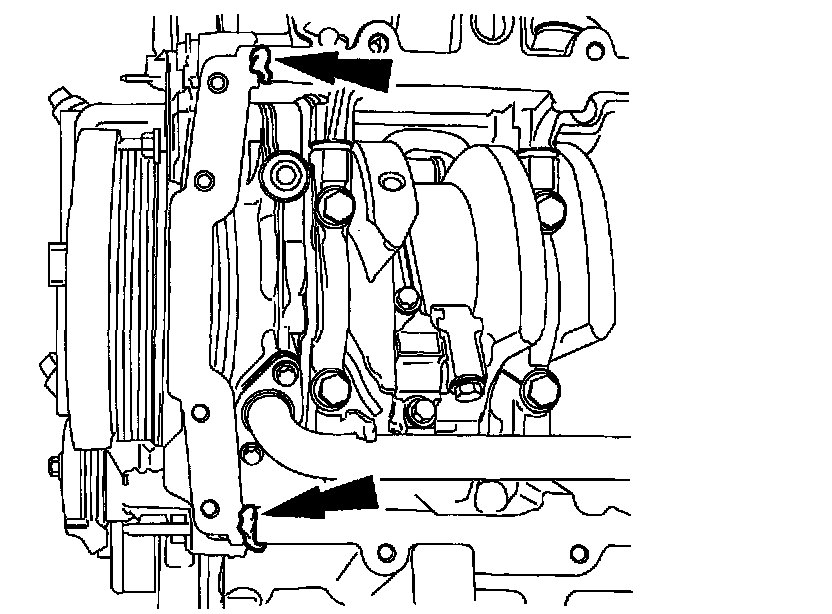
88. NOTE: If the oil pan is not secured within four minutes, the sealant must be removed and the sealing areas cleaned. To clean the sealing area, follow the directions provided on the packaging of the silicone gasket remover and the metal surface prep. Failure to follow this procedure can cause future oil leakage.
Apply silicone gasket and sealant at the engine front cover-to-cylinder block sealing surface.
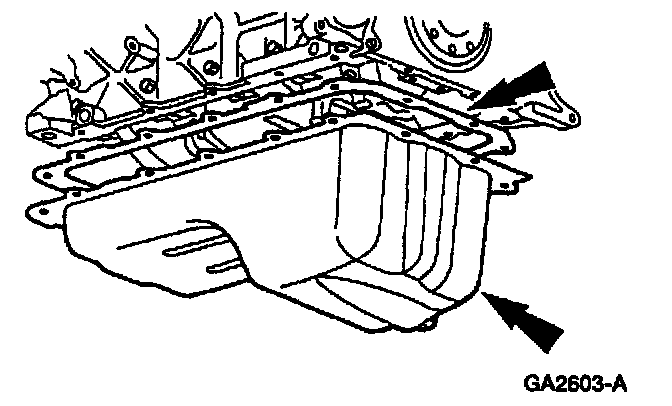
89. Install the oil pan gasket and the oil pan and loosely install the bolts.
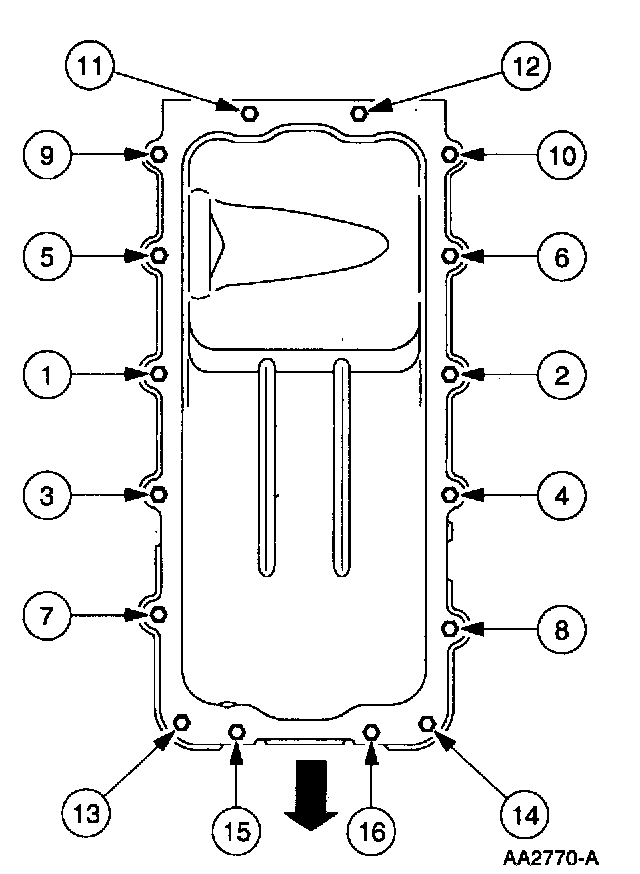
90. Tighten the bolts in three stages, in the sequence shown.
^ Stage 1: Tighten to 2 Nm (18 inch lbs.).
^ Stage 2: Tighten to 20 Nm (15 ft. lbs.).
^ Stage 3: Tighten an additional 90 degrees.
91. Lower the engine onto wooden blocks.
92. Remove the special tool.
93. Remove the special tool.
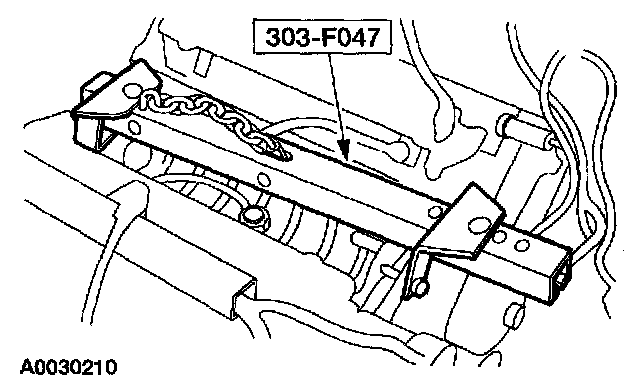
94. Install the special tool and raise the engine.
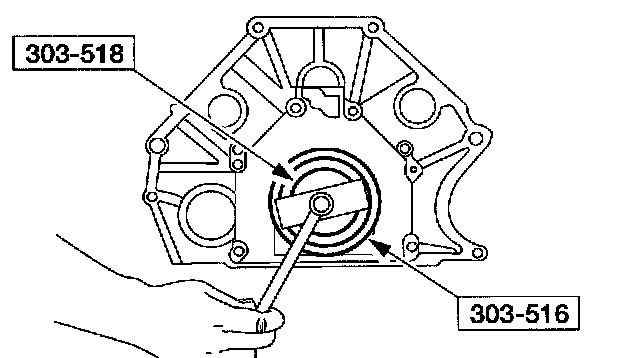
95. NOTE: Lubricate the inner lip of the crankshaft rear oil seal with clean engine oil.
Using the special tools, install a new crankshaft rear oil seal.

96. Using the special tools, install the crankshaft rear oil slinger.
97. Install the flexplate and bolts. Tighten the bolts in the sequence shown.