Front
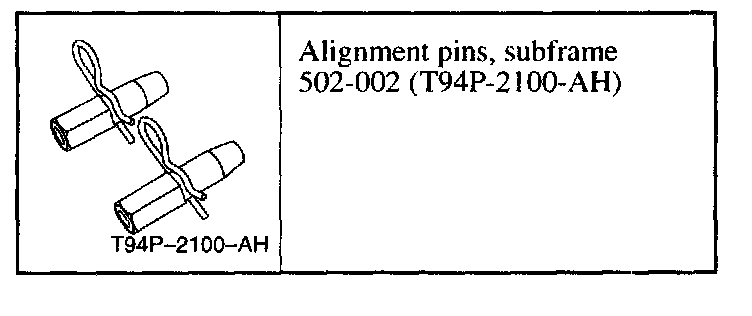
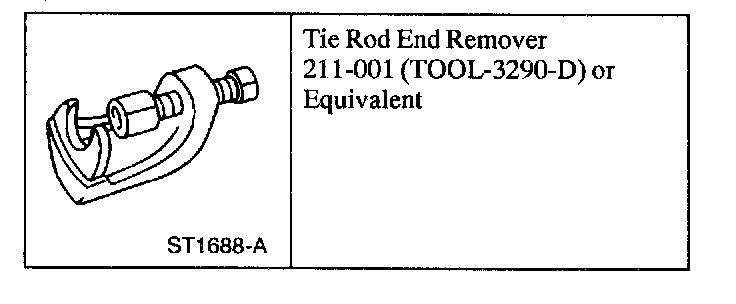
Special Tools:
Removal
1. Disconnect the battery ground cable.
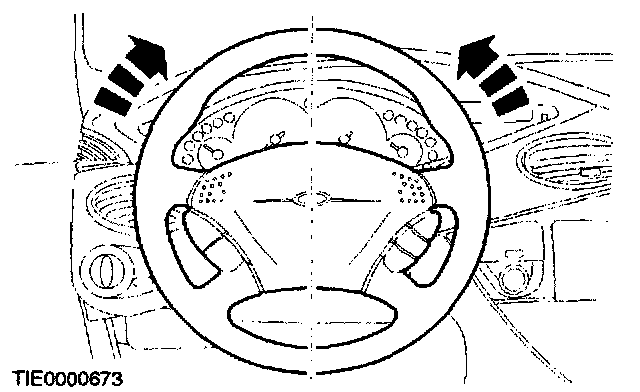
2. Center the steering wheel.
- Remove the ignition key and lock in position.
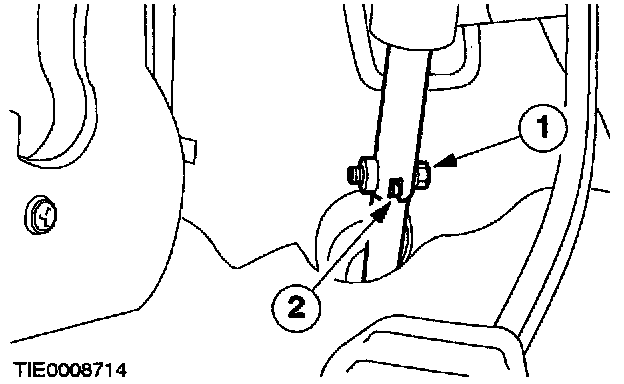
3. Disconnect the steering column shaft from the pinion extension.
1. Remove the bolt.
2. Release the steering column shaft from the pinion extension.
4. Loosen the front wheel nuts.
5. Raise and support the vehicle.
6. Remove the wheels.
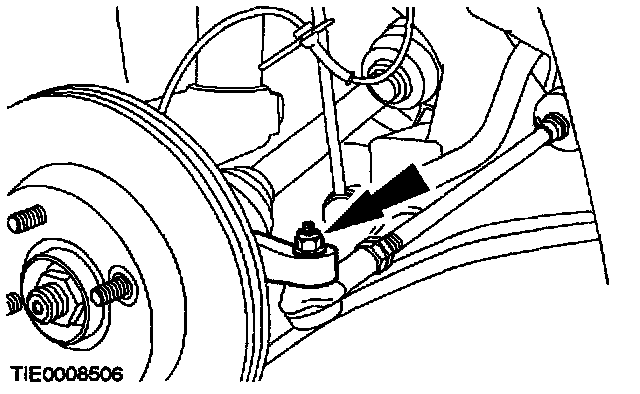
7. Remove the tie-rod end retaining nuts.
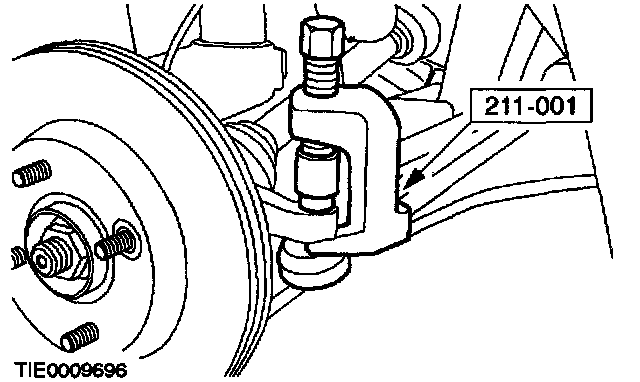
8. CAUTION: Protect the ball joint seal using a soft cloth to prevent damage.
Using the special tool, detach the tie-rod ends from the wheel knuckles.
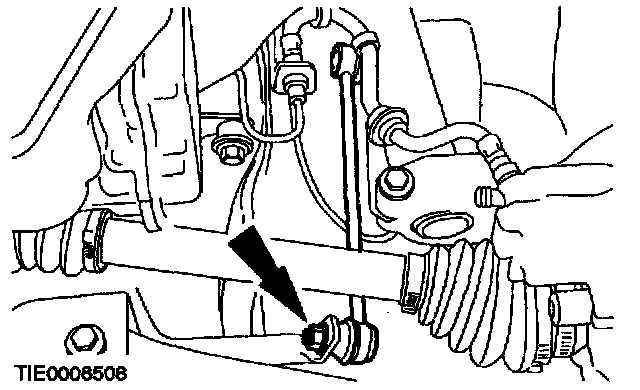
9. Detach the connecting links.
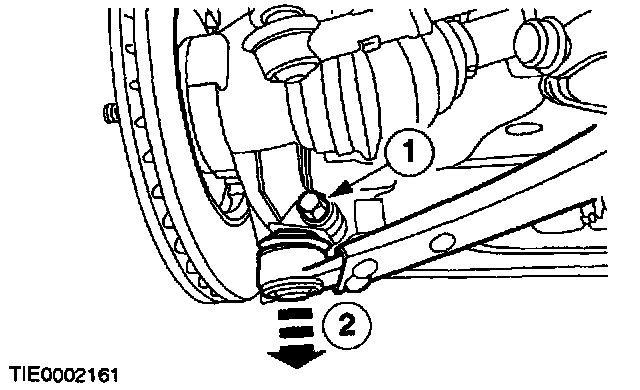
10. CAUTION: Protect the ball joint seal using a soft cloth to prevent damage.
Remove the lower arm ball joints.
1. Remove the bolt.
2. Remove the lower arm ball joint.
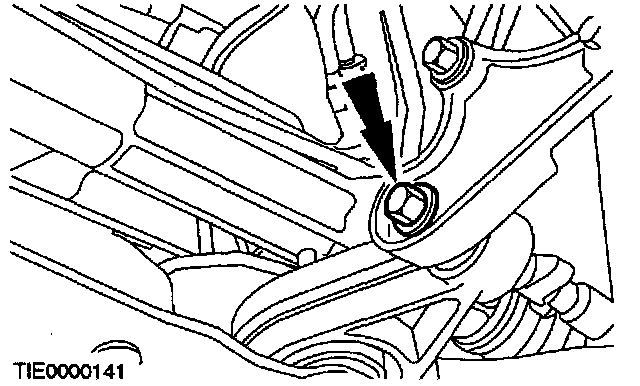
11. Remove the support insulator to transaxle center bolt.
12. Using a suitable transmission jack, support the crossmember.
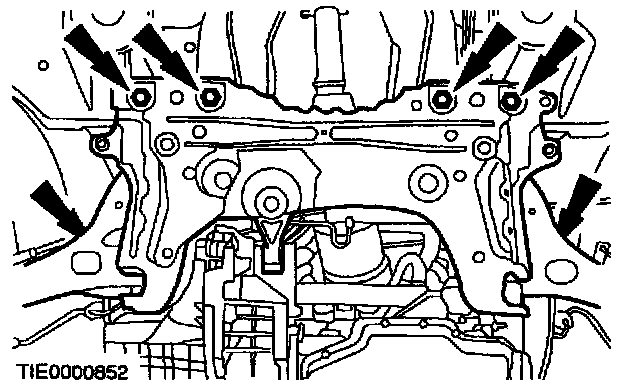
13. Remove the six crossmember bolts (support removed for clarity).
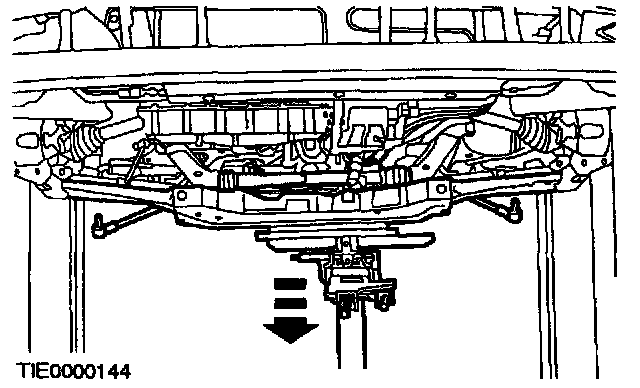
14. Lower the crossmember.
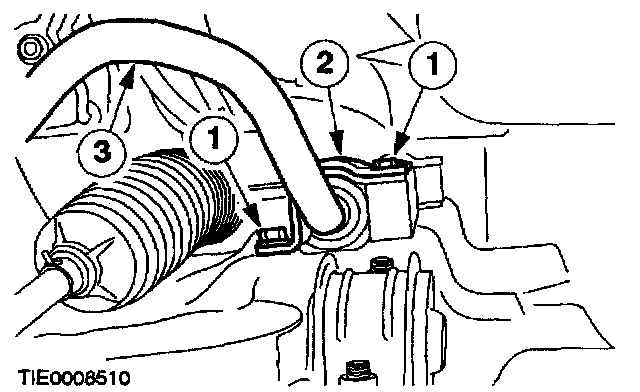
15. Remove the stabilizer bar.
1. Remove the bolts.
2. Remove the clamps.
3. Remove the stabilizer bar.
Installation
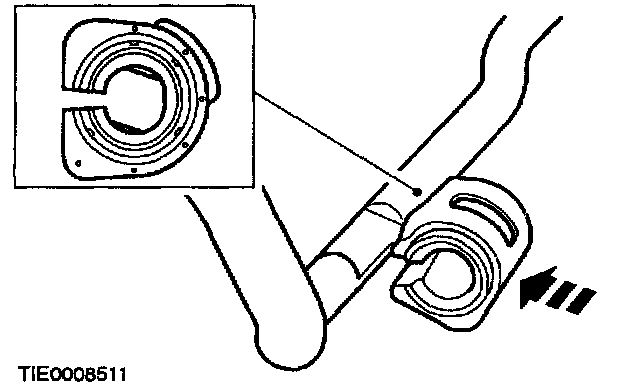
1. CAUTION: The stabilizer bar bushings must be located correctly on the flats of the stabilizer bar with no lubricant.
Install the bushings onto the stabilizer bar (both sides).
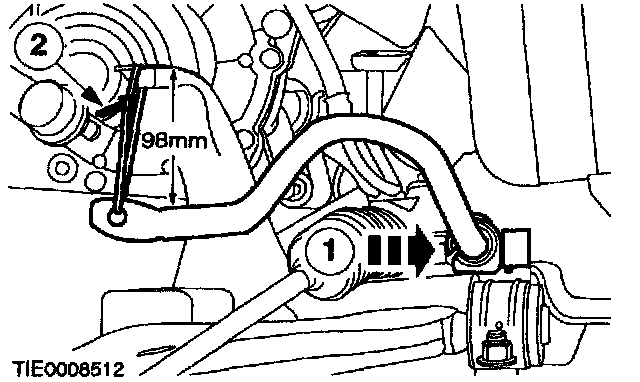
2. Set the stabilizer bar to the design height setting.
1. Locate the bushing against the spacer (both sides).
2. Support the stabilizer bar to specification (both sides).
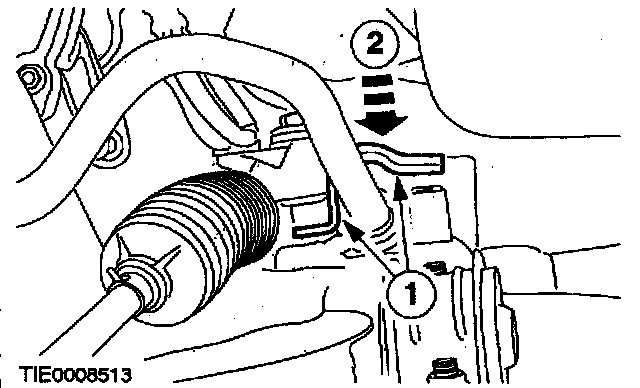
3. Install the clamps.
1. Apply water to the clamp to assist installation.
2. Press the clamp onto the bushing.
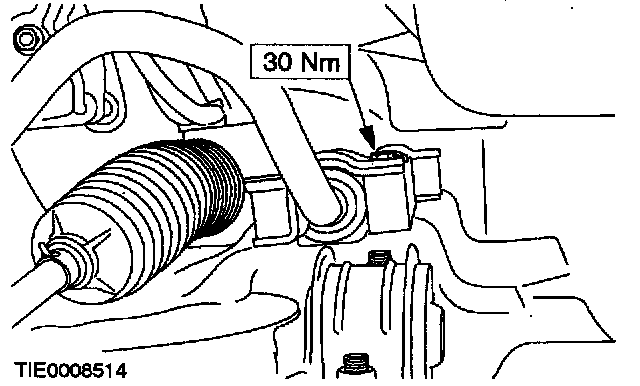
4. Install the clamp rear bolts (both sides).
5. Install the clamp front bolts (both sides).
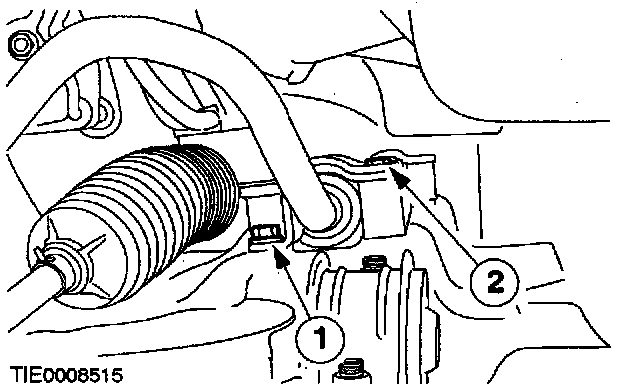
6. Tighten the clamp bolts.
- Tighten the bolts in the sequence shown in two stages.
- Stage 1: Tighten bolts 1 through 2 to 50 Nm.
- Stage 2: Tighten bolts 1 through 2 to 70 Nm.
7. Remove the stabilizer bar supports.
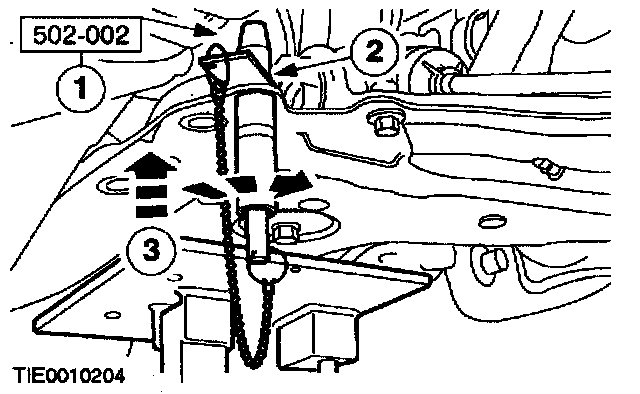
8. CAUTION: Make sure the crossmember ball bearing washers and captives are installed correctly.
Using the special tool, align the crossmember.
1. Insert the guide pins through the crossmember alignment holes.
2. Slide the locking plates into the grooves and tighten the guide pin sleeve.
3. Raise the crossmember, engaging the guide pins into the chassis aligning holes.
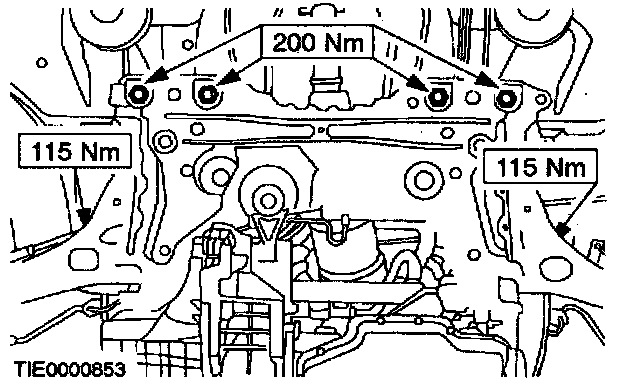
9. Install the crossmember bolts.
10. Remove the transmission jack.
11. Remove the subframe alignment pins.
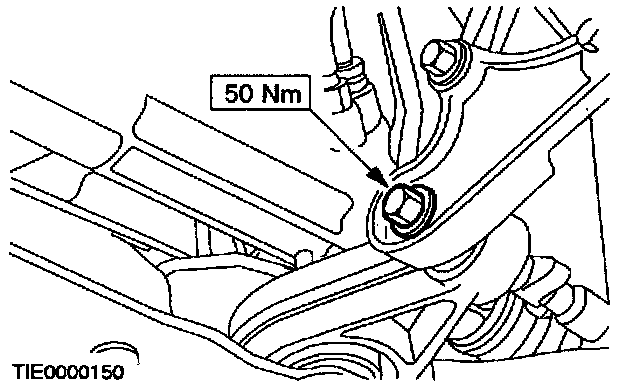
12. Install the support insulator center bolt.
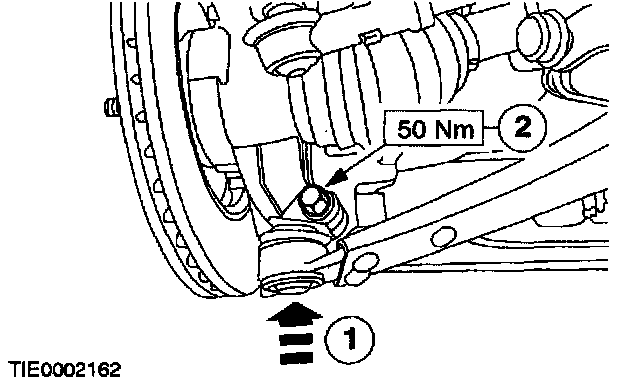
13. CAUTION: Make sure the heat shield is installed to prevent damage to the ball joint.
Install the lower arm ball joint.
1. Install the lower arm ball joint.
2. Install the bolt.
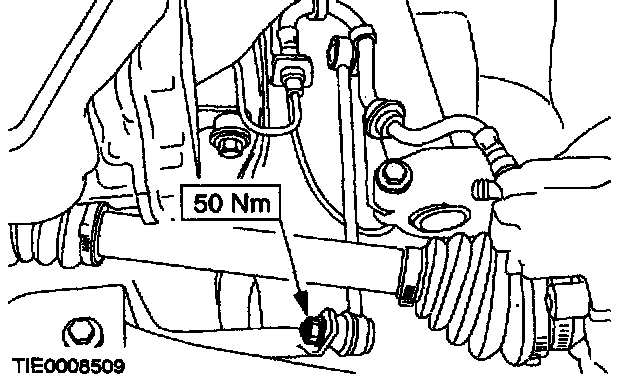
14. Attach the connecting links.
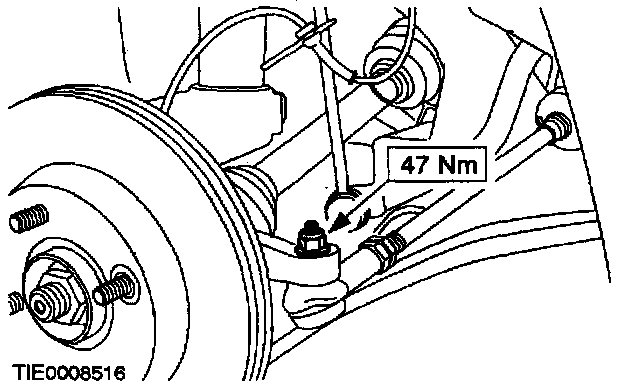
15. Install the tie-rod ends.
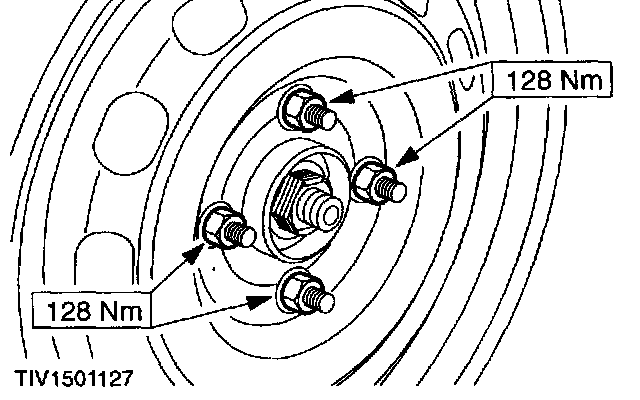
16. Install the wheels.
17. CAUTION: Make sure the vehicle is in the straight-ahead position, before lowering the vehicle.
Lower the vehicle.
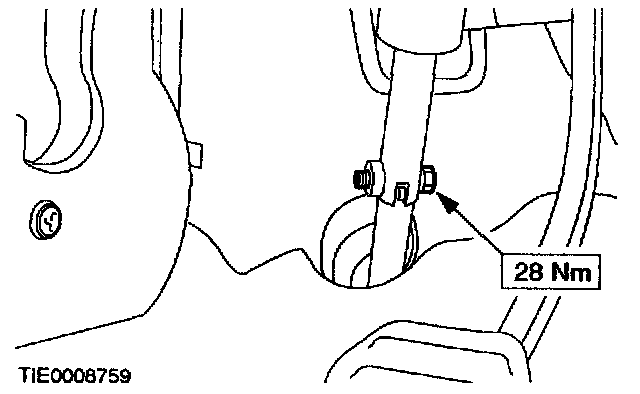
18. WARNING: Install a new pinch bolt. Failure to follow this instruction may result in personal injury.
Connect the steering column coupling shaft to the pinion extension with a hew bolt.
19. Connect the battery ground cable.