A/C - Front Blower Buzzing Noise
04-039July 9, 2004
Applies To:
1999-03 Odyssey - ALL
Buzzing From the Front Blower Motor
SYMPTOM
The front blower fan buzzes.
PROBABLE CAUSE
Debris accumulates around the wiper motor posts and under the cowl cover. Noise results from debris passing into the blower unit and blower motor.
CORRECTIVE ACTION
Remove the debris from the blower unit and the blower motor; replace the blower motor if necessary. Apply foam to the wiper motor post clearance holes, and reinstall the cowl top using new seals.
PARTS INFORMATION
Seal A:
P/N 74202-S0X-A00, H/C 7765043
Seal D (two required):
P/N 74205-S0X-A00, H/C 7765076
WARRANTY CLAIM INFORMATION
In warranty:
The normal warranty applies.
Operation Number: 612002
Flat Rate Time: 0.7 hour
Failed Part: P/N 74200-S0X-A00
H/C 5934641
Defect Code: 03217
Symptom Code: 04201
Skill Level: Repair Technician
Out of warranty:
Any repair performed after warranty expiration may be eligible for goodwill consideration by the District Parts and Service Manager or your Zone Office. You must request consideration, and get a decision, before starting work.
REPAIR PROCEDURE
1. Remove the right front door sill, the door opening trim, and the kick panel; pull the carpet aside.
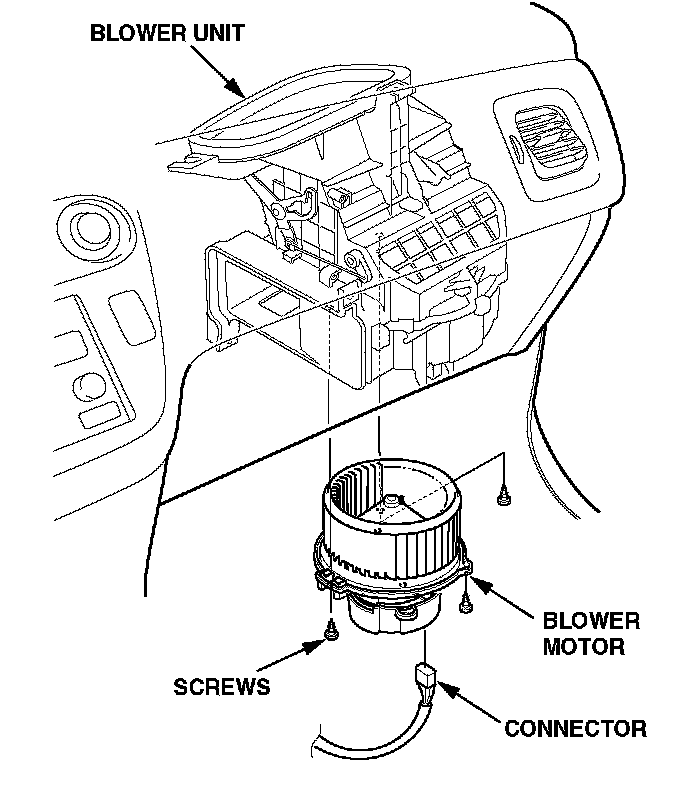
2. Disconnect the connector from the blower motor.
3. Remove the three screws that secure the blower motor to the blower unit; remove the blower motor.
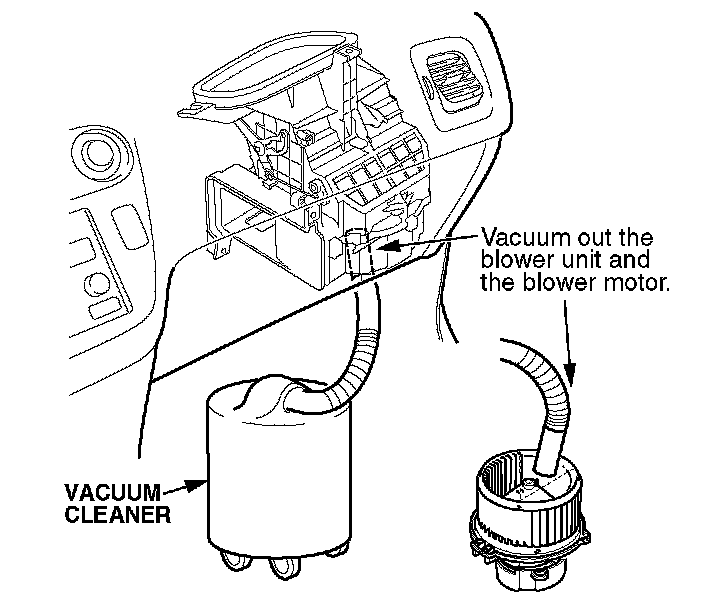
4. Use a vacuum cleaner to remove any debris from the blower unit and the blower motor.
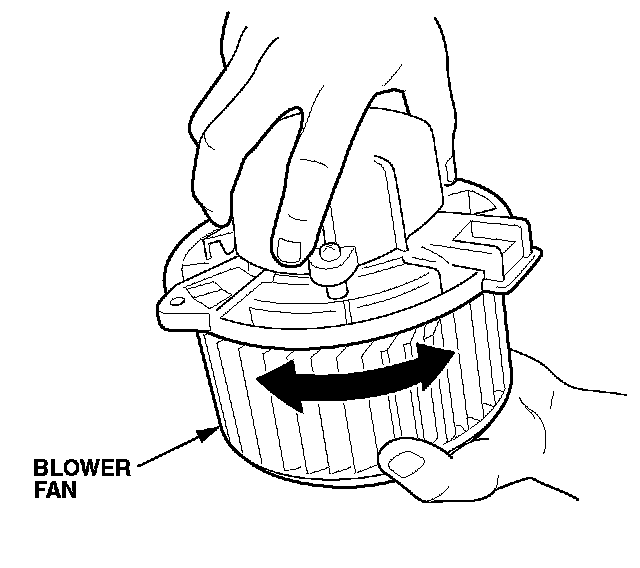
5. Inspect the blower motor for any possible damage by rotating the blower fan by hand.
^ If it rotates freely, reinstall the original blower motor, in reverse order of removal, and go to step 6.
^ If it does not rotate freely, replace the blower motor, and go to step 6.
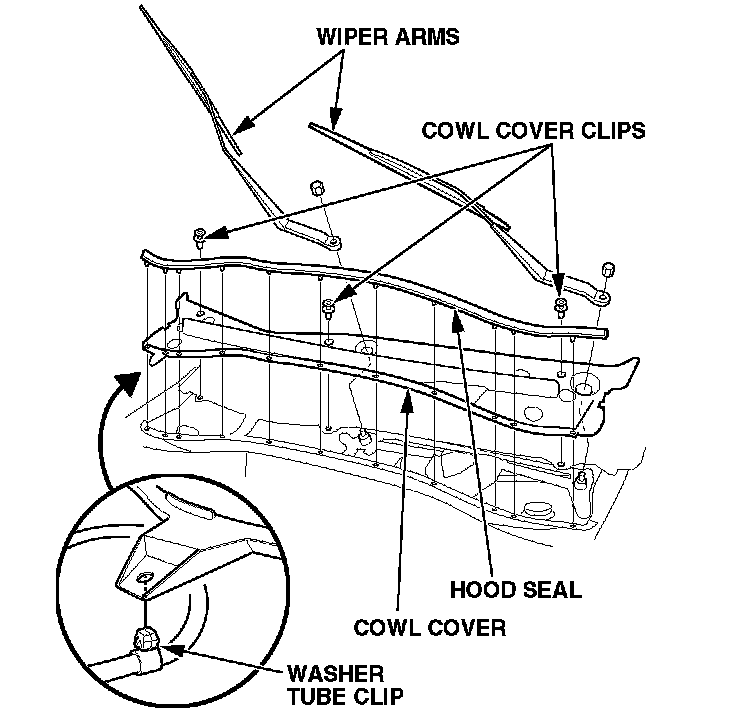
6. Remove both wiper arms.
7. Remove the three cowl cover clips and the hood top seal.
8. Remove the washer tube clip from the cowl cover.
9. Remove the cowl cover; do not break the tabs on the rear of the cover.
10. Clean the area around the driver's and passengers side wiper-motor-post clearance holes with isopropyl alcohol.
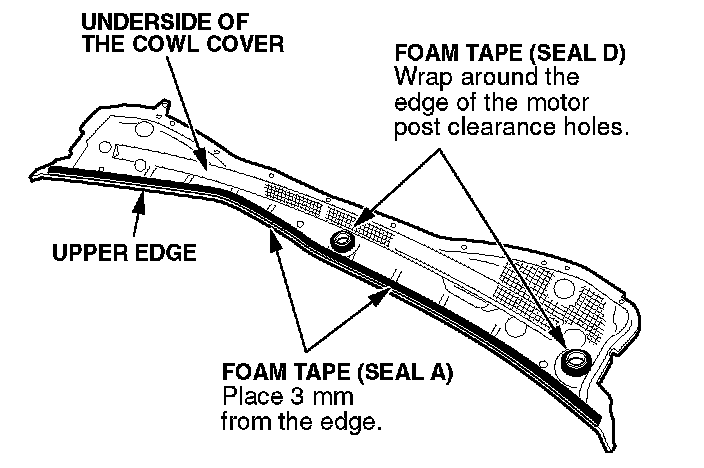
11. Apply foam tape in the areas shown. Place the foam tape (Seal A) at least 3 mm from the edge so that it is not visible after the cowl cover is installed.
12. Wrap foam tape (Seal D) around the edge of the motor post clearance holes.
13. Reinstall the cowl cover.
14. Reinstall the wiper arms. Torque the nuts to 24.5 N.m (18 lb-ft).

Disclaimer