Body - Manual Sliding Door Difficult to Open
00-091October 29, 2002
Applies To:
1999-02 Odyssey LX - ALL
2003 Odyssey LX - from VIN 2HKRL1...3H500001 thru 2HKRL1...3H500957
2003 Odyssey LX - from VIN 5FNRL1...3B000001 thru 5FNRL1...3B007555
Manual Sliding Door Is Difficult to Open
(Supersedes 00-091, dated November 20, 2001)
SYMPTOM
One or both of the manual sliding doors are difficult to open.
PROBABLE CAUSE
The sliding door opening trim (weatherstrip) or the subseal (body side) sticks to the door and makes it difficult to open.
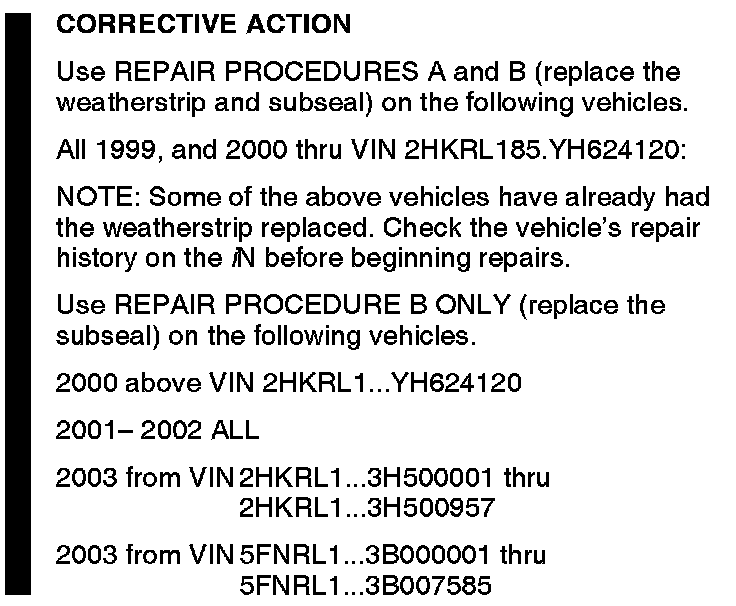
*CORRECTIVE ACTION*
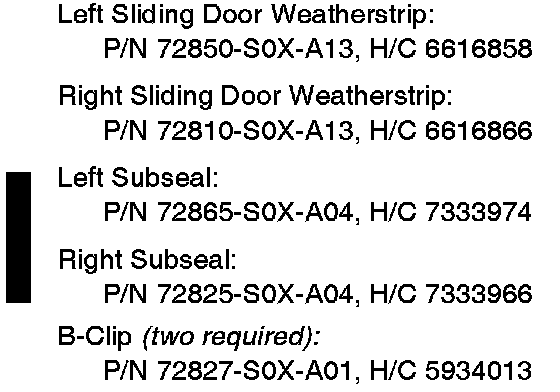
PARTS INFORMATION
RECOMMENDED MATERIALS
3M General Purpose Adhesive Cleaner:
3M P/N 051135-05954
Shin-Etsu Silicone Grease:
P/N 05795-9013, H/C 4642294
WARRANTY CLAIM INFORMATION
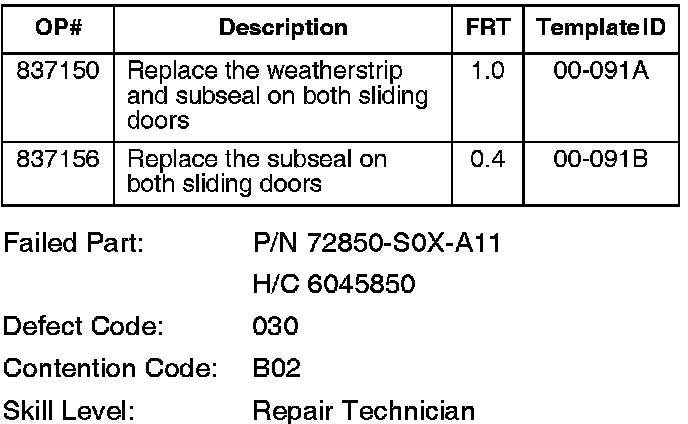
In warranty:
The normal warranty applies.
Out of warranty:
Any repair performed after warranty expiration may be eligible for goodwill consideration by the District Parts and Service Manager or your Zone Office. You must request consideration, and get a decision, before starting work.
REPAIR PROCEDURE A
1. Park the vehicle on level ground, and open the left sliding door.
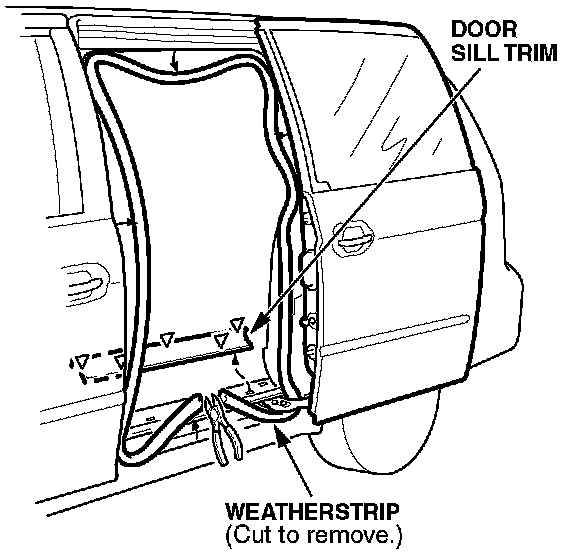
2. Remove the sliding door sill trim.
3. Pull the weatherstrip away from the body, cut it with a pair of diagonal cutters, then remove it.
4. Clean the weatherstrip flange with a clean shop towel and 3M General Purpose Adhesive Cleaner.
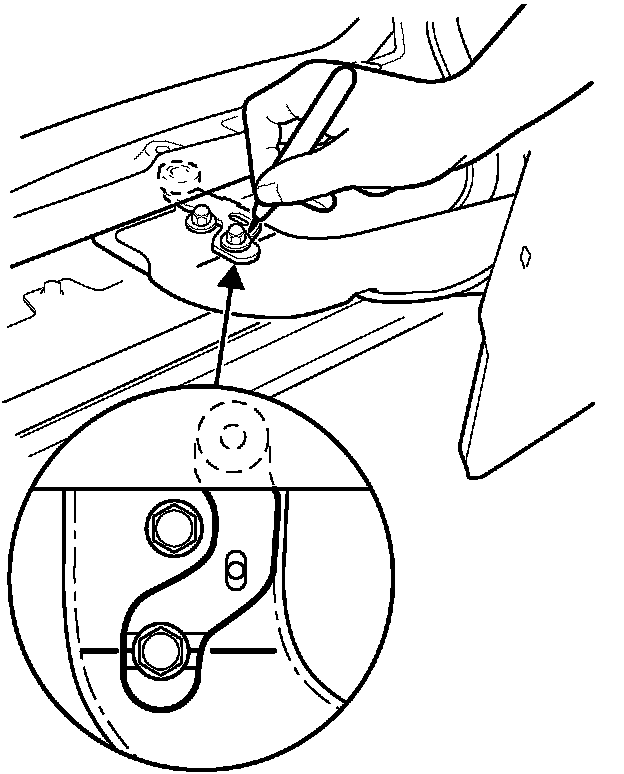
5. Mark the position of the lower roller lever with a felt-tip marker.
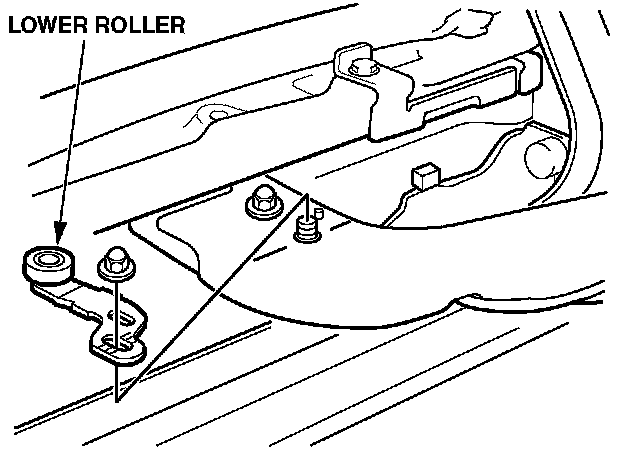
6. Slide the door forward 6 inches, then remove the outer lower roller nut.
7. Remove the lower roller.
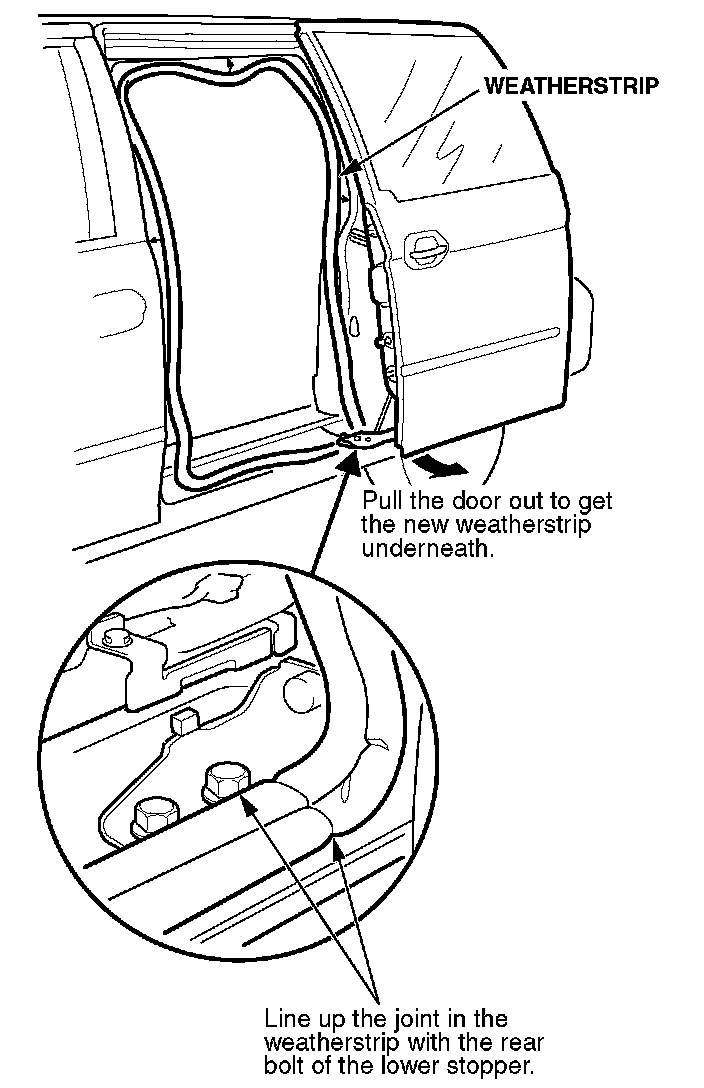
8. Pull out the lower front corner of the sliding door, then have an assistant loop the new weatherstrip under the lower roller lever.
9. Reinstall the lower roller.
10. Align the lower roller with the marks you made in step 5, then reinstall the outer lower roller nut. Torque the lower roller nut to 22 N.m (16 lb-ft).
11. Install the weatherstrip joint next to the second lower stopper mounting bolt.
12. Install the rest of the weatherstrip, and make sure it's not wrinkled.
13. Reinstall the sliding door sill trim.
14. Close and open the sliding door several times to make sure it operates normally.
15. Open the right sliding door, and repeat steps 2 thru 14 on the other sliding door.
REPAIR PROCEDURE B
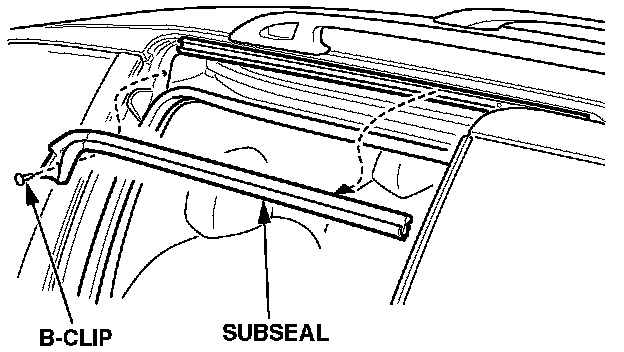
1. Remove the B-clip from the subseal with a trim pad remover tool, then pull the subseal out of its channel. Discard the subseal and the B-clip.
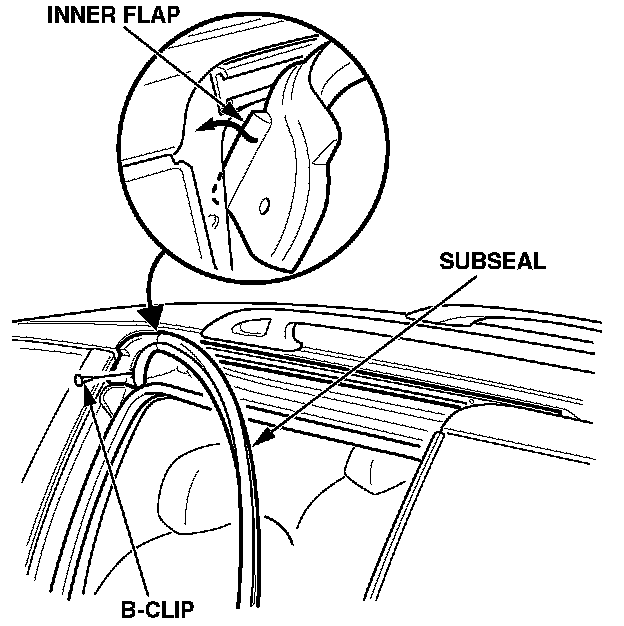
2. Using a new B-clip, attach the new subseal to the body. Make sure the inner flap of the subseal is positioned properly, and not folded under the subseal.
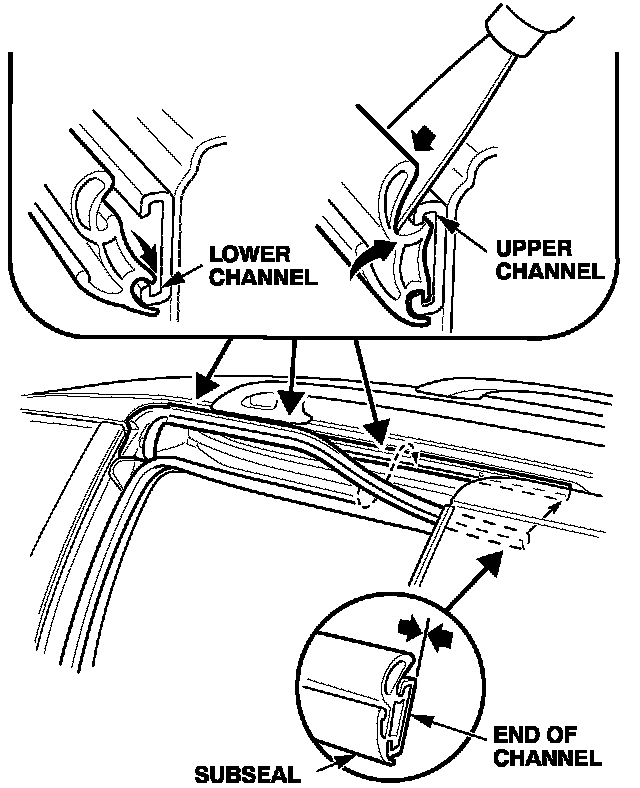
3. Carefully install the subseal into the lower channel, then use a putty knife to push the upper lip of the subseal into the upper channel.
NOTE:
Make sure the end of the subseal is flush with the end of the channel.
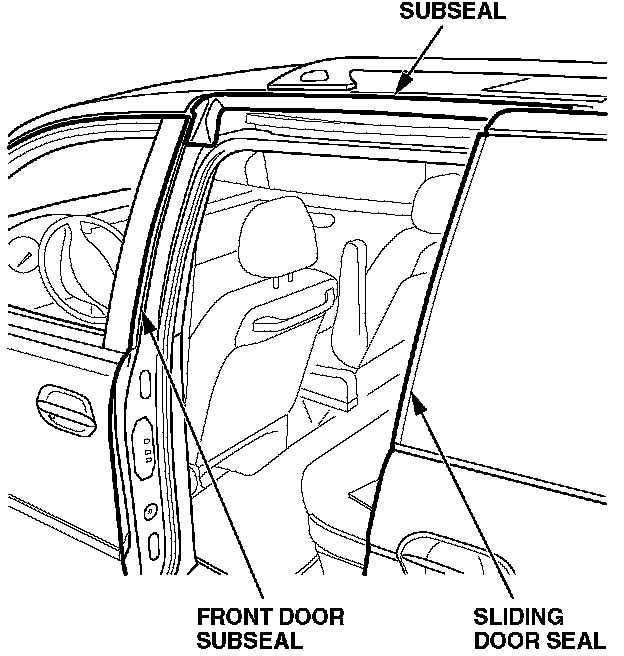
4. Apply a thin coat of Shin-Etsu silicone grease to the entire subseal, the front door subseal, and the sliding door seal.
5. Close and open the sliding door several times to make sure it operates normally.
6. Repeat steps 1 thru 5 on the other sliding door.

DISCLAIMER