Tools - Ball Joint Replacement
90honda05Model Applicable To
1983 ALL
PRELUDE
File Under Bulletin No.
83-016
SPECIAL Issue Date
TOOLS
MAY 1983
BALL JOINT REPLACEMENT
These tools are used to remove and install the lower ball joint in the front suspension.
^ Ball Joint Remover/installer H/C 1484732, T/N 07965-SB00100
^ Ball Joint Installation Base H/C 1484740, T/N 07965-SB00200
^ Ball Joint Removal Base H/C 1484757, T/N 07965-SB00300
USE WITH:
A bench vise that opens to at least 5" inches wide.
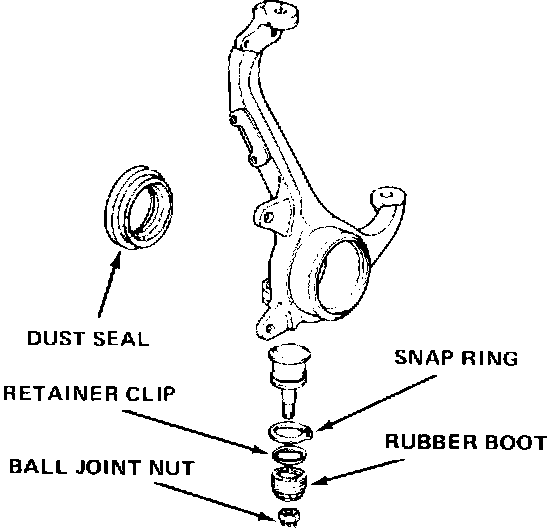
HOW TO USE:
For detailed instructions on knuckle removal and installation, see the 1983 Prelude Service Manual, page 20 - 10.
1. Remove the retainer clip, rubber boot, snap ring, and dust seal from the knuckle.
2. Place the Ball Joint Remover/Installer on the knuckle and secure lightly with the ball joint nut.
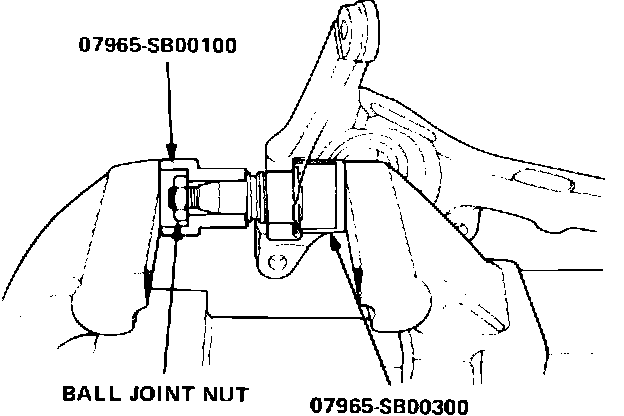
3. Then, place the Removal Base over the top of the ball joint, as shown, and place the entire assembly in a vise.
4. Tighten the vise jaws to press out the old ball joint.
5. Remove the assembly from the vise and discard the old ball joint.
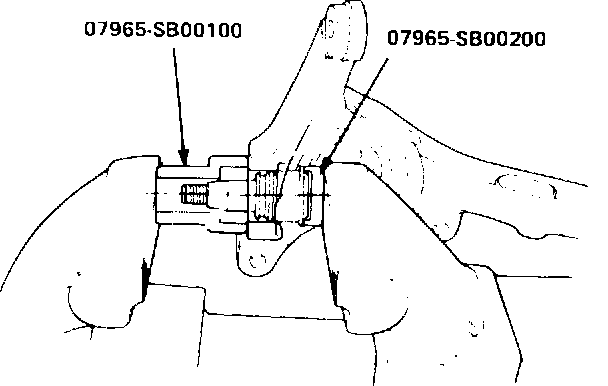
6. Place the new ball joint into the knuckle by hand. Position the Remover/installer and Installation Base as shown, then place the entire assembly in the vise.
7. Tighten the vise to press the new ball joint into place; the ball joint will stop moving when it is fully seated.
8. Remove the assembly from the vise and inspect the ball joint.
9. Install the snap ring that holds the ball joint in place, then slip on the new rubber boot and retainer clip.
10. Install a new dust seal on the inside of the knuckle.