Coolant: Service and Repair
Coolant Replacement'00 model:
1. Set the heater temperature control dial to maximum heat.
2. Remove the radiator cap.
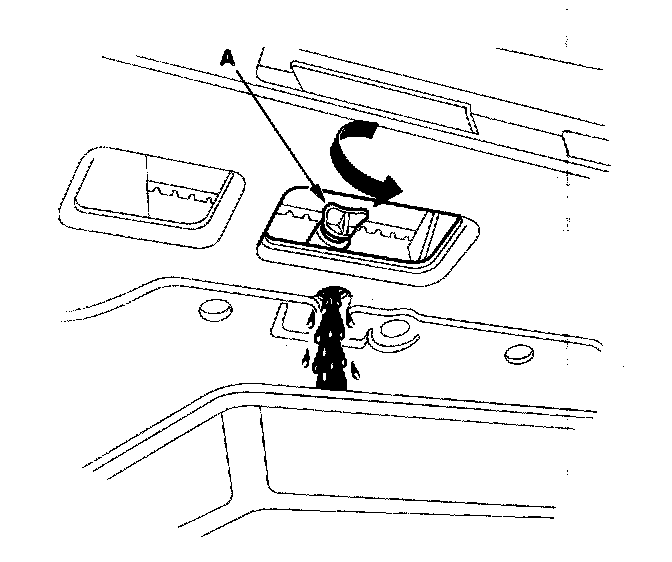
3. Loosen the drain plug (A), and drain the coolant.
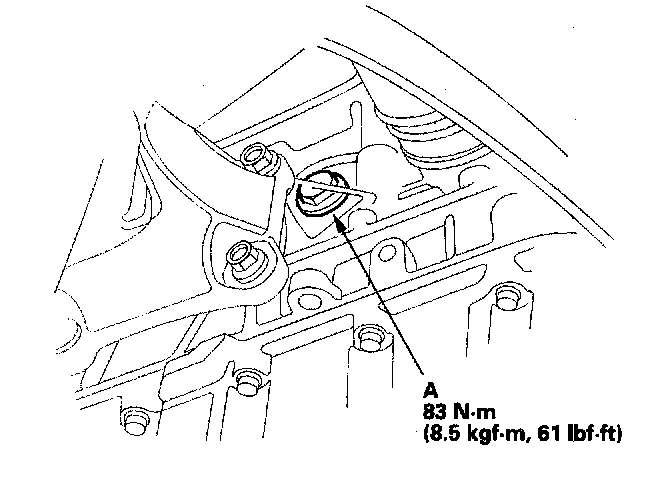
4. Remove the drain bolt (A) from the right side of the cylinder block.
5. After the coolant has drained, apply liquid gasket to the drain bolt threads, then reinstall the bolt with a new washer and tighten it securely.
6. Tighten the radiator drain plug securely.
7. Remove, drain and reinstall the reservoir. Fill the reservoir halfway to the MAX mark with water, then up to the MAX mark with antifreeze.
8. Mix the recommended antifreeze with an equal amount of water in a clean container.
NOTE:
- Always use Genuine Honda Antifreeze/Coolant. Using a non-Honda coolant can result in corrosion, causing the cooling system to malfunction or fail.
- For best corrosion protection, the coolant concentration must be maintained year-round at 50% minimum. Coolant concentrations less than 50% may not provide sufficient protection against corrosion or freezing. Coolant concentrations greater than 60% will impair cooling efficiency and are not recommended.
- Do not use additional rust inhibitors or anti-rust products; they may not be compatible with the coolant.
Engine Coolant Refill Capacity [including reservoir capacity of 0.6 l (0.6 US qt. 0.5 Imp qt)] : 6.5 l (6.9 US qt. 5.7 Imp qt)
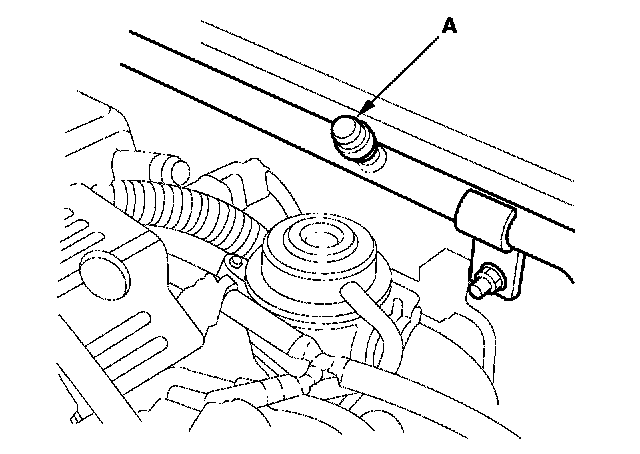
9. Remove the bleed cap (A) from the heater bypass tube.
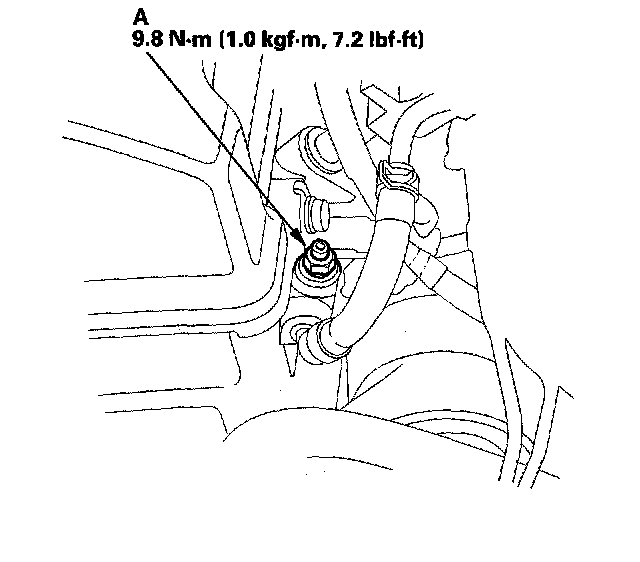
10. Loosen the air bleed bolt (A) in the intake manifold.
11. Pour coolant into the radiator to the bottom of the filler neck. Do not let coolant spill on any electrical parts or the paint. If any coolant spills, rinse it off immediately.
12. Tighten the bleed bolt as soon as coolant starts to run out in a steady stream.
13. Install the bleed cap as soon as coolant starts to run out in a steady stream.
14. With the radiator cap off, start the engine and let it run until warmed up (radiator fan comes on at least twice). Then, if necessary, add more coolant mix to bring the level back up to the bottom of the filler neck.
15. Put the radiator cap on tightly, then run the engine again and check for leaks.
'01 model:
1. Set the heater temperature control dial to maximum heat.
2. Remove the radiator cap.
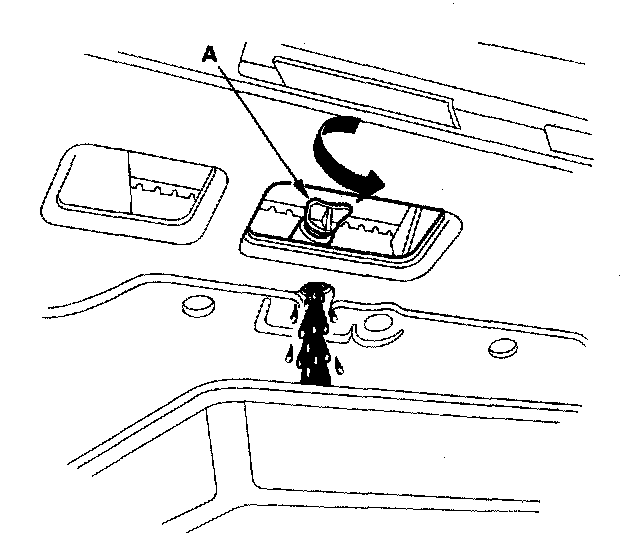
3. Loosen the drain plug (A), and drain the coolant.
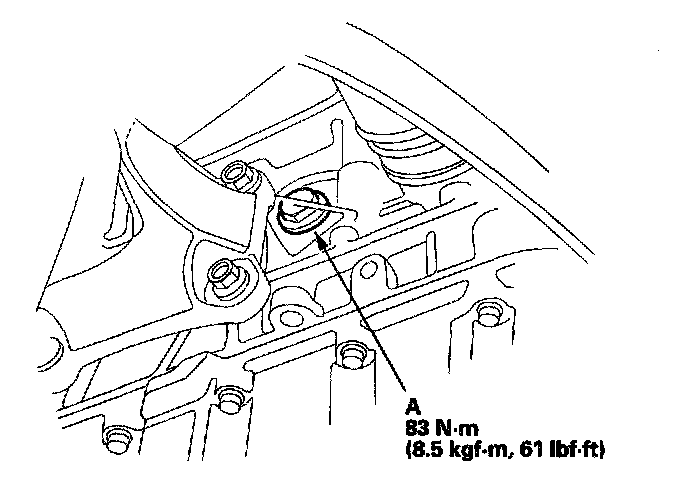
4. Remove the drain bolt (A) from the right side of the cylinder block.
5. After the coolant has drained, apply liquid gasket to the drain bolt threads, then reinstall the bolt with a new washer and tighten it securely.
6. Tighten the radiator drain plug securely.
7. Remove, drain and reinstall the reservoir. Fill the tank to the MAX mark with Honda All Season Antifreeze/Coolant Type 2.
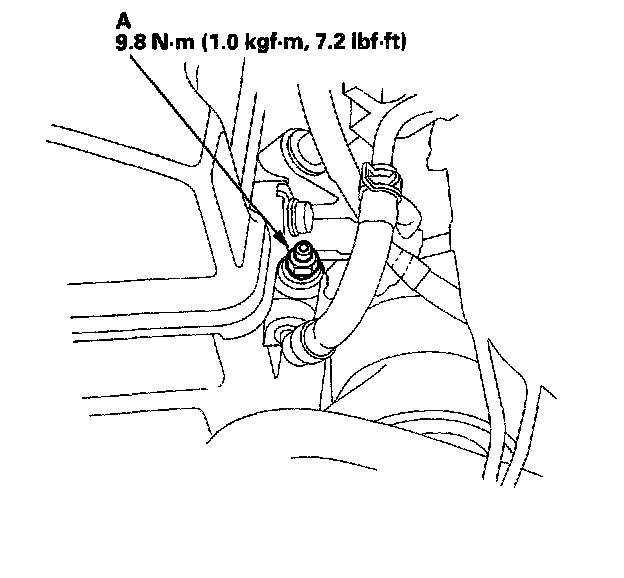
8. Remove the bleed cap (A) from the heater bypass tube.
9. Loosen the air bleed bolt (A) in the thermostat housing, then pour Honda All Season Antifreeze/ Coolant Type 2 into the radiator to the bottom of the filer neck. Do not let coolant spill on any electrical parts or the paint. If any coolant spills, rinse it off immediately.
NOTE:
- Always use Honda All Season Antifreeze/Coolant Type 2. Using a non-Honda coolant can result in corrosion, causing the cooling system to malfunction or fail.
- Honda All Season Antifreeze/Coolant Type 2 is a mixture of 50% antifreeze and 50% water. Premixing is not required.
10. Tighten the bleed bolt as soon as coolant starts to run out in a steady stream.
11. Install the bleed cap on the heater bypass tube as soon as coolant starts to run out in a steady stream.
12. With the radiator cap off, start the engine and let it run until warmed up (radiator fan comes on at least twice). Then, if necessary, add more Honda All Season Antifreeze/Coolant Type 2 to bring the level back up to the bottom of the filler neck.
13. Put the radiator cap on tightly, then run the engine again and check for leaks.